
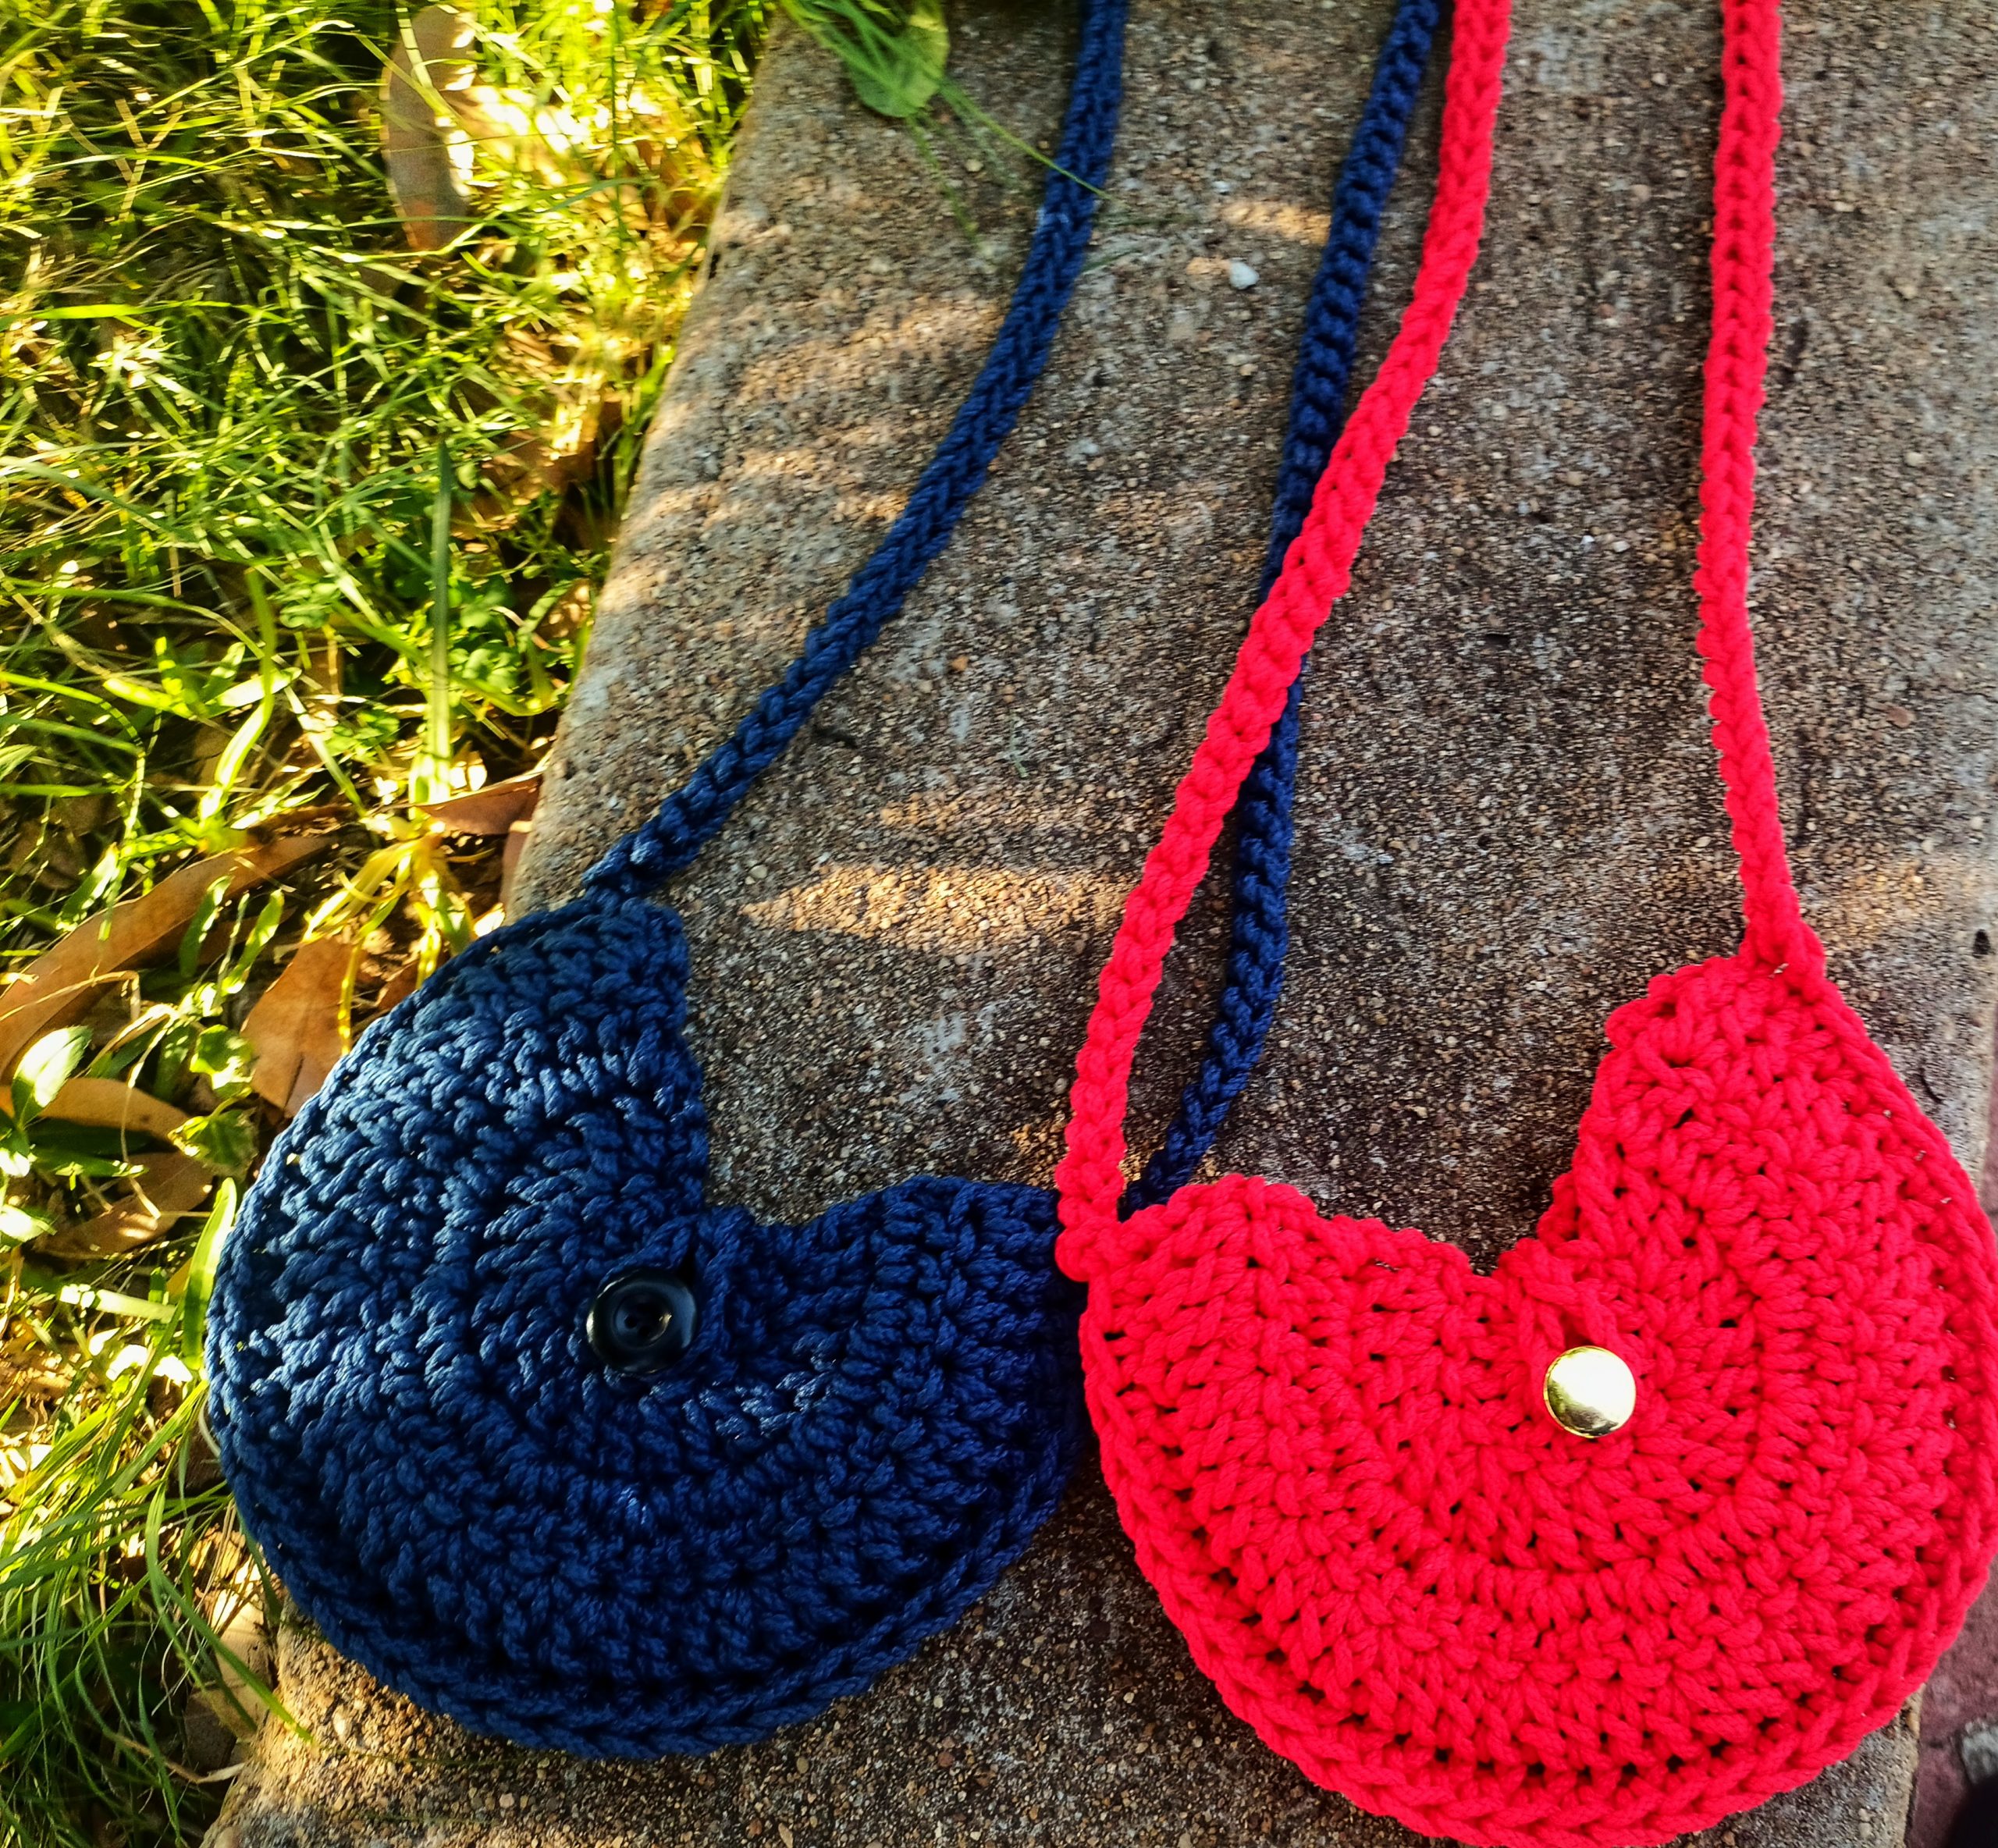
This crochet crossbody bag is for a small halfmoon shaped bag. For a video aid the link to the video is at the bottom of the page.
It can be one of those last minute projects that you can do in less than 2 hours. I also have this other crossbody bag, a smaller one, the Simplicity phone bag pattern. This bag is crocheted using single crochet, double crochet and slip stitch. If you have left over yarn you can use it to crochet this crossbody bag.

Level of skill Required:
Knowledge on how to crochet double crochet, single crochet, slip stitch and chain is required for this pattern. Also one needs to know how to crochet into the magic circle/ring.
Material list for the Crochet crossbody bag:
- Crochet Hook size 6mm
- Rope or t-shirt yarn or any other yarn that is about 3mm
- Meters used -120metres
- Scissors
- Button (2cm diameter)
Tension:
Gauge: 4″ = 4 rows x 9 stitches
One size bag
Finished bag measurements
Diameter of finished bag= 22cm/ 8.66”
Crochet Terms in US Terminology
- turn – turn your work so that you can work back for the next row
- join – join two stitches together , done by working a slip stitch in the top of the next stitch
- rep – repeat (do it again)
- st (s) – stitch(es)
Stitch guide
- ch – chain
- sl st – slip stitch
- sc – single crochet
- dc – double crochet
Pattern notes:
- You are going to work in rows
- In order to begin your row, you must first chain 3. This counts as your first double crochet stitch. You will then crochet your second dc st into the base of the same chain3. This will be your first set of 2 dc in the first st.
- You can change the size of the bag by adjusting the number of rows. You increase the sequence like this after row 4 ,
- row 5: 2dc,1dc,1dc,1dc
- Row 6: 2dc,1dc,1dc,1dc,1dc
- Row 7: 2dc,1dc,1dc,1dc,1dc,1dc
- Row 8 and so on
Instructions for the crossbody bag
For the 1st side:
Row 1: start with the magic ring/circle. Make 3 chains (to represent your first dc) and 11 dc into the ring and turn (total of 12 dc)
Row 2: put 2 dc in each stitch until the end of the row (for the first st: chain 3 and 1 dc in base of the same chain 3 as written above in the pattern notes). Turn (Total dc 22)
Row 3: crochet 2 dc in the first stitch, 1 dc in the following st (for the first st: chain 3 and 1 dc in base of the same chain 3 as written above in the pattern notes). Repeat the sequence of: *2dc, 1dc* until the end of the row. Turn (Total dc 32)
Row 4: put 2dc in the first st, 1 dc in the next 2 st (for the first st: chain 3 and 1 dc in base of the same chain 3 as written above in the pattern notes). Repeat the sequence of *2dc, 1dc, 1dc* until the end of the row. (Total dc 42)
For the 2nd side: repeat row1 to row 4 above.
Joining the sides:
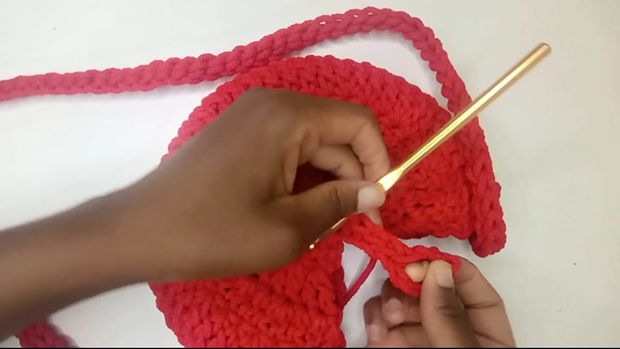
- After finishing the 2nd side you should have 2 similar sides as shown below
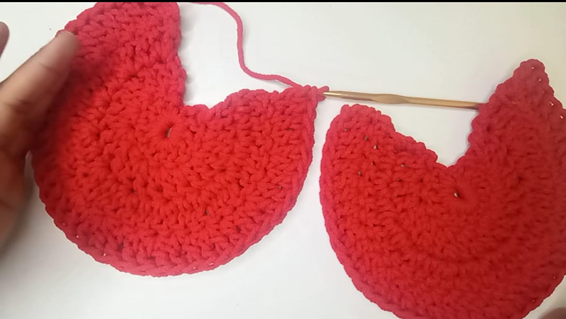
Figure 2: 2 equal sides to be joined together
- Join the two sides with single crochet. Make sure the number of sts is the same for both sides. Single crochet in the front loop of the side closest to you and the back loop of the side further away from you as shown below:
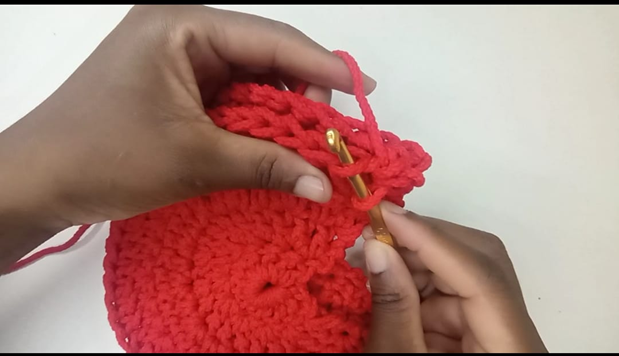
- Join with single crochet until you reach the last st. At the end do not cut your yarn we will continue to crochet the handle.
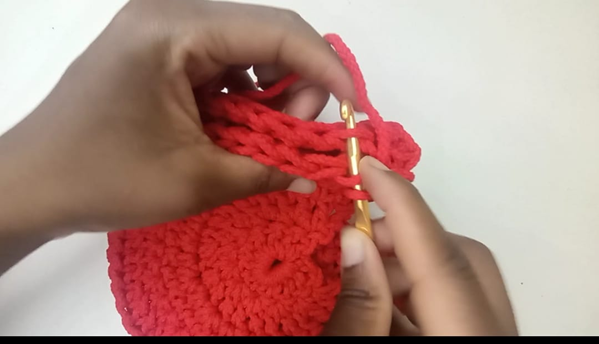
The handle/handbag cord After joining the sides continue and chain 110 or chain to your desired length of handle and join to the other side
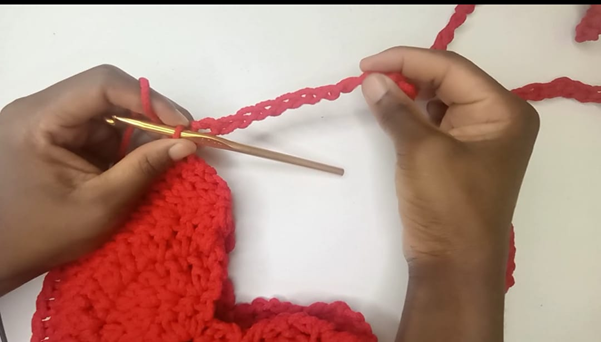
- After joining to the other side turn and start slip stitch along the chain until you are back at the starting point
- Cut and fasten off the ends
Inserting the button and button hole to the crochet crossbody bag
- Sew the button just below the center of one side as shown below:
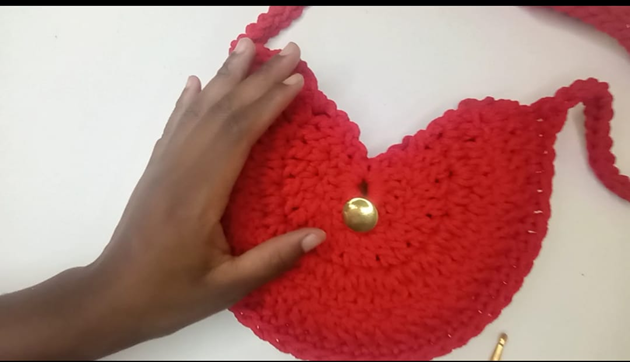
On the center of the other side chain 11 so that the chain is able to wrap around the button on the other side. Join on the 6th chain with slip stitch and continue with slip st into the remaining chains until you are back at the starting point (that is the center).
- Cut and fasten off the ends to finish the bag
Your bag is complete.
The step by step video tutorial is found here