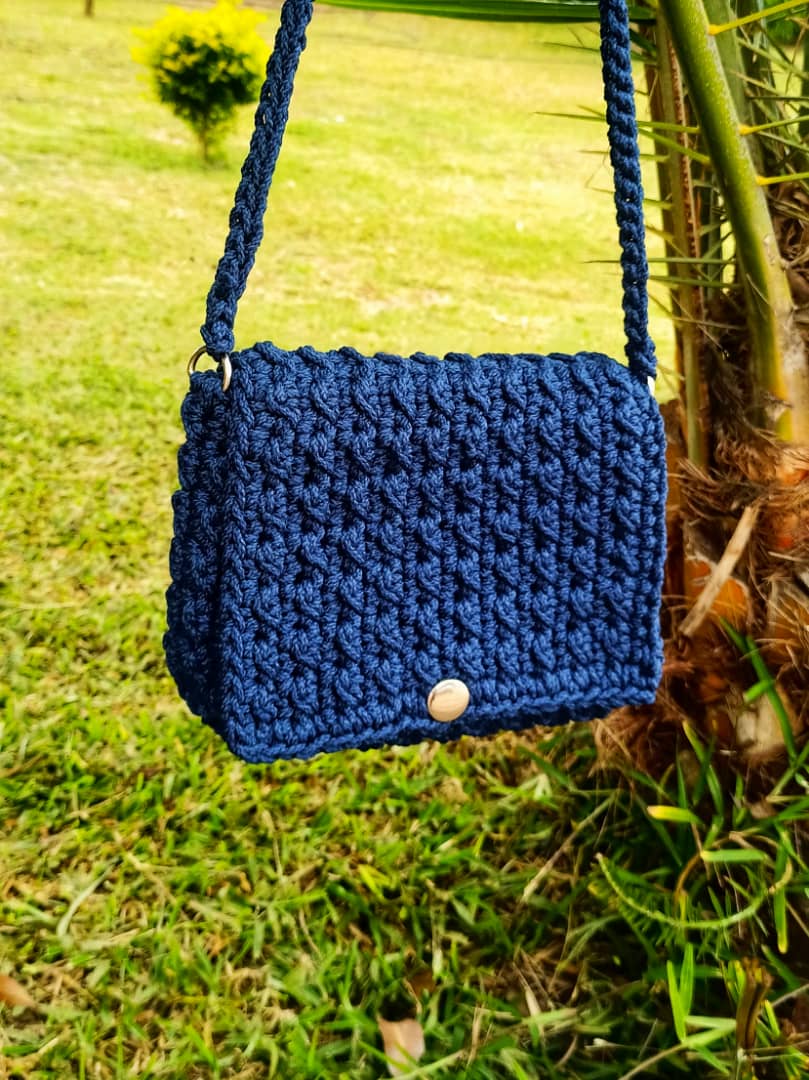
Hie everyone, here is a free written crochet pattern of a shoulder bag, the Companion bag. In this post, I will show you how to crochet this beautiful shoulder bag with a neat pattern. I love the way the pattern sort of form a ribbed texture. I also have another bag with the ribbed texture the Portable ribbed bag pattern, it is also a free pattern.
The Companion bag is a very simple bag to crochet. You crochet a large piece and two small side pieces that you join together with a tapestry needle.
If you prefer an ad-free, printable PDF version this pattern, you can purchase it right below by clicking the BUY NOW button. Thank you for supporting my designs.
Level of skill Required:
To crochet the shoulder bag, you need to know how to crochet single crochet, half double crochet and slip stitch is required for this pattern.
Crochet shoulder bag free pattern Material list:
- Crochet Hook size 6mm
- Macramé/ Rope or t-shirt yarn or any other bulky yarn that is about 3mm thick
- Meters used – 140 meters /153 Yards
- Scissors
- Button (20mm diameter)
- Sewing needle and sewing thread (for the button)
- 4 Stitch markers
- 2 metal rings for the handle
- Tapestry needle
Finished bag measurements
17cm height and 24cm width
Gauge
4 inches = 10 rows by 9 stitches
Crochet Terms in US Terminology
- rep – repeat (do it again)
- st (s) – stitch(es)
- ** – means do what is written in-between the asterisks (for example rep** , means repeat what is written in between the asterisks)
Stitch guide
- ch – chain
- sl st – slip stitch
- sc –single crochet
- hdc – half double crochet
Crochet shoulder bag Pattern notes:
- You are going to work in rows.
- The chain 1 at the end of each row is a turning chain therefore it does not count as a stitch
- The number in the brackets at the end of each instruction is the total number of stitches for that row.
Crochet shoulder bag free pattern Instructions:
- Step 1 – the large piece
- Step 2 – the small sides
- Step 3 – joining the sides and the button
- Step 4 – the handle
Step 1- The large piece
Foundation row: ch 50. sc 1 in the 2nd chain from the hook. Sc 1 the rest of the chains until you finish all the chains. Chain 1 and turn (49)
Row 2: In this row you alternate slip stitch and half double crochet. You begin with a slip stitch and you finish the row with a slip stitch.
Slip st in the first st, *1 hdc in the next st, sl st in the following stitch* repeat from * to * until you finish the row, chain 1 and turn (49)
Row 3: 1 sc in each st until the row is done, chain 1 and turn (49)
NB: when you crochet the single crochet row, make sure you insert your hook at the top of each stitch.

From row 4 to row 21: Repeat row 2 and row 3. Row 21 should be a single crochet row. Do not cut your yarn

The button hole
Count your rows on the side that is on the left of row 21. Put a stitch marker in the 11th row on this side.

After you complete row 21 do not cut your yarn and crochet this side with the st marker. Since this side does not have stitches you are going to insert your hook in each row and work 1 sc in each.

When you reach the stitch marker, skip the row with the st marker and chain 2, continue with sc in the next row space until you finish the side. The chain 2 you did is the button hole. Cut and fasten off the ends.

Step 2 – The small Sides
Side one
Row 1: ch 14, sc 1 in the 2nd chain from the hook. Sc 1 the rest of the chains until all the chains are done. Chain 1 and turn (13)
Row 2: In this row you alternate slip stitch and half double crochet. You begin with a slip stitch and you finish the row with a slip stitch.
Slip st in the first st, *1 hdc in the next st, sl st in the following stitch* repeat from * to * until you finish the row, chain 1 and turn (13)
Row 3: 1 sc in each st until the row is done, chain 1 and turn (13)
NB: when you crochet the single crochet row, make sure you insert your hook at the top of each stitch.
From row 4 and row 5: Repeat row 2 and row 3. Row 5 should be a single crochet row.
Cut and fasten off the ends.

Take one metal ring and attach to the top of the side using a tapestry needle as shown below.


Crochet the second side
Repeat what you did with the first side above and attach the metal ring.

Step 3: Joining the sides and the button
The side with the button hole (on the large piece) is going to be the overlapping side. So join the small sides to the other side without the buttonhole.
Align your stitches of both sides (13 stitches from the small side to the large side) as shown below and put st markers to hold both pieces in place.

For the bottom of the bag (the curve part), attach 5 stitches from the large piece to the side that is opposite the metal ring (of the smaller side we are attaching) as shown below

Attach the remaining side using stitch markers (13 stitches from the small side to the large side) as shown below:

Attach the sides using a tapestry needle as shown below


Join the other sides repeat what you did with the other sides as described above.

You can also check on this video tutorial how I sew the sides together
Sew the button directly opposite the button hole:


Step 4- The Handle
Do 1 slip knot on the crochet hook and attach it to the metal ring on the sides and chain 80.

Join the chain to the other metal ring on the other side. Turn and crochet slip stitch in each chain until you are back at the starting point.
When you reach the starting point, slip stitch into the ring, cut the yarn and fasten it off along the handle.
Here is the step by step video tutorial:
- Cut and fasten off all the other ends to finish the bag
- Your bag is complete

I need to know where you get your yarn.
I get my yarn on Etsy, some of it in a local shop… How ever you can get the yarn on Amazon or even Ali express. It’s polyester macrame cord or cotton macrame cord.