
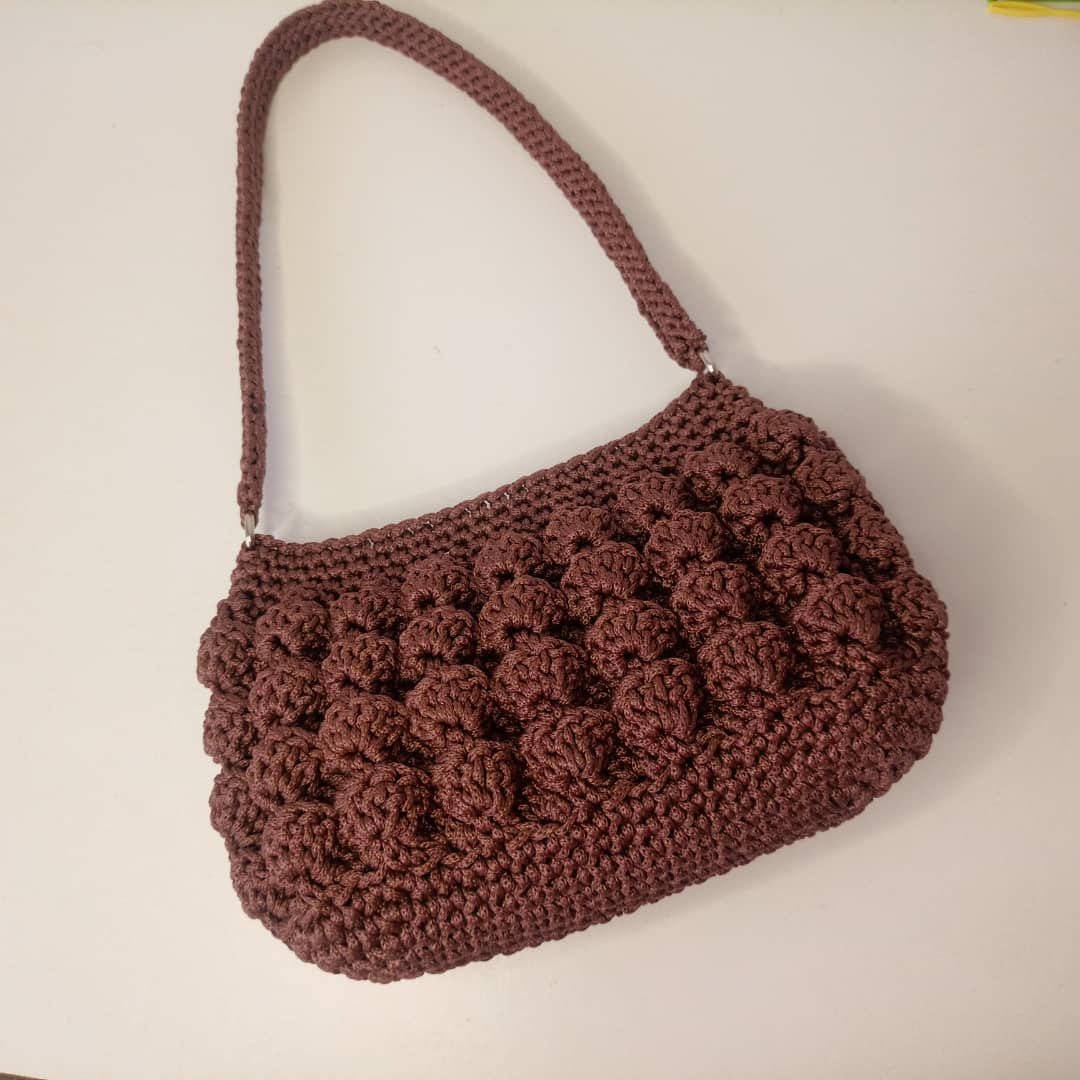
Ever wanted a stylish yet easy-to-make purse? The Brown Bliss Bag crochet pattern is your answer. This trendy crochet purse pattern offers a modern look with a classic twist. We’ll cover everything you need to know, from materials to finishing touches.
If you love crocheting purses, you might also want to check out the Matipa purse and the Other bag crochet patterns.
Le us get started on the Brown Bliss Bag Crochet pattern.
Level of skill Required :
This pattern is written in USA terms
Knowledge on how to crochet double crochet, single crochet, slip stitch and chain is required
Material list:
- Crochet Hook size is 4mm
- 3mm thick polyester or cotton macrame cord (you can use any other type of yarn that you have but make sure it is not too thick and that the size of the yarn corresponds to a 4 mm crochet hook)
- Total meters used – 200 meters
- Scissors
- 7 Stitch markers
- Tapestry needle
- 2 Metal ring buckles for handle
One size bag
Finished bag measurements
- Height -14 cm
- Width – 25 cm
- Handle length – 51 cm
Crochet Terms in US Terminology
- rep – repeat (do it again)
- inc – increase to put more than one stitch (in this case 2 stitches) in one stitch
- st (s) – stitch(es)
- ** – means do what is written in-between the asterisks (for example rep** , means repeat what is written in between the asterisks)
Stitch guide (US TERMS)
- ch – chain
- sl st – slip stitch
- sc – single crochet
- dc – double crochet
Pattern notes:
- You are going to work in rounds.
- Remember to mark the first stitch at the beginning of each round
- For the base of the bag: the number in the brackets at the end of each instruction is the total number of stitches for that round.
Instructions:
The bag is made in 3 steps
- Step 1 – the bottom
- Step 2 – the sides
- Step 3 – the handle
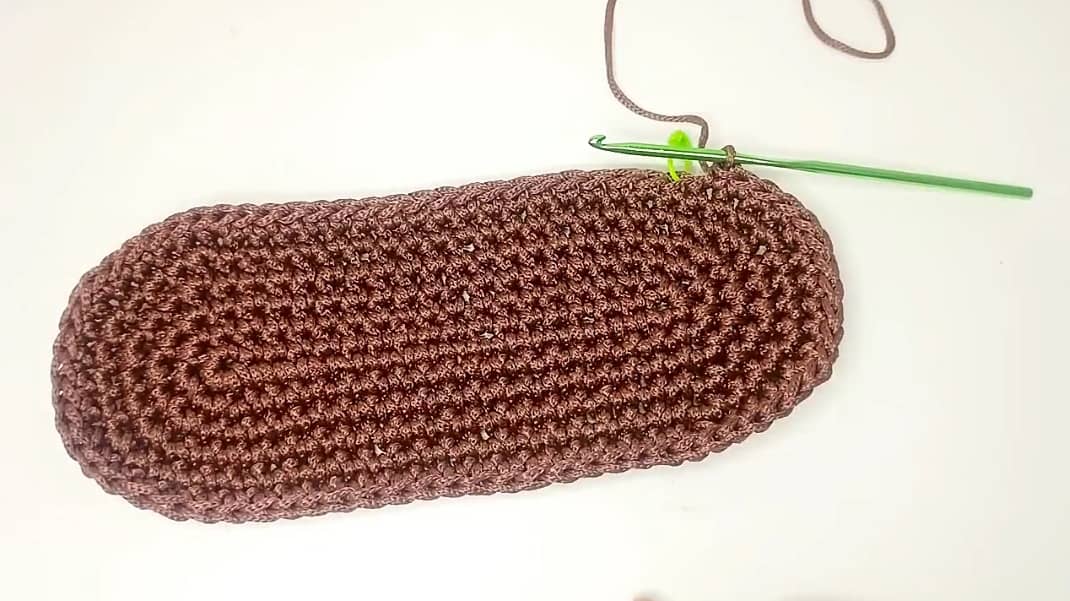
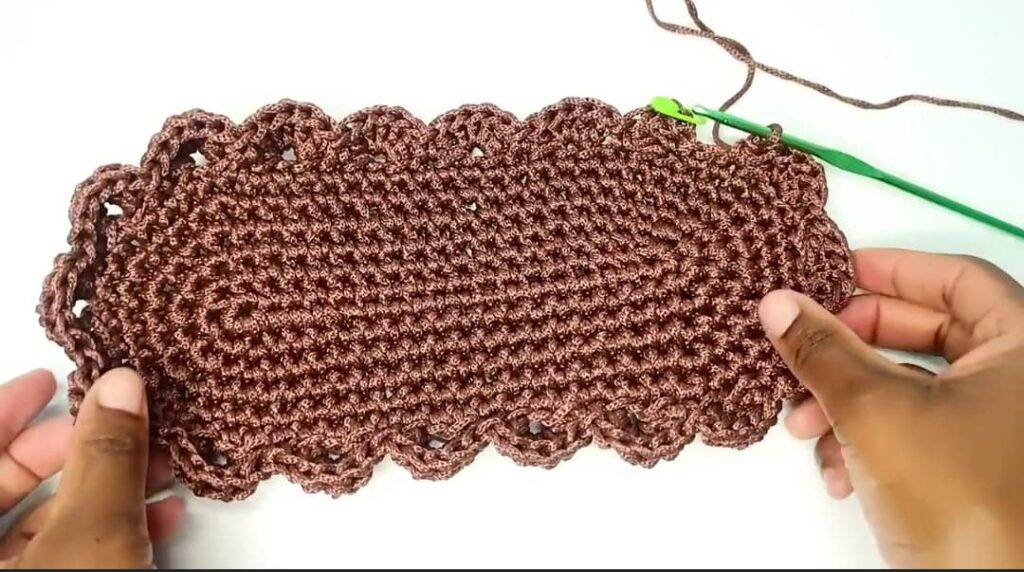
Step 1- The Bottom
Foundation round: make a slip knot and ch 19. (For a longer base you can increase the number of chains at the beginning here). Sc 1 in the 2nd ch from the hook and put a st marker (take note of the color of this st marker or if possible, it should be a different color from the rest of the markers as it also marks the starting point of the round), continue with 1 sc in each of the following chains. Sc 5 in the last ch and put 3 st markers into the 2nd, 3rd, 4th sts of the 5 sc just made. Continue to crochet at the back of the chains putting 1 sc at the back of each chain. Sc 4 in the last chain (the back of the first sc of the round) and put st markers into the last 3 sts of the 4 sc just made. (42)
Round 2: sc 1 in the 1st st (put back the st marker) *continue with 1sc in each of the following sts which do not have stitch markers until you reach a st marker, sc 2 (this is an increase) in each of the sts with st markers, put back the st marker into the 1st st of the increase.* Rep from * to * until you are back at the starting point. (48)
Round 3 to Round 6: Repeat round 2.
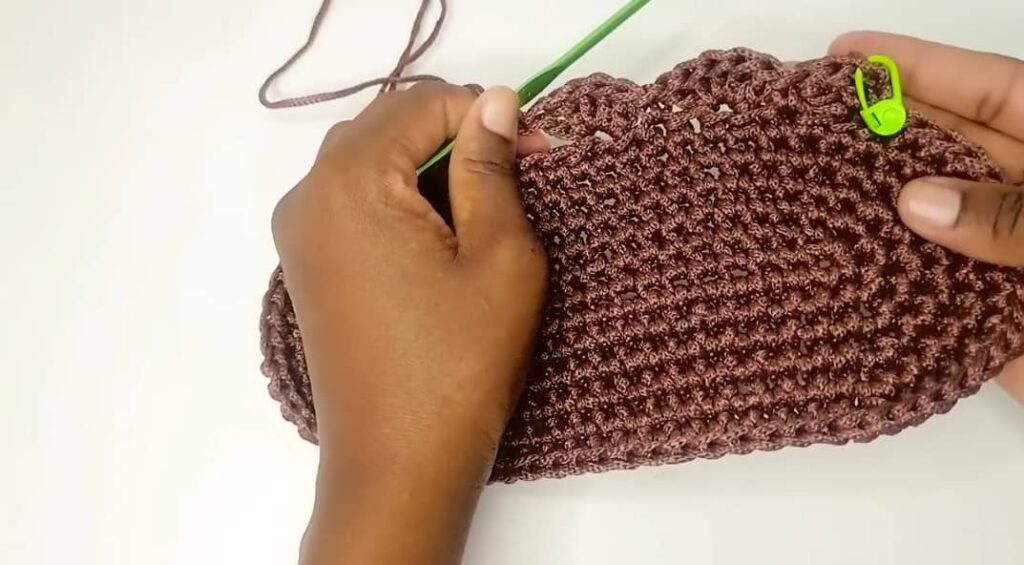
After completing round 6 you should have 72 stitches. In case the final round of the base has a different number of total stitches that is not 72 (that is if your base is bigger or smaller), just make sure that the total number of the stitches of the last round of the base is in the multiples of 4 (incase the final stitch count is not in the multiples of 4 just add a stitch or two in the last 2 sts and check if the st count is now in the multiple of 4) . For a wider base you can keep on increasing the number of rounds of the base. Remove all the other st markers and remain with the one marking the starting point. This completes the base of the bag.
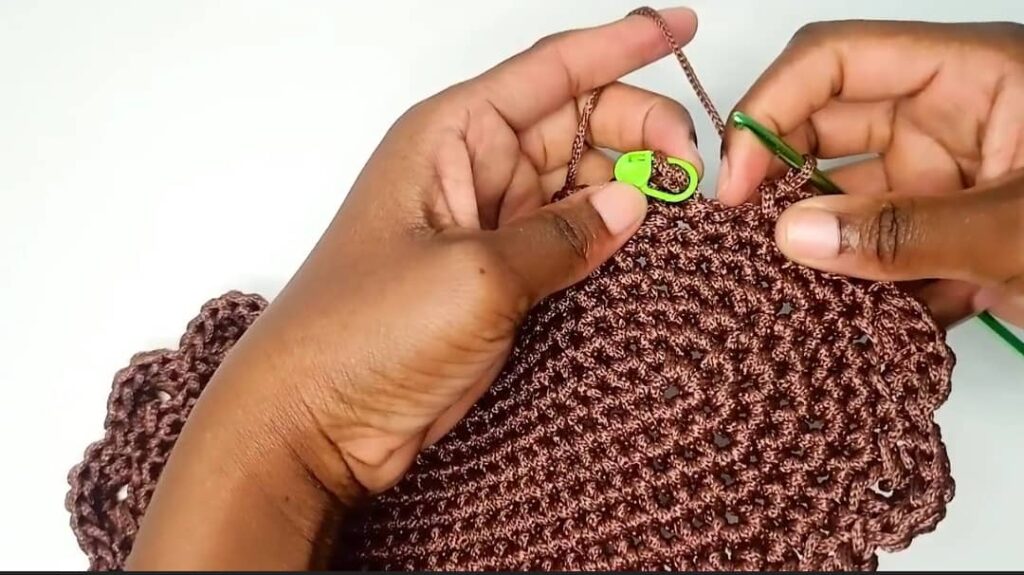
Step 2 – The Sides
Round 1 (of the sides): insert hook in the back loop of the first stitch and make a slip stitch.
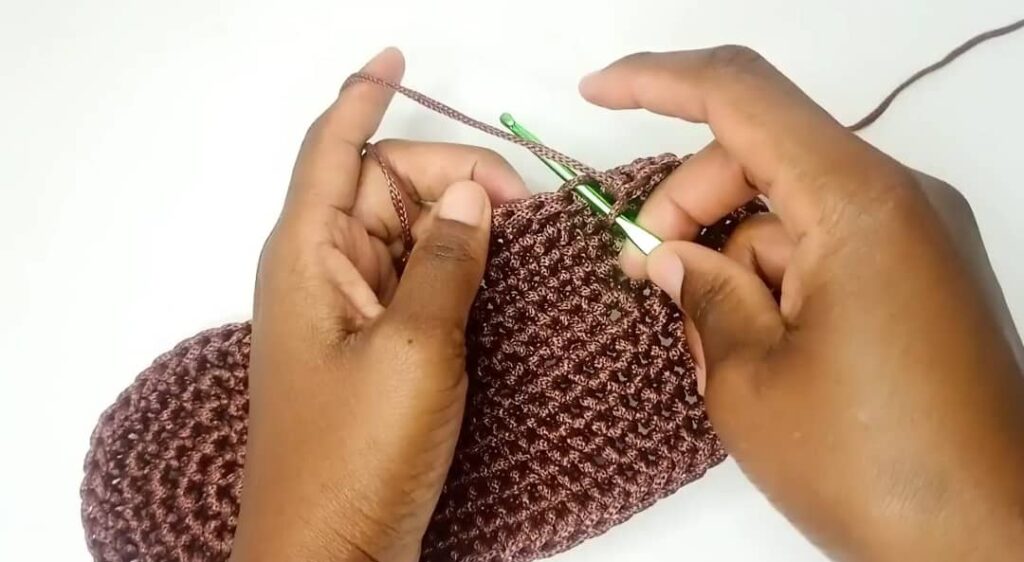
Chain 3 (this will act as the first double crochet of the round). Put a st marker in the 3rd chain of the chain 3 just made to mark the starting point.
Insert hook in the back loop of the first stitch of the round that is at the base of chain 3 just made (the st in which we did slip stitch in the back loop earlier) and crochet 2dc.

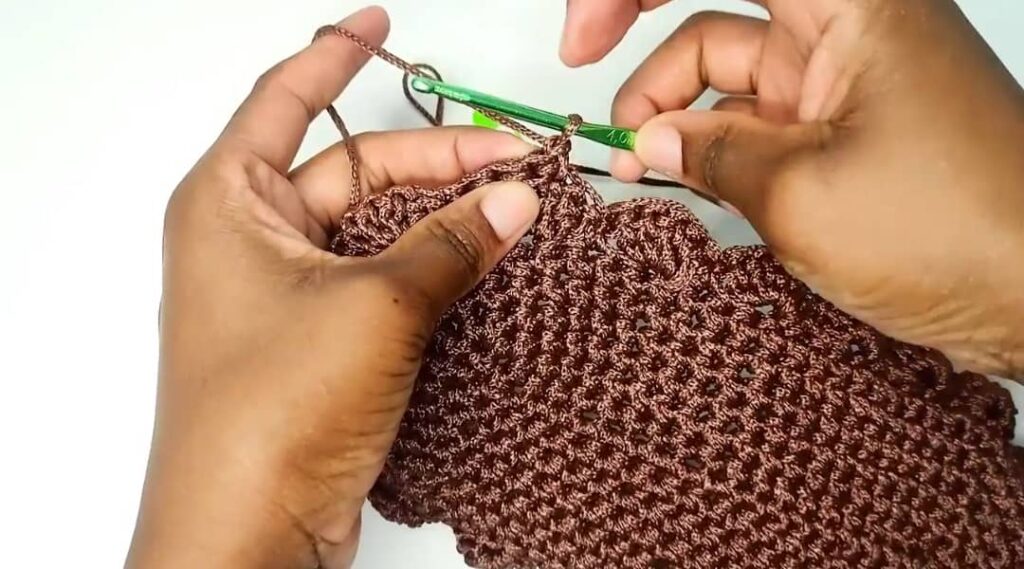
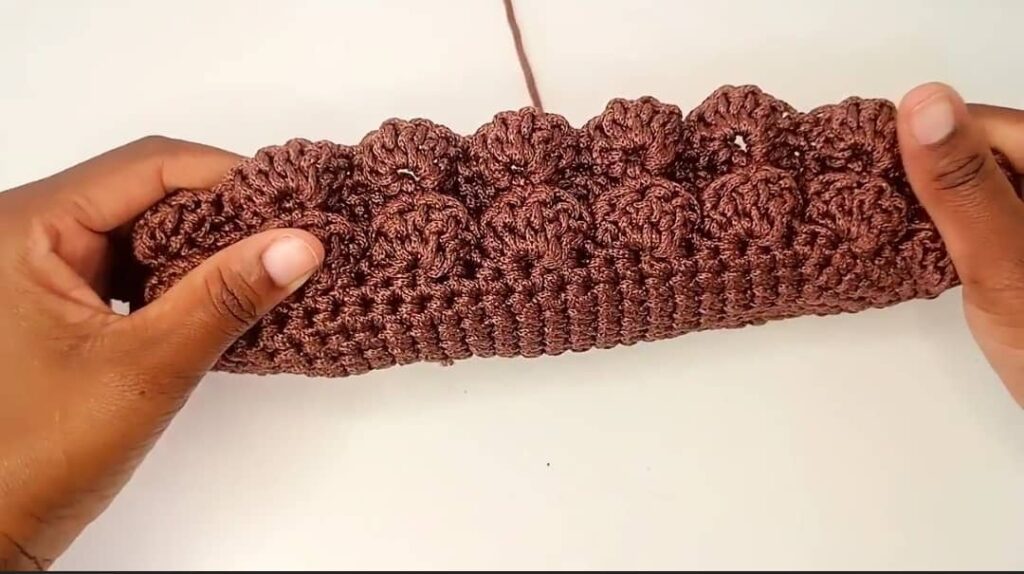
*Skip the next stitch (which is the 2nd st of the round) and in the following st (which is the 3rd st of the round) insert hook below both loops (the top two loops of a st as shown below) and make 1 sc. Skip again the next stitch (the 4th st of the round) and then in the following st (the 5th st of the round) crochet 5 dc in the back loop only*. Repeat from * to * until the round is done.
At the end of the round after doing a single crochet you should be left with one stitch plus a slip stitch (this slip st is the one we did at the beginning of the round and this slip st does not count as a stitch, it is part of the fist st of the round).
Insert hook in the marked chain of the chain 3 we did at the beginning and make a slip stitch to complete the round.
Round 2: chain 1 and turn
Skip the chain just made and insert hook below both loops of the following stitch and work 1 sc and mark the st just made. *Skip 2 sts and in the next st (this next st is the top of the sc we did in the previous round) insert hook in the back loop and crochet 5 dc. Skip the following 2 sts and in the next insert hook below both loops and work 1 sc. (you may want to turn your work so that the top of the sts faces you to see the top of your sts properly). * repeat from * to * until the round is done.
At the end of the round, you should have 2 sts left (you will also see a small vertical st, this is the chain 1 that we did at the beginning and does not count as a st). Put 2dc in the slip stitch next to the chain 3 with the stitch marker (this ensures that the first set of DC that was 3 becomes 5 DC like the rest)
Since we began the round with a single crochet we finish the round with just a slip st. (we do not crochet 2 dc like we did in the previous round). So to crochet the slip st, insert hook below both loops of the first st of the round (the one marked earlier) and make the slip st.
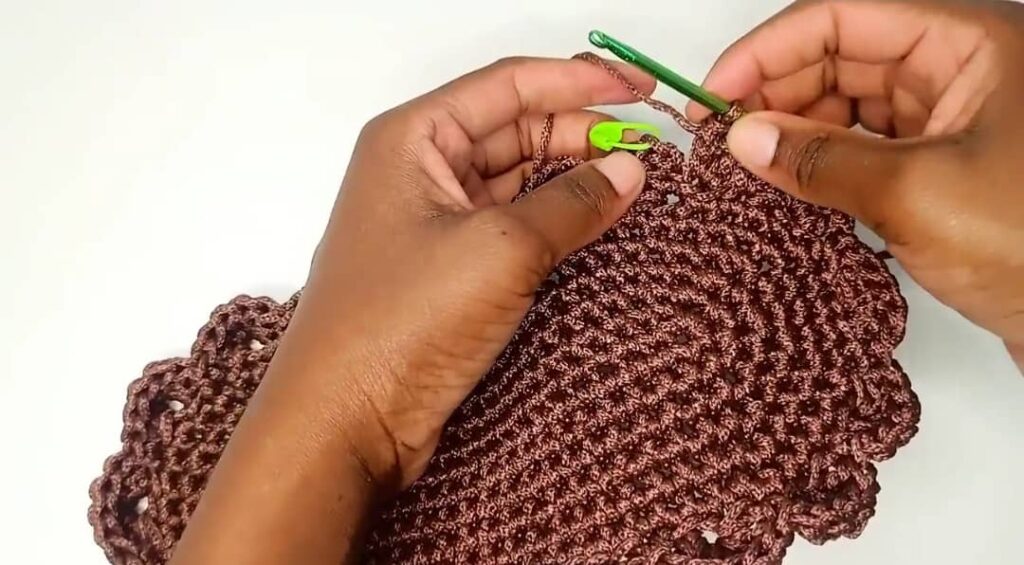
Round 3: chain 3 and turn
Insert hook in the back loop of the st at the base of the chain 3 and crochet 2 dc.

* Skip the next 2 sts and in the following st insert hook below both loops and work 1 sc, skip again 2 sts and in the next st (this next st is the top of the sc we did in the previous round) insert hook in the back loop and crochet 5 dc.* repeat from * to * until the round is done.
At the end of the round you should be left with 3 sts that is 2 normal sized sts and 1 last small st. Since we began the round with 3 dc (that is the chain 3 and the 2dc) and yet the rest of the round we were crocheting 5 dc we need to add 2 dc to the first 3dc of the round to make them 5. Therefore skip the last 2 sts and insert hook in the back loop of the last small st and crochet 2 dc. Insert hook in the marked chain of the chain 3 we did at the beginning and make a slip stitch to complete the round.
NB: when a round begins with a chain 3 and 2dc, you finish the round with 2 dc. Also when a round begins with single crochet you finish the round with only slip st.
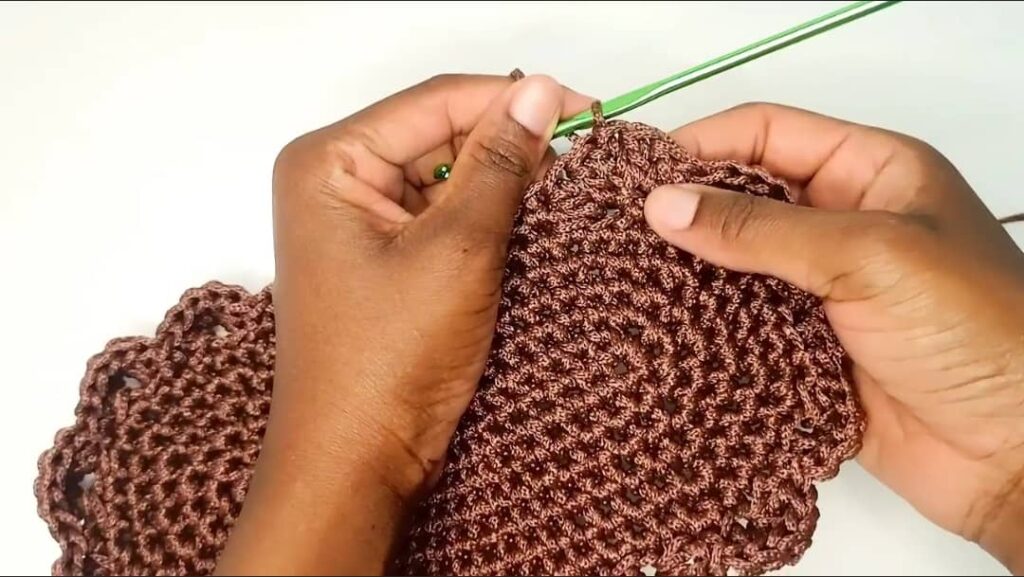
Round 4 to round 9: repeat round 2 and round 3
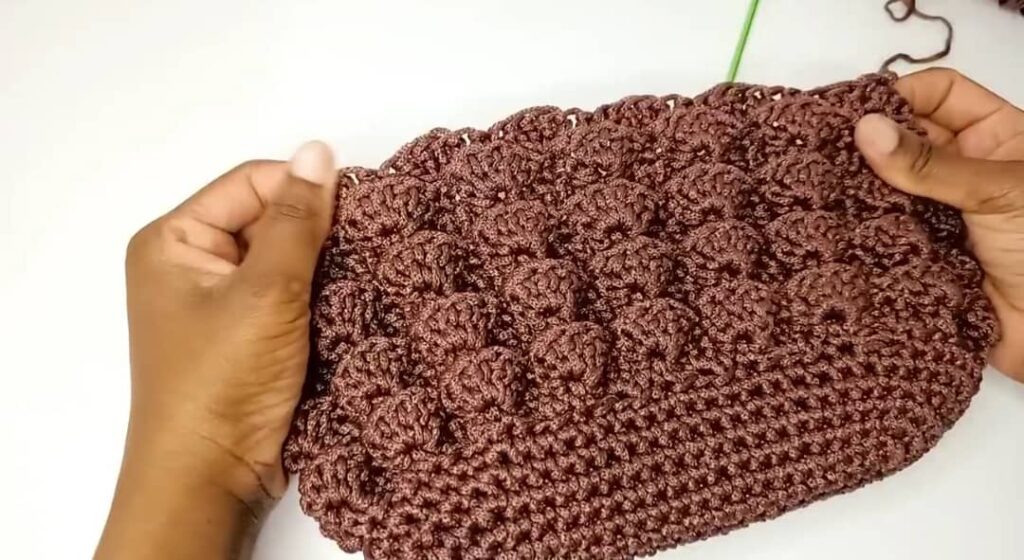
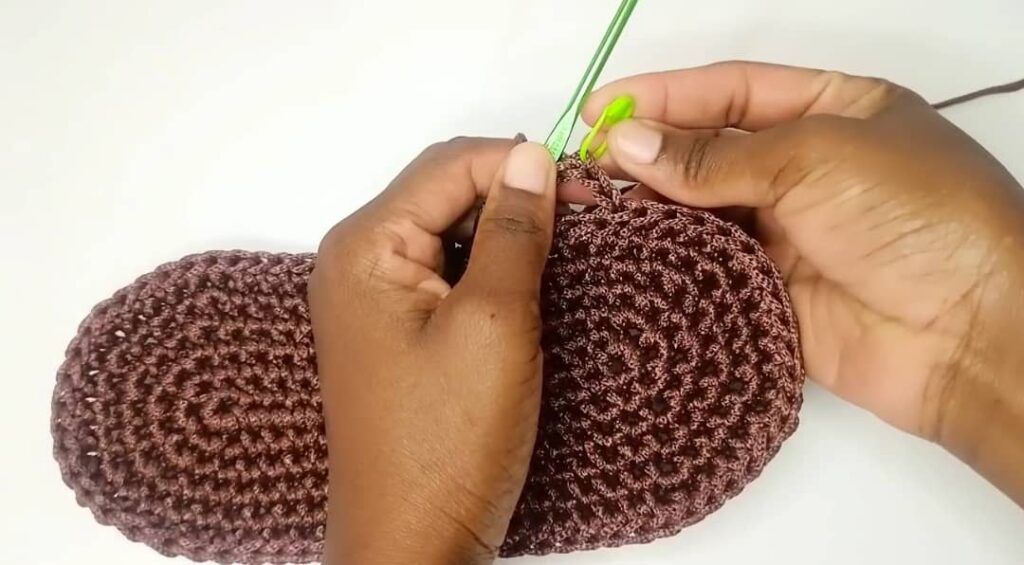
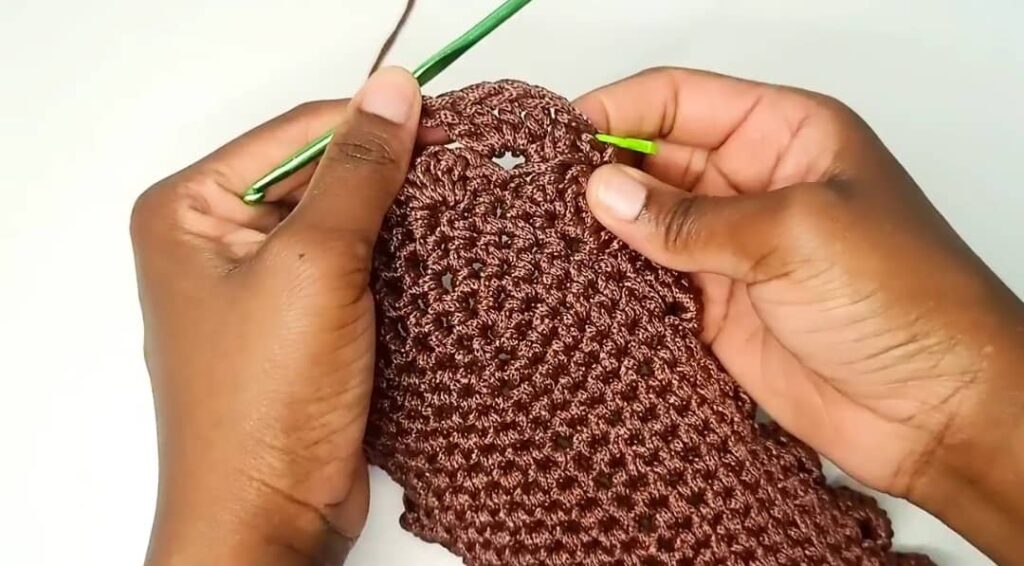
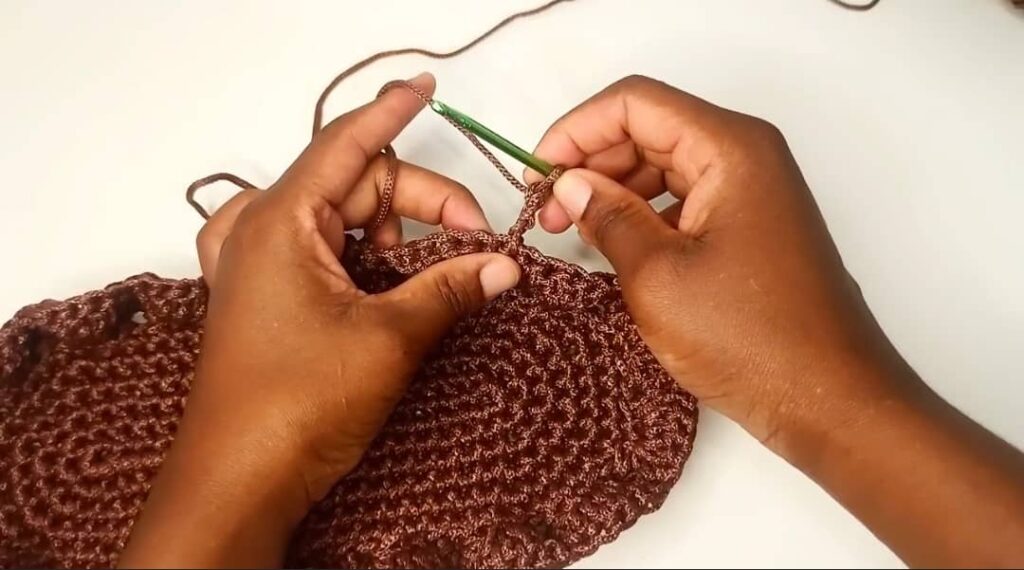
Round 10: chain 1, mark the chain 1, *skip the next st and insert hook below both loops of the following st and work 1 sc*. Repeat from * to * until the round is done. (By skippinig stitches, we will reduce the size of the opening of the bag)
Round 11: sc 1 in each stitch right round until all the sts are done. Remember to mark the first st of the round.
Before beginning the 12th round, mark the points were you are going to put the metal buckles for the handle. To do this, lay your bag flat, put a stitch marker on one edge and put another stitch marker along the other edge.
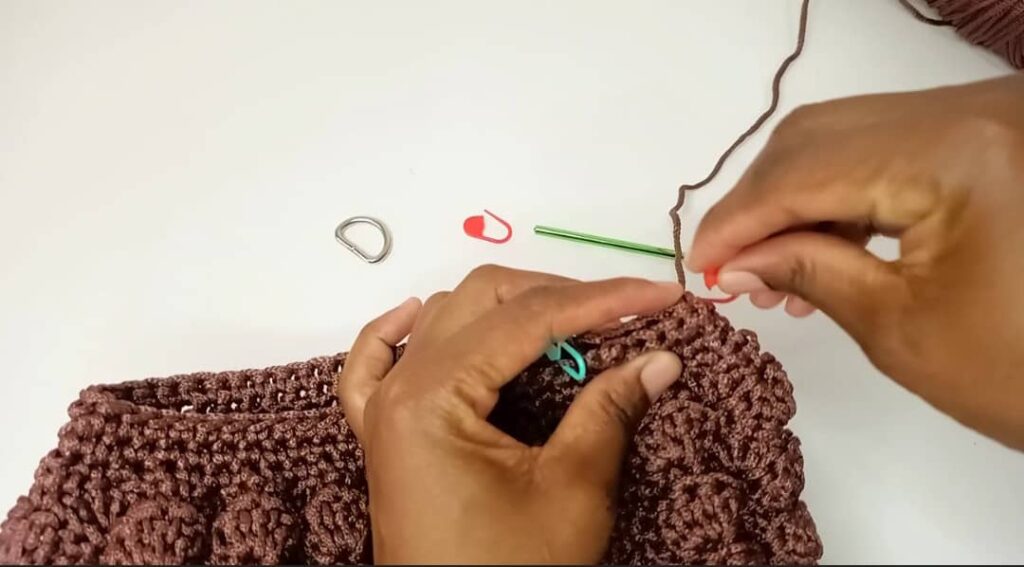
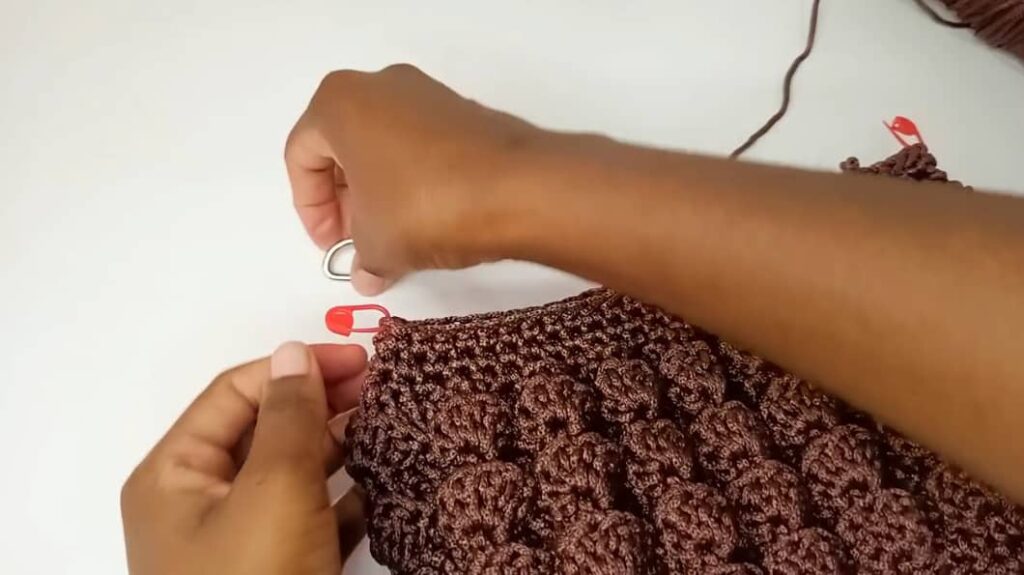
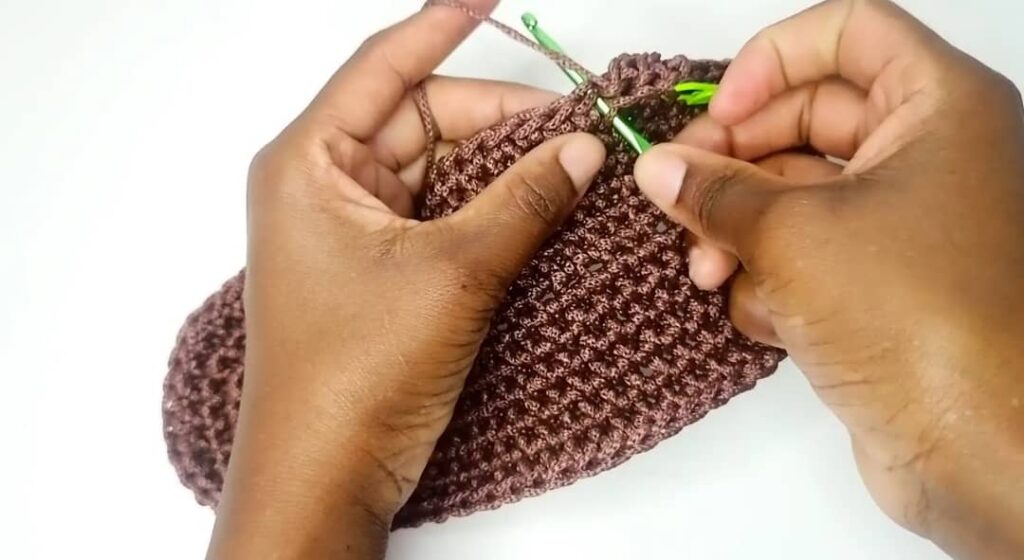
Round 12: sc 1 in each st until you reach the marker on the edge. When you reach the marker, put the buckle in front of the st and insert hook first inside the buckle then into the st and work a single crochet just making sure that the buckle is held by the stitch just made.
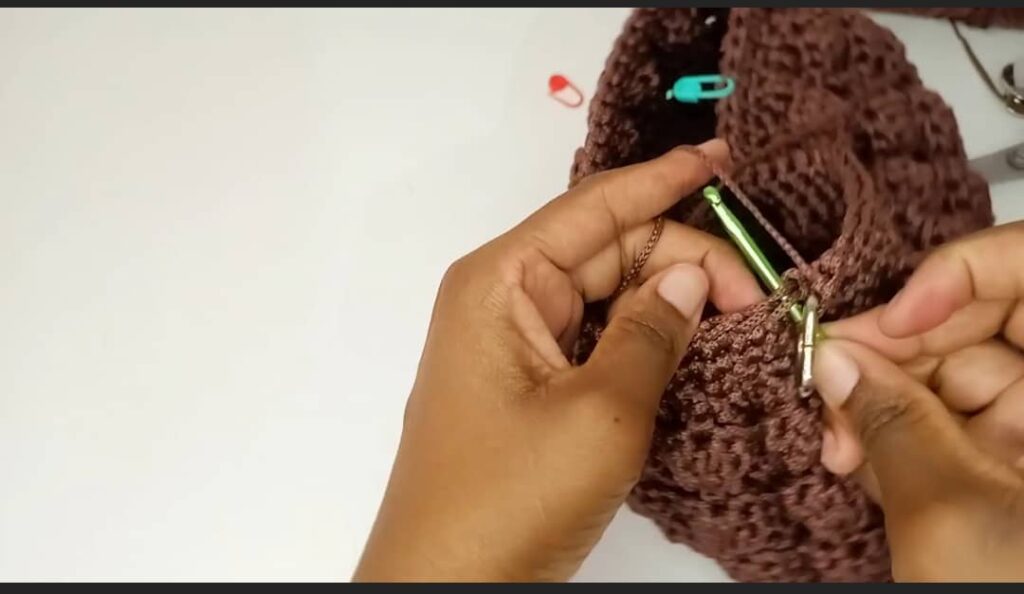
Repeat again in the following st, insert hook through the buckle first and then into the st and work a single crochet. The buckle should be held onto the bag with two st (if using a buckle with a larger diameter the buckle can be held with more than two sts).
Continue with 1 sc in each of the following stitches until you reach the next st marker on the other edge. Repeat and crochet the buckle onto the bag as we did earlier. Put 1 sc in each of the remaining sts of the round. At the end of the round cut, fasten off and hide the ends of the yarn.
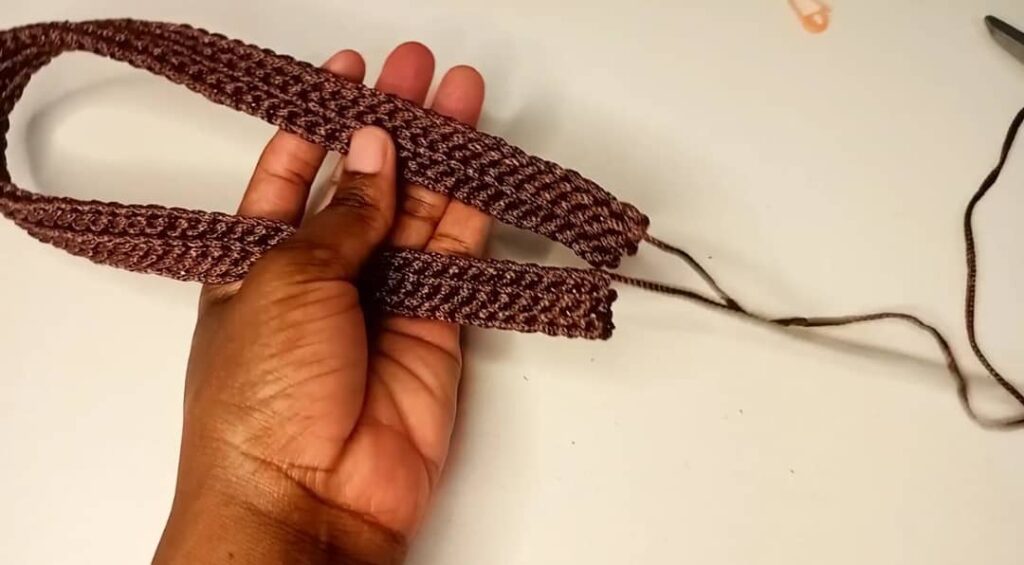
Step 3 – The handle
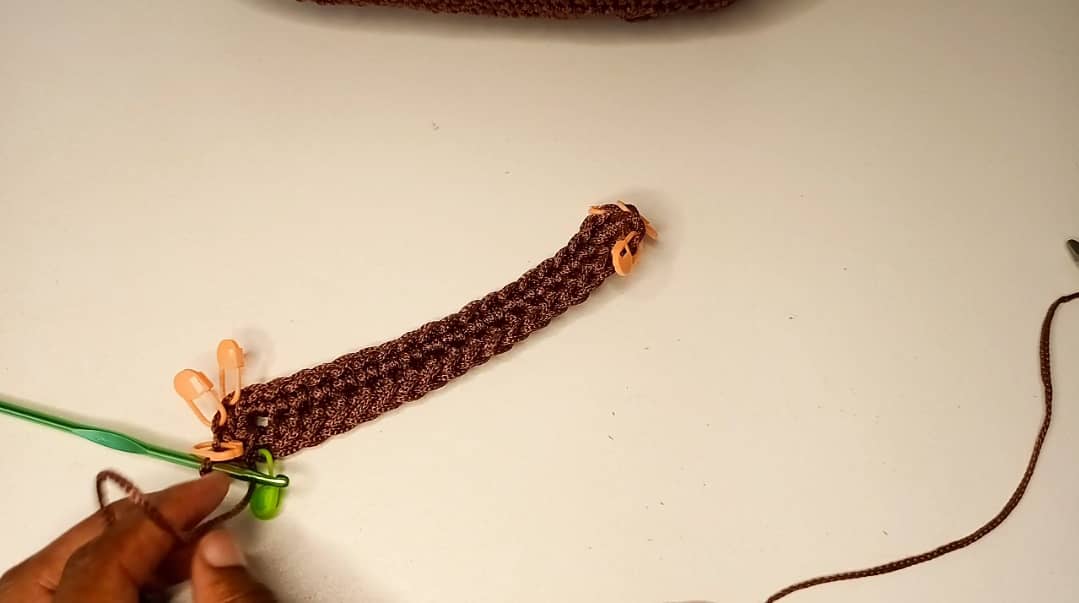
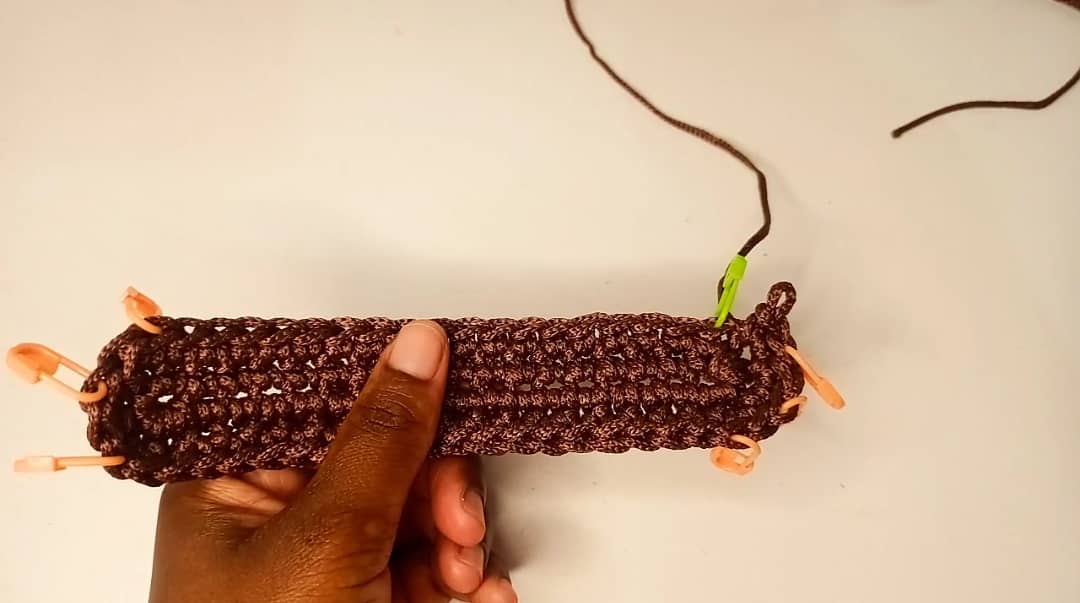
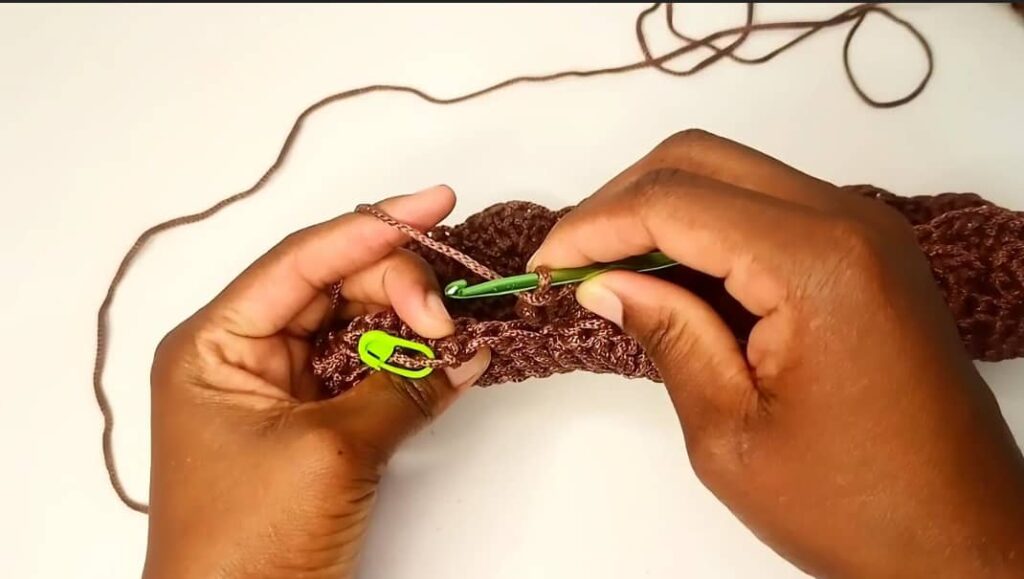
Row 1: Leave a tail of about 30 cm, make a slip knot and chain 80 (increase the number of chains for a longer handle). Turn your chain insert hook in the back bar of the chains and put one slip st in each chain. Continue with one slip st in the back bar of each chain until the row is done. Chain 1 and turn (79)
Row 2: put 1 slip st in the back loop only of each stitch until the row is done, chain 1 and turn (79)
Row 3 to row 5: repeat row 2. At the end of row 5, leave a tail of about 30 cm. Pull the tail through the loop on the hook. (add more rows to make handle thicker)
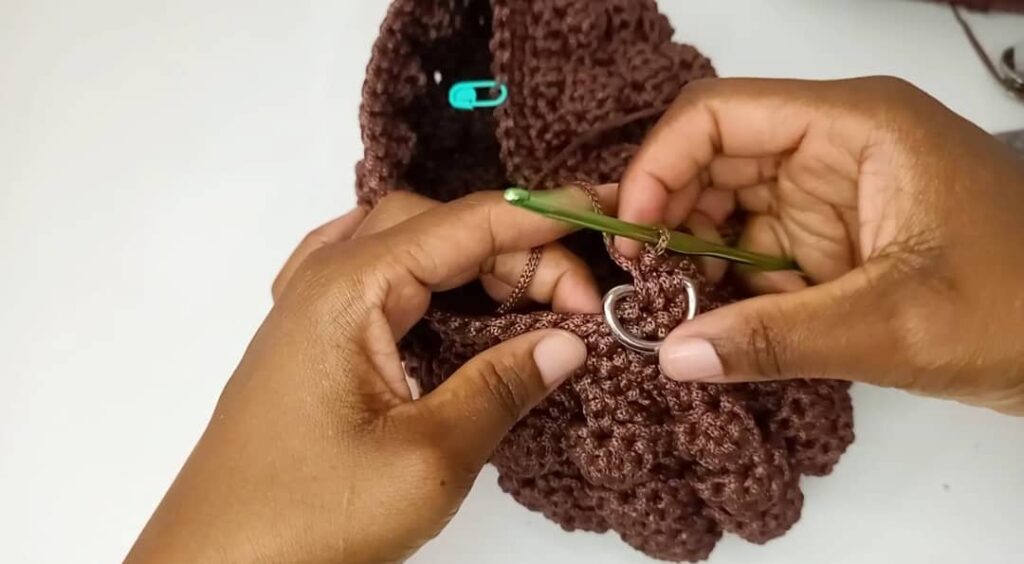
Attaching the handles:
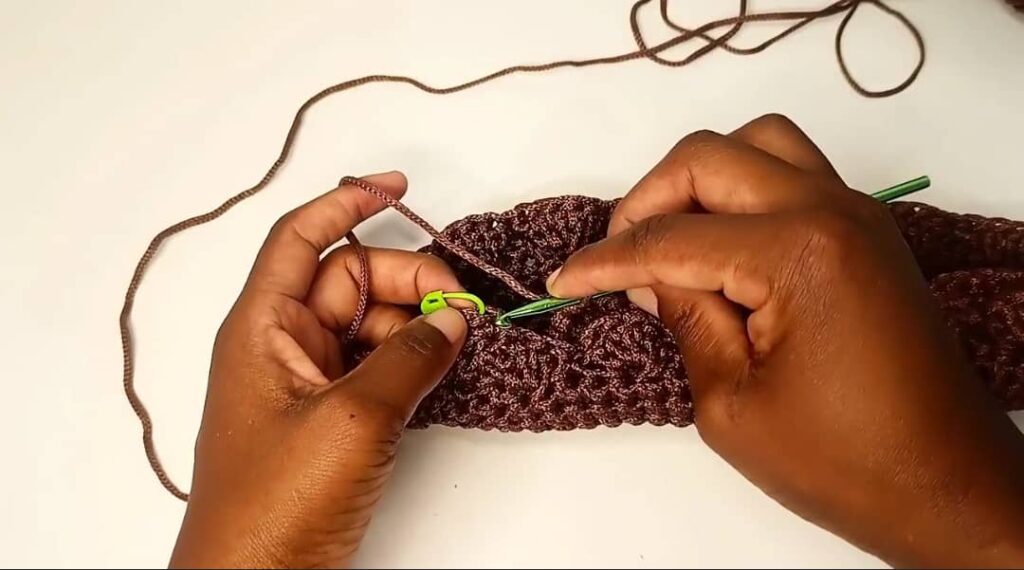
Step 1: Insert the tail end into a tapestry needle and join the handle to the metal buckles on the bag.
Step 2: To join the handle, insert tapestry needle through the buckle and then insert on the loops along the edge of the handle and back to the buckle.
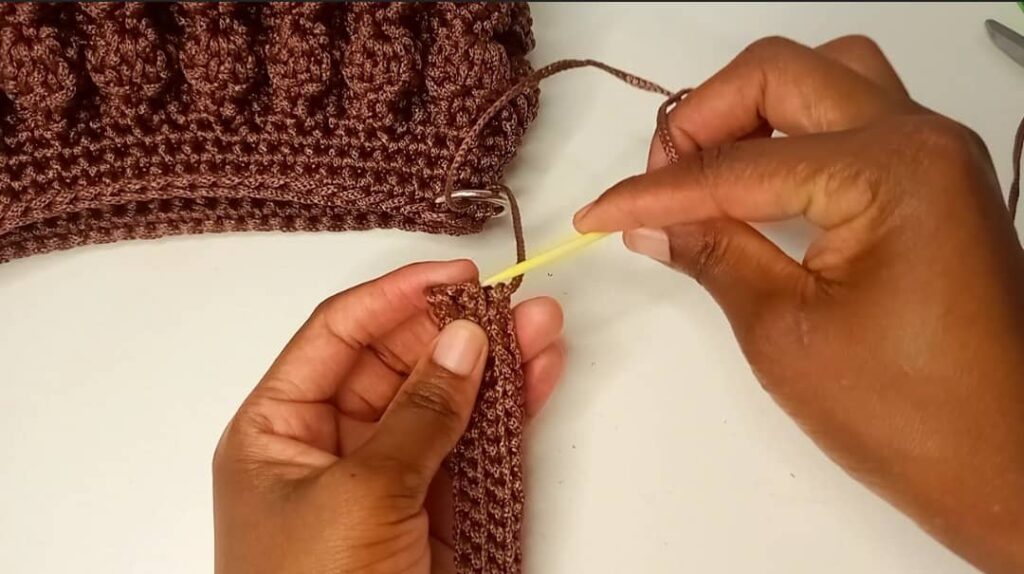
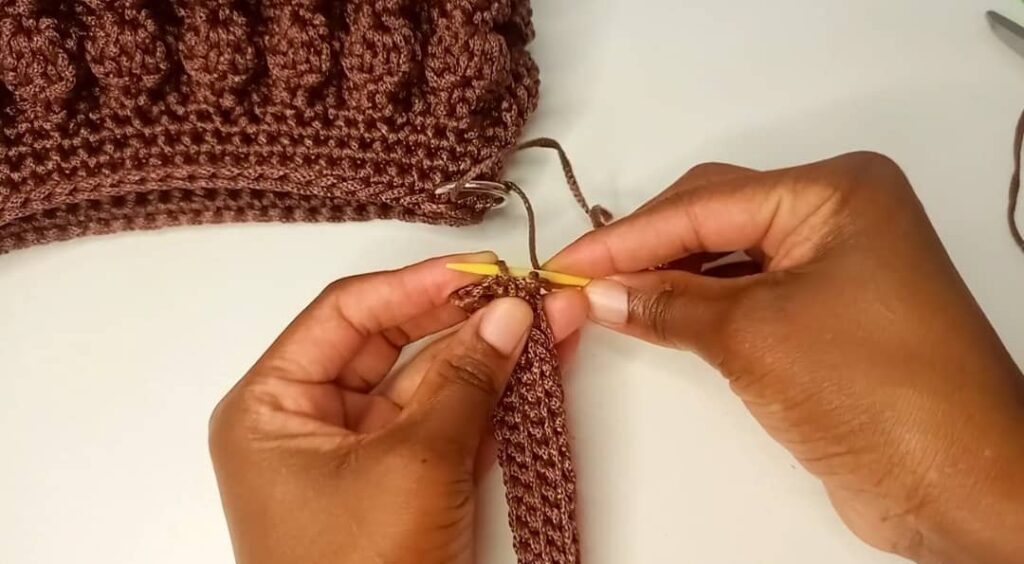
Step 3: Repeat step 2 until you have four loops (or more if the handle is thicker) holding the handle to the buckle.
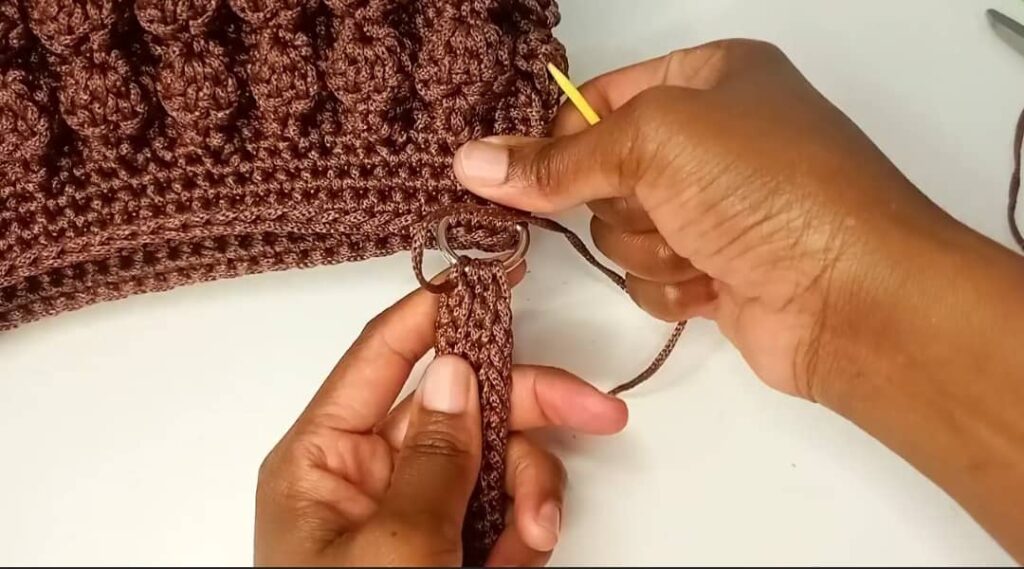
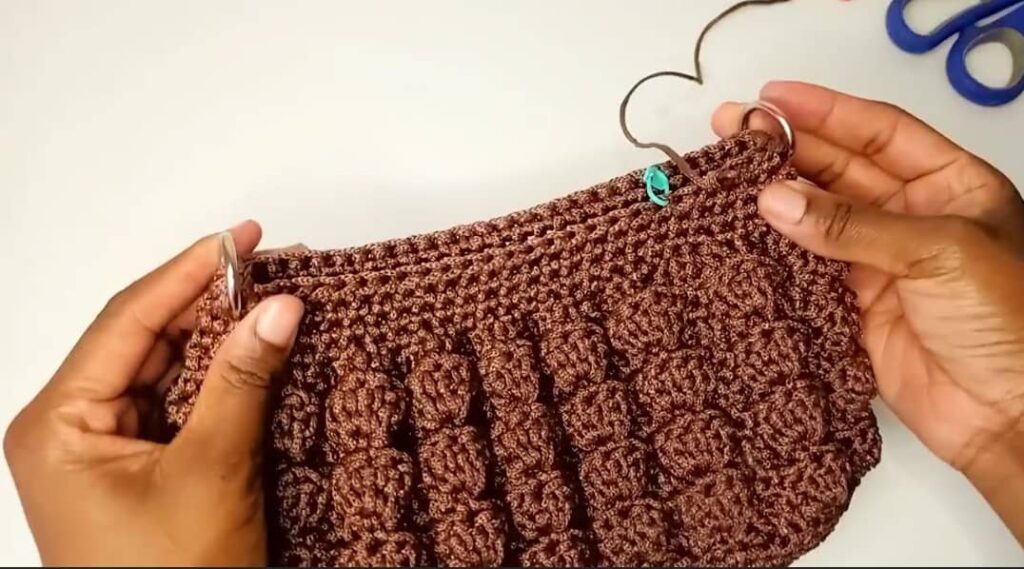
Fasten off and hide the tail along the wrong side (or the underside) of the handle neatly. Cut off any remaining ends to finish up (fabric glue, if available can be used to keep the ends intact).
Repeat step 1 to step 3 to attach the other end of the handle onto the second buckle. Cut and fasten off all ends.
The bag is done. One can line the bag and put a zipper or button. You can watch the step by step video tutorial here: