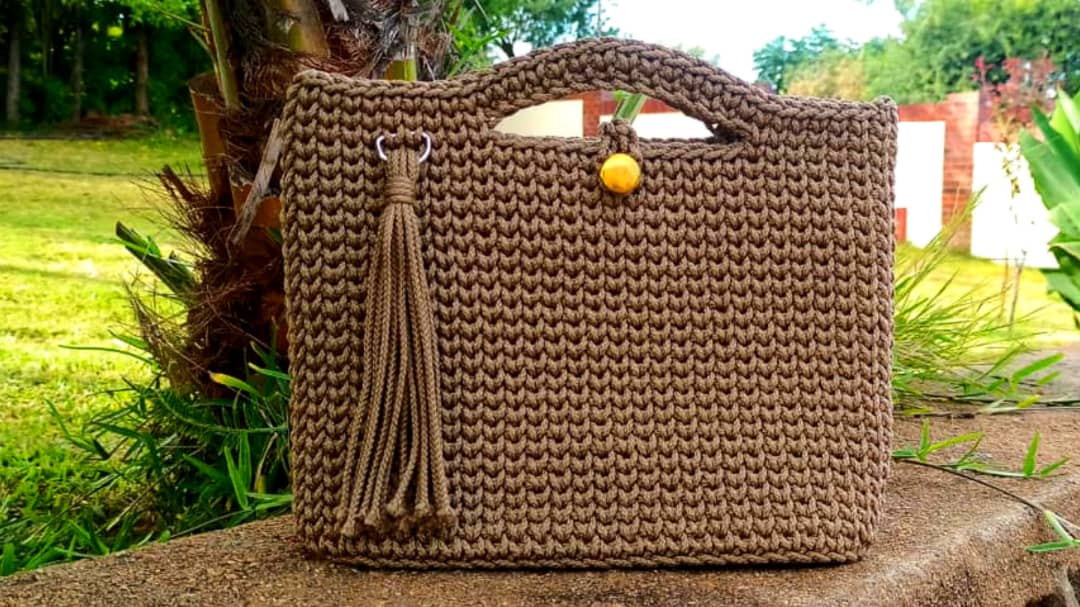
Crochet a bag:This pattern was inspired by the Forest Green bag. Both bags have a classic touch on them and if you cannot have them both at least crochet one for yourself. The crochet pattern is very easy to follow and it is a one round repeat pattern until you finish.
This bag is mostly suitable for going on meetings, date, or even on ladies outing.
For this bag I used macrame because it gives my bags the firmness they need. You can also use t- shirt yarn for this crochet bag.

Level of skill Required:
Knowledge on how to crochet single crochet and slip stitch is required for this pattern.
Crochet a bag Material list for the pattern:
- Crochet Hook size 6mm
- Macramé/ Rope or t-shirt yarn or any other bulky yarn that is about 3mm thick
- Meters used – 250m/273 Yards
- Scissors
- Button (20mm diameter)
- Sewing needle and sewing thread (for the button)
- 6 Stitch markers
- Metal ring (for the tassel)
Tension:
Gauge: 4″ = 11 rows x 9 stitches
One size bag
Finished crochet bag measurements
9,5 inches height and 12.5 inches width
Crochet Terms in US Terminology
- join – join two stitches together , done by working a slip stitch in the top of the next stitch
- rep – repeat (do it again)
- inc – means increase that is crochet two or more stitches in one stitch
- st (s) – stitch(es)
- ** – means do what is written in-between the asterisks (for example rep** , means repeat what is written in between the asterisks)
Stitch guide
- ch – chain
- sl st – slip stitch
- sc – single crochet
Pattern notes:
- You are going to work in rounds.
- The number in the brackets at the end of each instruction is the total number of stitches for that round.
Crochet a bag Instructions
The bag is made in 4 steps
- Step 1 – the bottom
- Step 2 – the sides
- Step 3 – the handles
- Step 4 – the button, button hole and the tassel
The knit stitch/ waistcoat stitch
The knit stitch will be used in step 2 and step 3. Here is how you crochet the knit stitch:
Insert the hook between the “legs” of the stitch (rather than the upper portion of the stitch) then work a regular single crochet stitch.
Step 1- The Bottom
Foundation round: ch 20. Sc 1 in the 2nd ch from the hook and put a st marker (take note of the color of this st marker or if possible it should be a different color from the rest of the markers as it also marks the starting point of our round), continue with sc in the next 17 ch.
Sc 4 in the last ch and put 3 st markers into the 3 sts of the 4 sc that you just crocheted. Continue to crochet at the back of the chains, sc 3 in the last chain and put 2 st markers into the last 2 sts. (42)

NB: Note that from here onwards we are going to crochet 2 sc in the sts with st markers, and putting back the st marker into the first stitch of the increase. This is going to be done until the bottom of the bag is done.
Round 2: Sc 2 in the 1st st (put back the st marker into the 1st st of the increase), *sc 1 in the following sts which do not have stitch markers until you reach a st marker, sc 2 in the sts with st markers (put back the st marker into the 1st st of the increase).*
Repeat from * to * until you are back at the starting point. (48)
Round 3 and 4:
repeat round 2. That is in every stitch with a stitch marker you increase that is put 2 sc then in the stitches without the stitch markers you put 1 sc until the round is done. Round 4 should have a total of 60 st
Round 5: remove all the other st markers and remain with the one that marks the starting point (the one in the first st). Slip st in each st right around. This completes the bottom. It should look as shown below:

Step 2 – The Sides
Round 1: sc 1 into the outer two loops of the first st (do not insert your hook through the slip st) put back the st marker in the first st, continue with 1sc in each st (outer two loops) until the round is done. (60)


Round 2: *crochet 1 knit stitch in each st right round (you can refer at the top on how to crochet the knit stitch)*, repeat from * to * until you finish the round. (60)
Round 3 to round 24: repeat round 2.
Step 3 – The Handles
From round 24 of step 2.
Round 25: starting from the first st, put a st marker in st number 6; 19; 36; 49

Continue crocheting the knit st, when you reach the first st marker, remove it and crochet into that st, chain 14, skip the 12 stitches in between and join the ch into the next st marker with the knit st.
This is your first handle. After joining the chain, in st number 22 and 23, take the metal ring and crochet through it. Continue with 1 knit st in each st until you reach the next st marker.
When you reach the next st marker, remove it and crochet into that st, then chain 14, skip 12 stitches and join the ch into the next st marker with the knit st. Crochet knit st into the remaining stitches until you are back at the starting point.

Round 26: crochet 1 knit st in each st. When you reach the handles, sc 1 in each chain by inserting your hook at the back bumps. Repeat until the round is done.

Round 27: work 1 knit st in each st including the handles right round. At the end join the last st to the first st with a slip st, cut and fasten off the ends. The handles are done.
Step 4:The Button,Button Hole And The Tassel
- Sew the button just below the handle of one side at the center as shown below:

On the center of the other side chain 9 so that the chain is able to wrap around the button on the other side. Join on the 6th chain from the hook with slip stitch and continue with slip st into the remaining chains until you are back at the starting point (that is the center).

For the tassel cut 10 strands of yarn which are about 18 inches long, insert them through the metal ring. Tie the strands together just below the metal ring. Trim the ends of the strands to get a nice finish.


- Cut and fasten off the ends to finish the bag
- The crochet bag is done. You can find the video tutorial here.
What size macrame do we use 3mm?
Yes it’s 3mm thick macrame cord
Thank you for sharing your talent with us. I am looking forward to working on this project.