
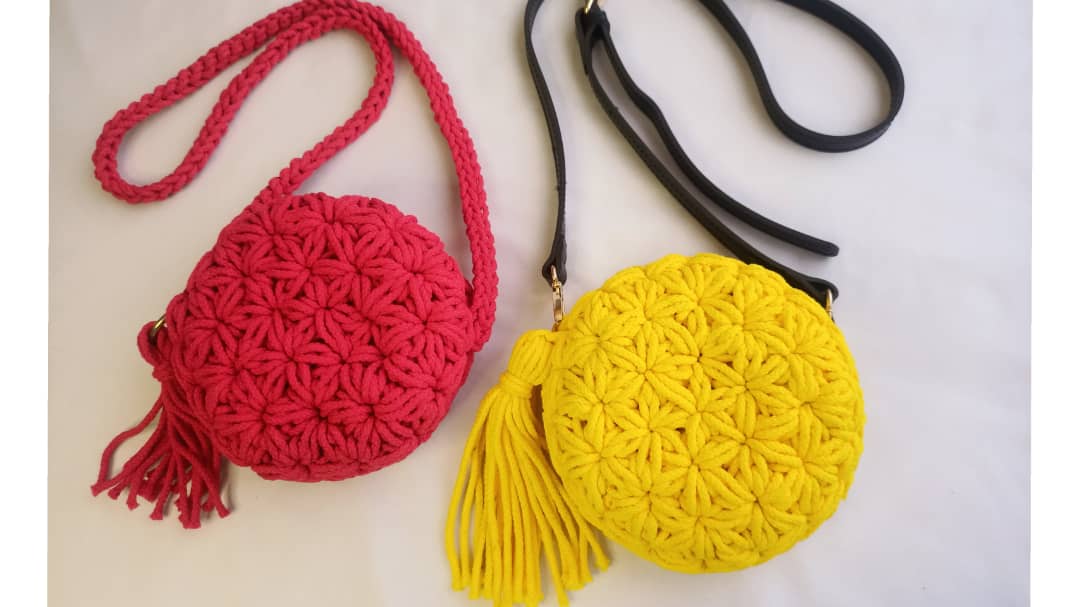
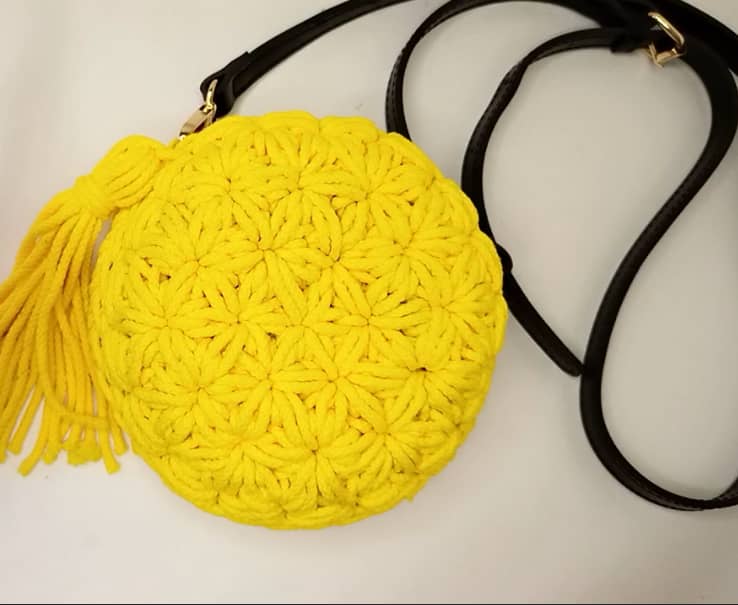
How to crochet the Jasmine stitch round bag…..Hie everyone. I have always admired the Jasmine stitch and I thought crocheting a bag using the stitch would be very difficult. Guess what…. this is one of the easiest stitches I have comes across especially in the round. You just need to practice having many loops on the hook and you are good to go. In this pattern I have done my best to explain every step, however I also have a video tutorial which can aid you as you crochet the bag. if you are a fan of crochet round bags you can also check out the Pink Hexy bag and the Halfmoon cross body bag patterns.
If you prefer an ad-free, printable PDF version this pattern, you can purchase it right below by clicking the BUY NOW button. Thank you for supporting my designs.
Level of skill Required:
Knowledge on how to crochet single crochet and slip stitch is required for this pattern.
Material list:
- Crochet Hook size 6mm
- Macramé/ Rope or t-shirt yarn or any other bulky yarn that is about 3mm thick
- Meters used – 95 meters
- Scissors
- 2 Stitch markers
- Tapestry needle
- Zipper about 20cm length
- Sewing thread (two colors) and needle( for attaching the zipper)
- Leather handle (optional)
One size bag
Finished bag measurements
7 inches diameter
Stitch guide
- ch – chain
- sl st – slip stitch
- sc – single crochet
Pattern notes:
- The most important thing to note is the size of the puffs in your work, making the puffs shorter or longer will make a big difference on how the bag turns out.
- In this pattern each Jasmine stitch will be referred to as a flower with 6 puffs (the puffs being the petals) and one center.
- You are going to work in rounds.
Instructions:
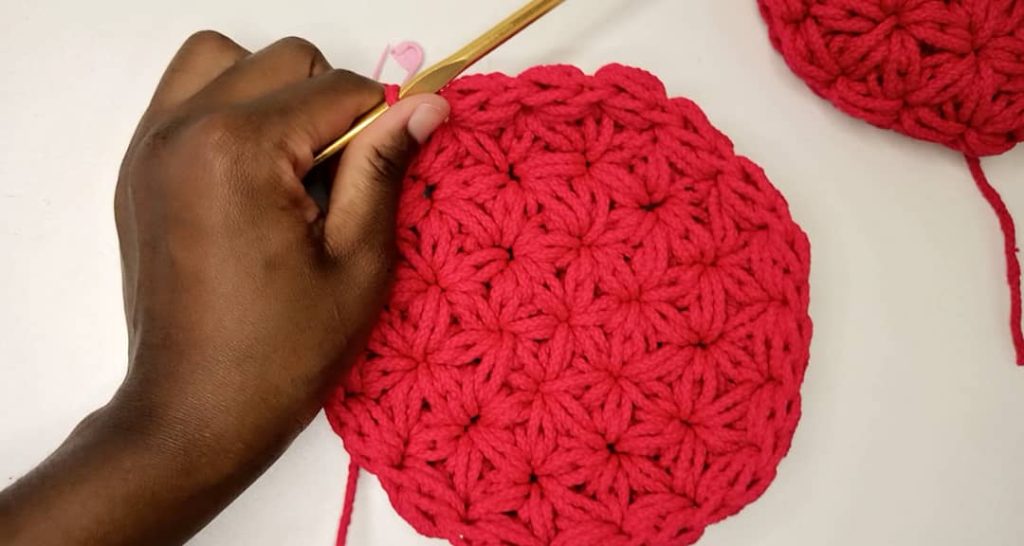
1st round:
Step 1:
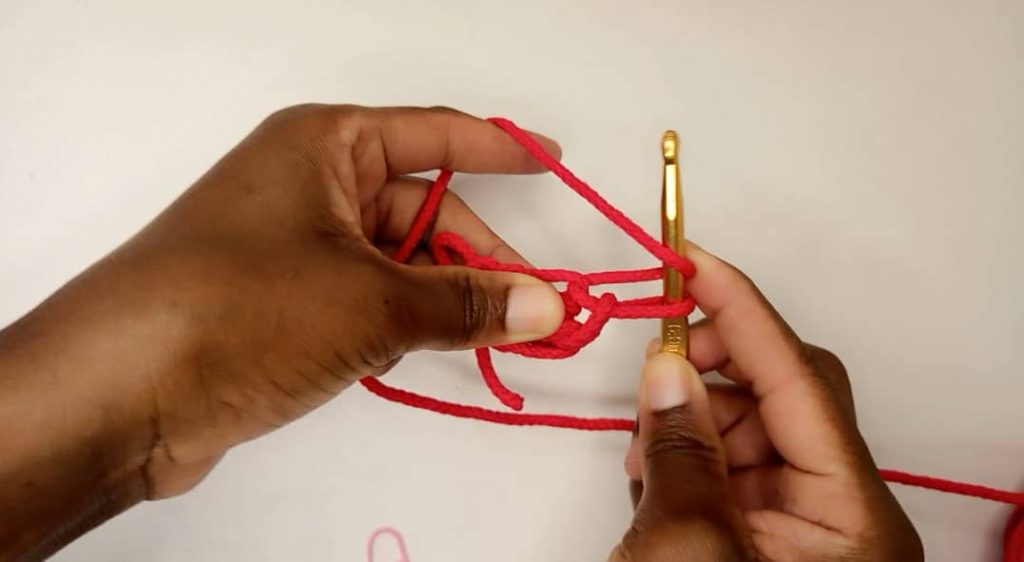
start with a slip knot on your hook, chain 2, elongate the loop on the hook, yarn over and insert into the first chain. Pick up yarn and pull through (you now have 3 loops on hook), yarn over insert into the first chain again. Pick up yarn and pull through (you now have 5 loops on the hook) hold your yarn at the base near the first chain.
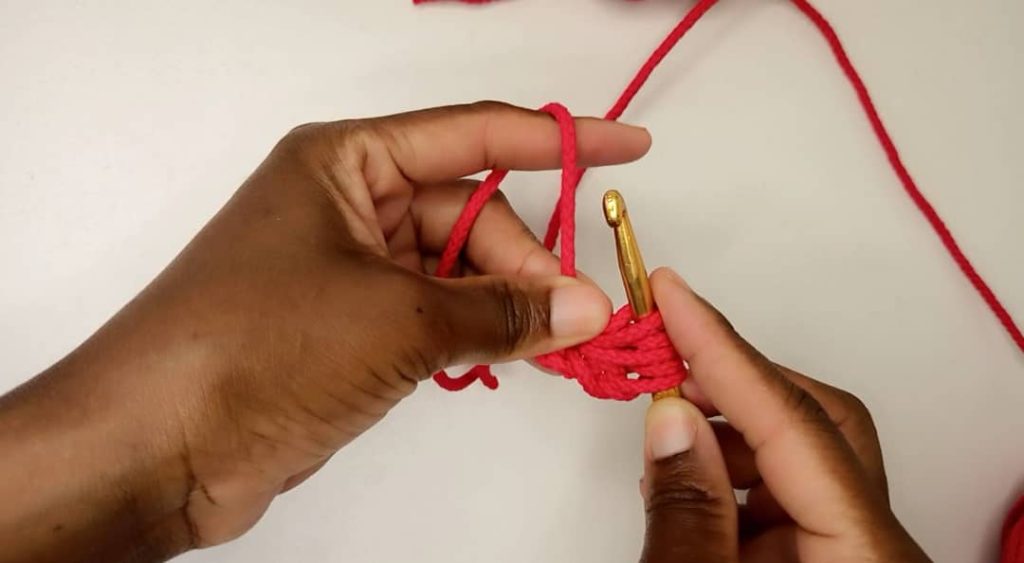
Yarn over pull through all 5 loops, insert hook under the loop you are holding
pick up a loop, pull through the 1 loop on the hook to make a slip knot. Your first petal is done.
So for this first flower we now have 1 petal
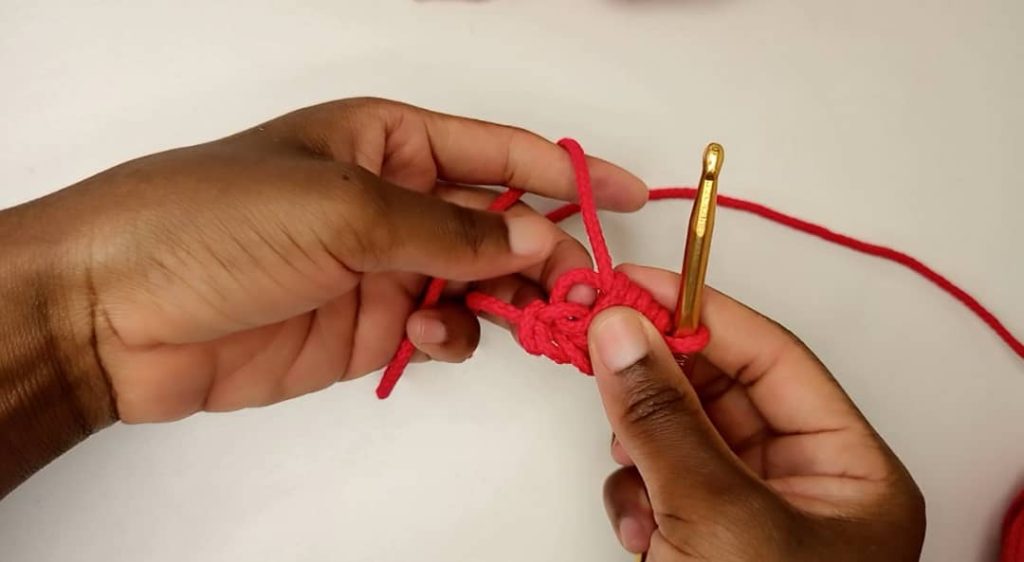
Step 2: Making the second petal of the first flower.
NB: note that as we crochet the petals for the first flower we will also crochet along some petals for the flowers of the next round
Yarn over and insert hook in the slip knot just made and pull up a long loop,
yarn over again and insert hook in the slip knot just made and pull up another long loop. This is one incomplete petal but before we complete it we are going to make another petal this time inserting our hook on the center of the flower (the chain 1 from step 1 above). At this point you have 5 loops on the hook;
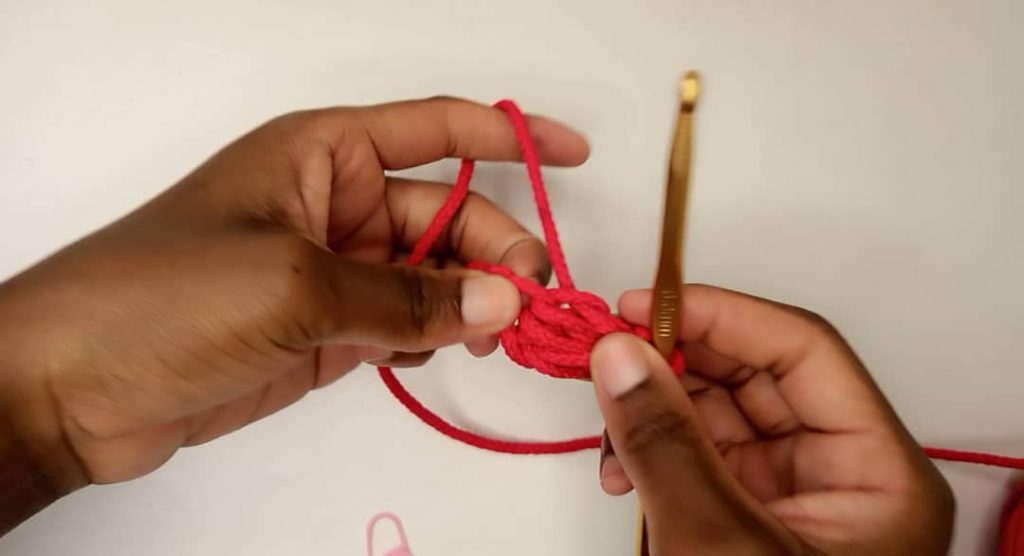
Step 3:
Yarn over and insert hook on the center (chain 1 above) pull up a long loop, yarn over again, insert hook on the center and pull up a long loop, at this point on your hook you should have 9 loops and it will seem as if you have 2 incomplete petals.
Step 4:
Hold yarn at the base near the center yarn over and pull through all 9 loops, insert hook under the loop you are holding and pick up a loop, pull through 1 loop on the hook to make a slip knot. You now have 3 petals of which 2 are from the flower we are working on.
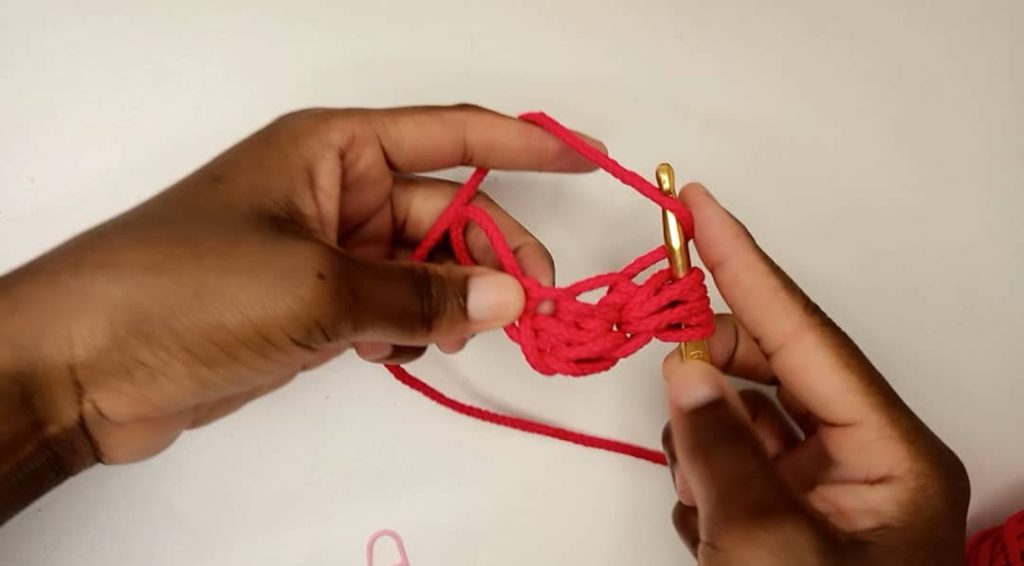
Repeat step 2, step 3 and step 4 until you have 5 petals on the first flower.
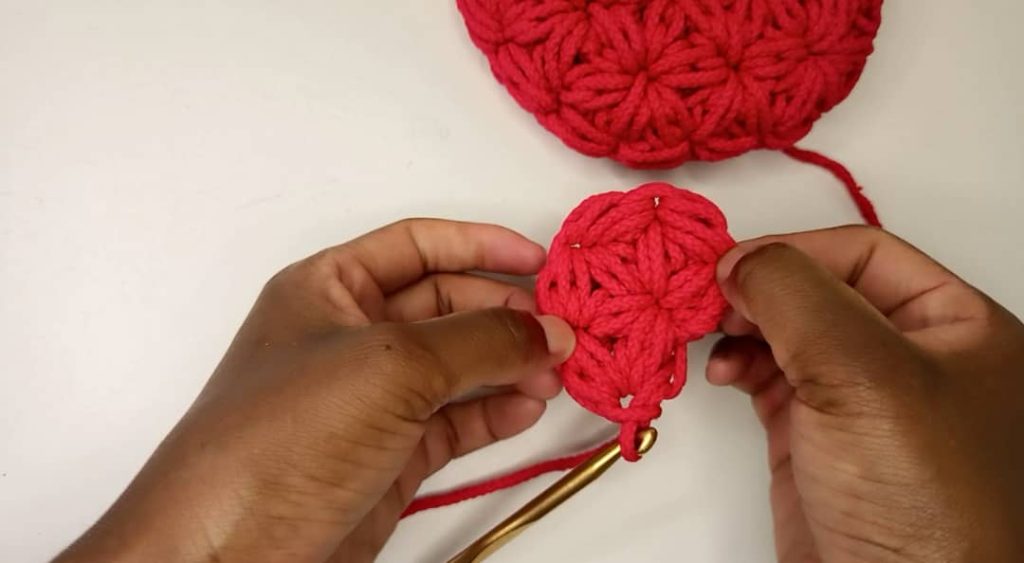
Step 5: Making the final petal (the 6th petal) of the first flower
The 6th petal is made accompanied by other two petals. Previously in step 2 and 3 we made two petals at the same time however for the last petal, you make 3 petals at the same time instead of 2. Repeat step 2 and 3 as described above, from there skip step 4 and move to step 5 described below:
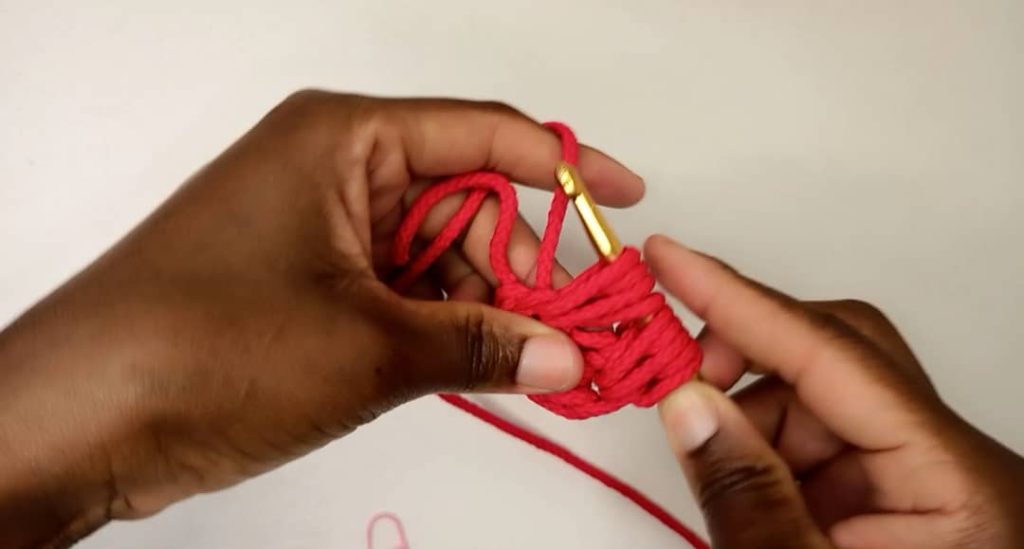
Yarn over insert hook in the next center (the immediate slip stitch) of the second flower we are going to work on.
Pull up a long loop yarn over again insert hook in the center of the next flower as mentioned earlier and pull up a long loop (you now have 13 loops on the hook)
Hold yarn at the base near the center yarn over and pull through all 13 loops, insert hook under the loop you are holding and pick up a loop, pull through 1 loop on the hook to make a slip knot. At this point we have completed the first flower and first round (first round has 1 flower and we already have a few petals made for the second flower).
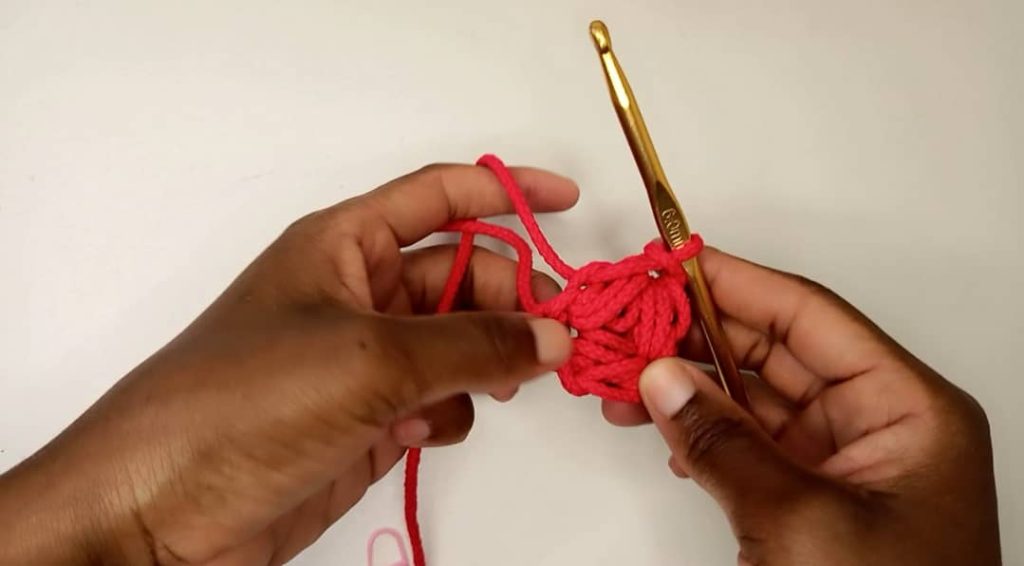
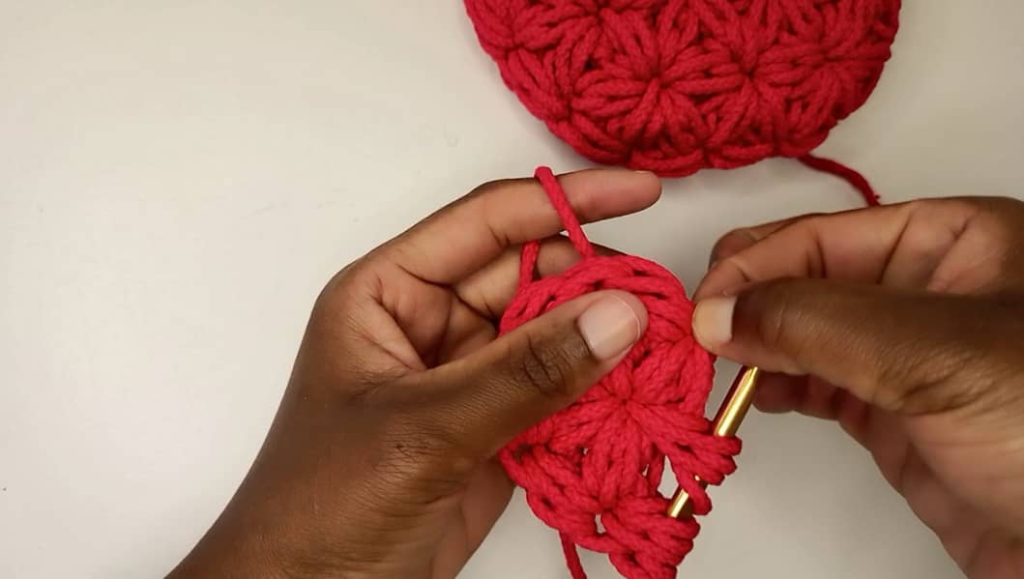
Round 2 and Round 3
Moving on to the next round, put a marker on the slip knot just made, this is going to be the center of the last flower of the second round.
I am not following any sequence here, I found it easier that you just make sure each flower has 6 petals before moving on to the next flower and you know that you have completed a round when you reach the stitch marker used to mark the center of the last flower of the round. So before the flower has 6 petals you crochet 2 petals at once as done in step 2, 3 and 4 above until you have 5 petals and for the last petal (the 6th petal) you do 3 petals at once as shown in step 2,3 and 5, after that you then move on to crochet the next flower. Also take note that whenever you start working on a new flower first count the number of petals already present and then go on to crochet the remainder.
NB: you identify a petal by tracing to see if it originates from another center of another flower
Crochet round 2 and round 3. We already have 1 round and working on the second round. Complete the second round and crochet the third.
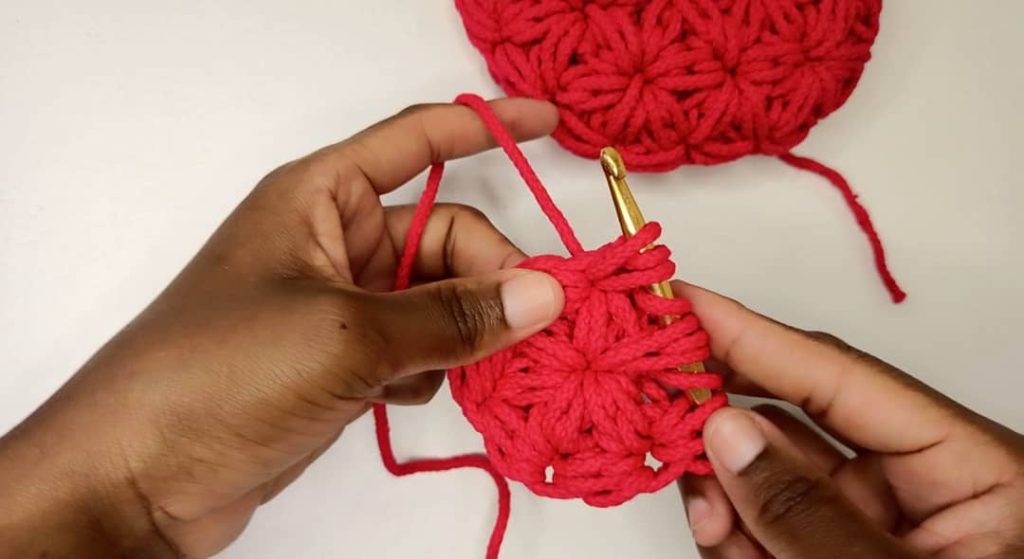
Round 4: put 1 sc in the back loop of each stitch ( put st marker in the first sc you make) right round until you are back at the starting point. The circle will slightly curve inwards. Cut and fasten off the ends.
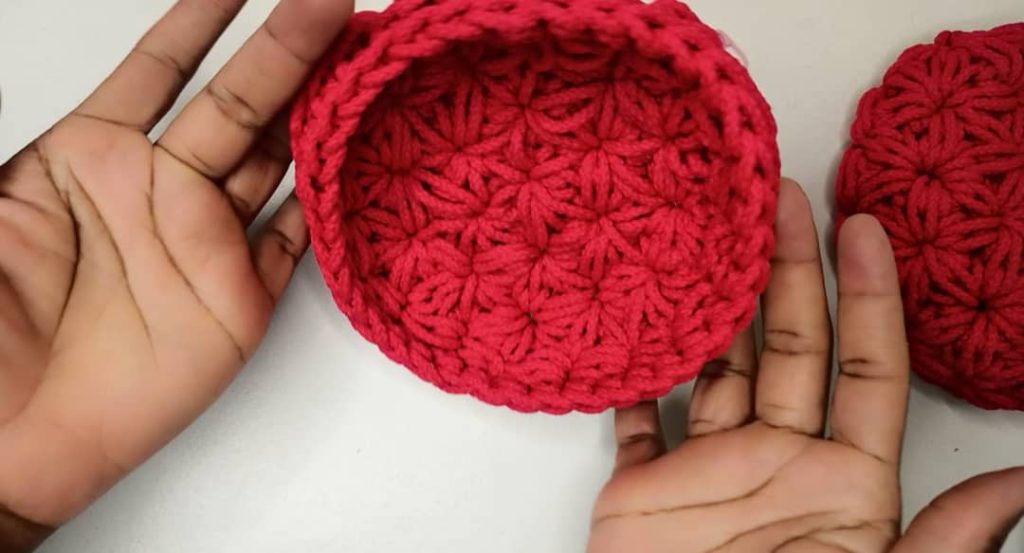
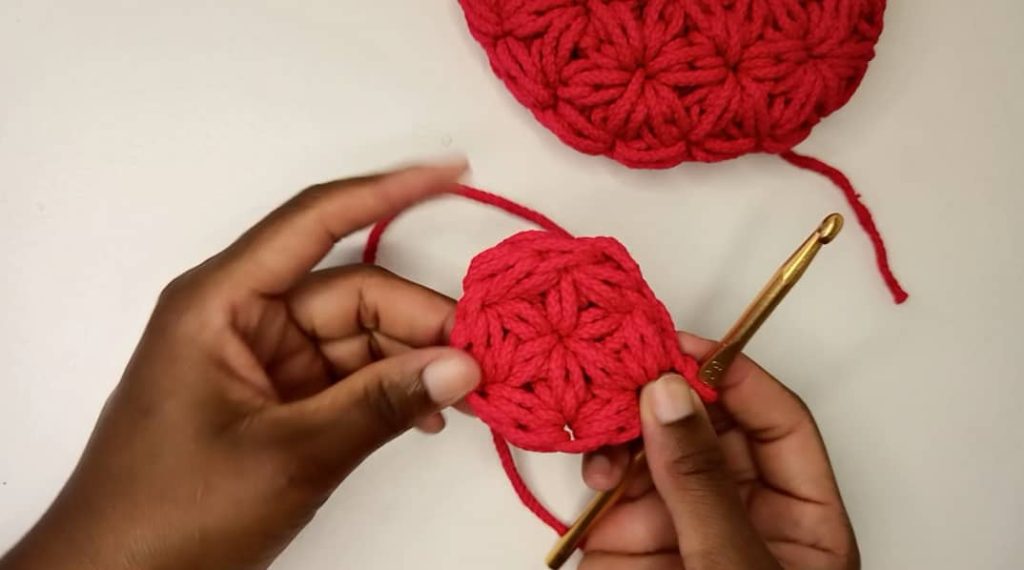
Repeat the pattern from round 1 to round 4 to make another identical circle.
Joining the two circles
Count 15 stitches put stitch markers in the 1st and 15th stitches. This is going to be the opening of our bag. Align both circles and join using a tapestry needle as shown below:
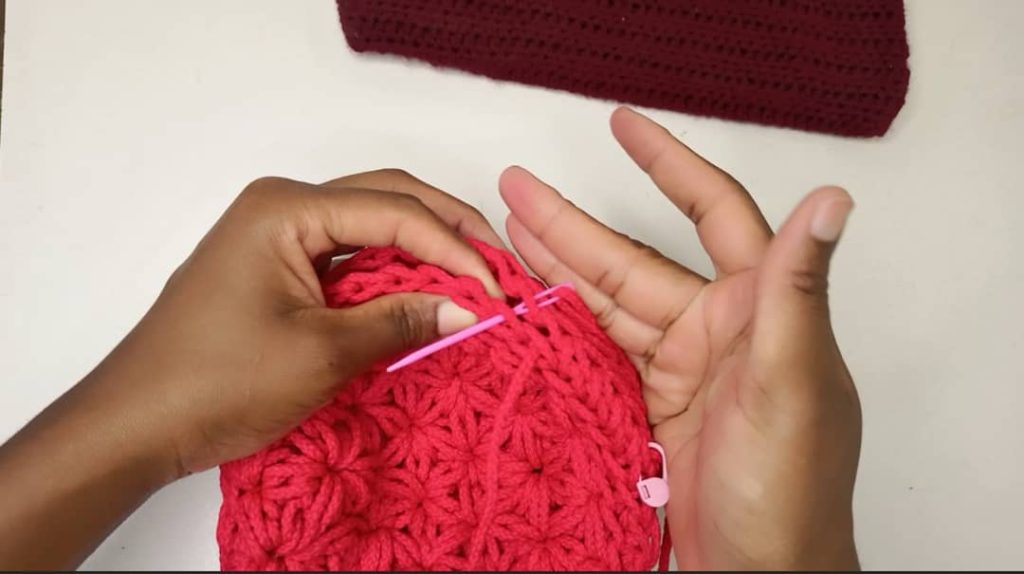
Begin in the st with stitch marker and also finish in the other stitch with marker. Remember we are leaving 14 stitches as the opening of the bag. After joining, cut and fasten off the ends
Align your zipper along the edges of the opening that was left earlier on. Use a thread with lighter or a different color to temporarily attach the zipper to the bag as shown below:
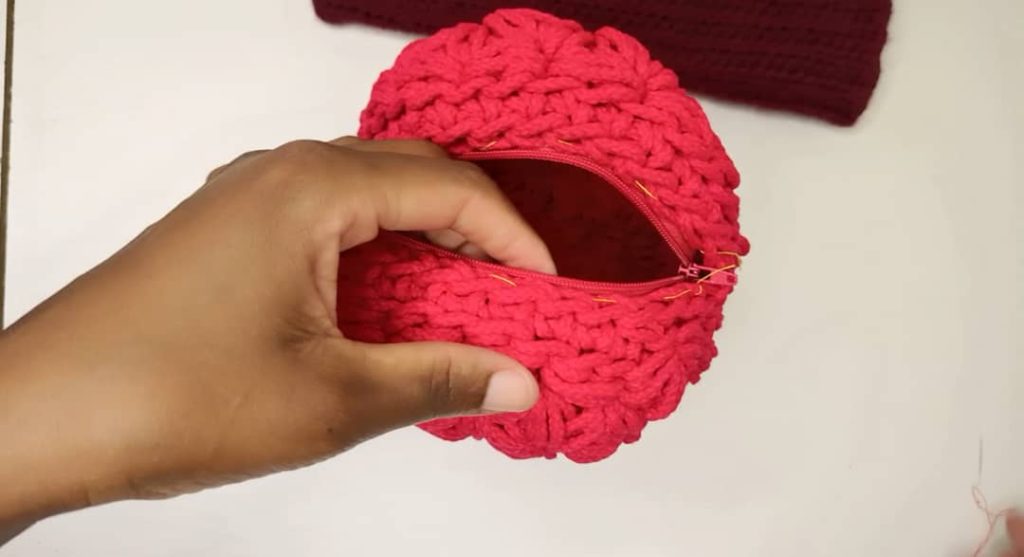
Sew in the zipper permanently onto the bag using a thread with the same color as the bag and zipper. When done remove the thread used earlier on to temporarily attach the zipper. If you have a sewing machine you can use the machine to attach the zipper.
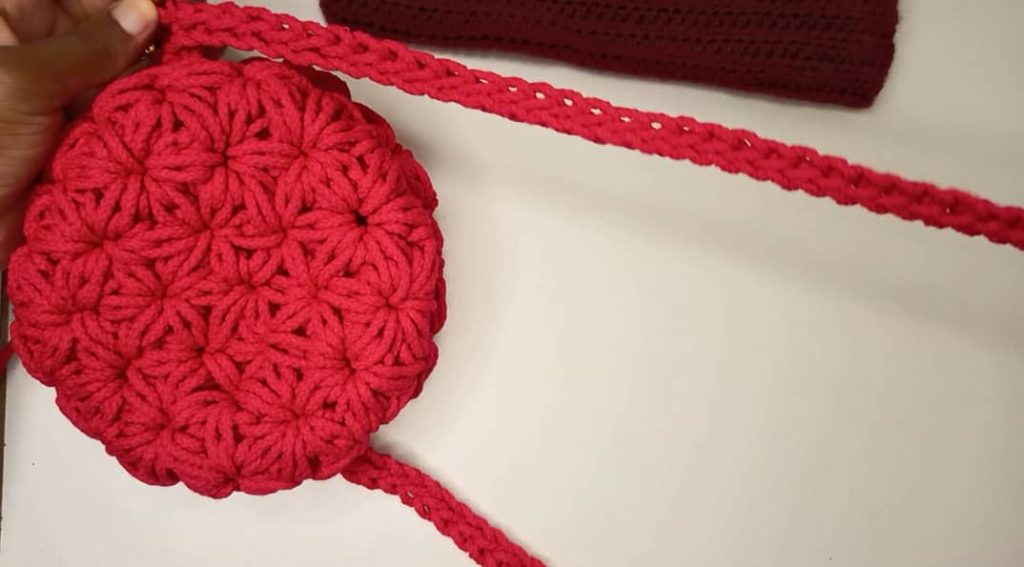
Handle
At this point if you have a leather handle you can go on and attach it to the bag as shown below
otherwise you can crochet a simple handle.
Make a slip knot and attach it on one side just below the zipper. Chain 100 or to desired length and join the chain to the other side. Turn and slip stitch along the chain until you are back at the starting point. Cut and fasten off the ends.
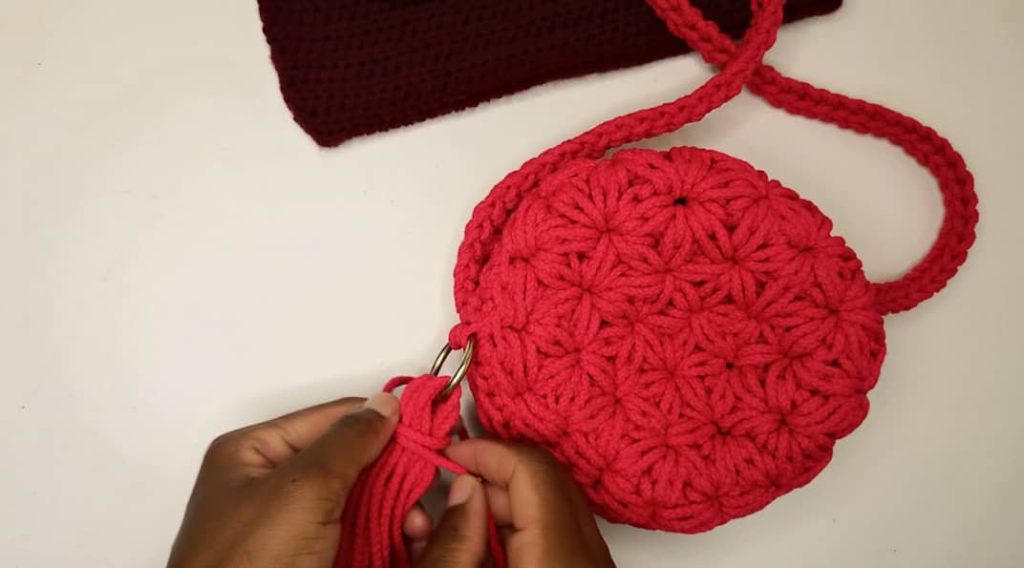
For the tassel:
Attach a small metal ring on the side of the bag for the tassel
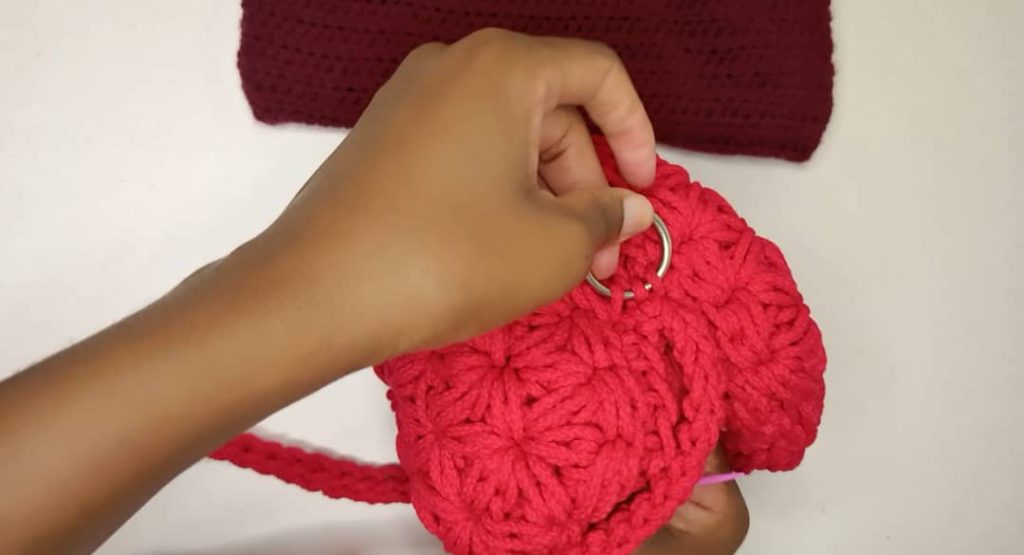
Take a few strands of yarn/macramé and insert them through the metal ring.
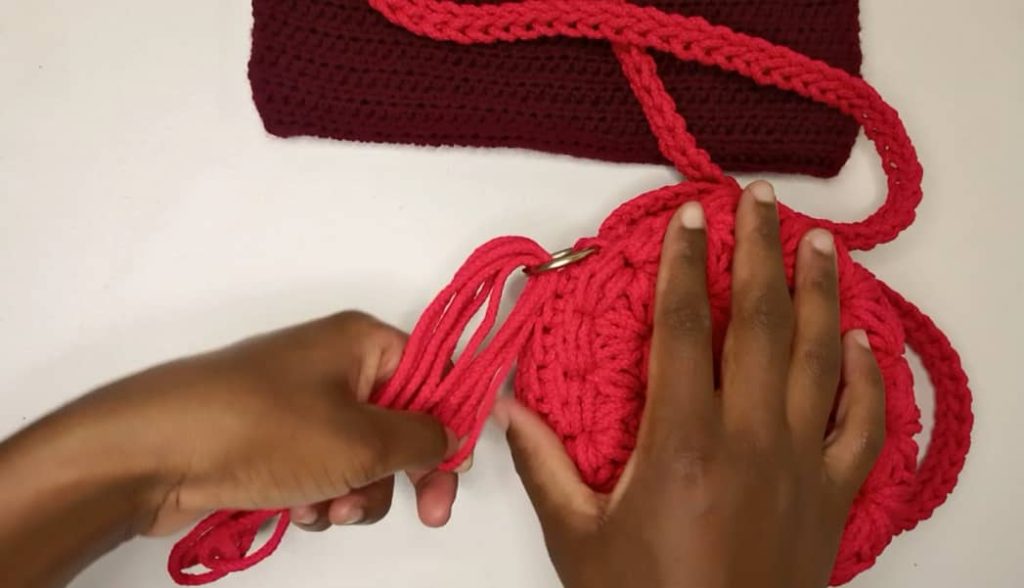
Tie at the top as shown below to make a tassel. Trim the ends to finish up.
Your bag is done.