

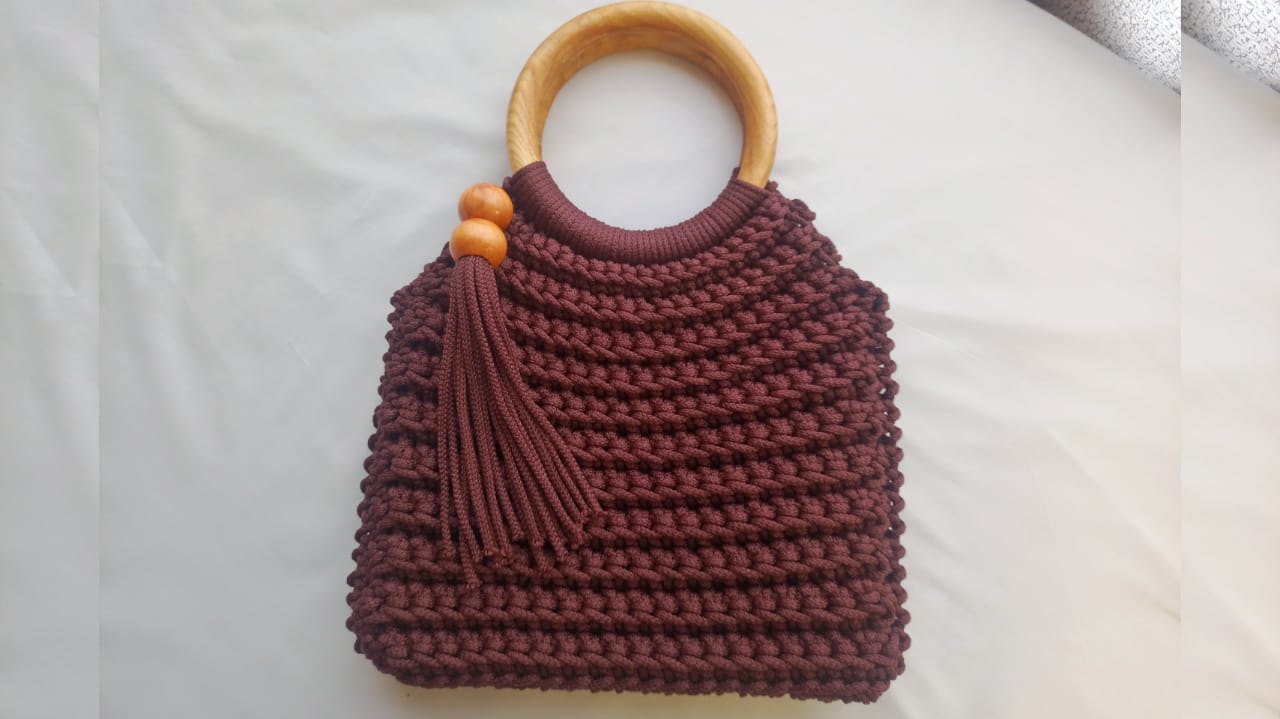
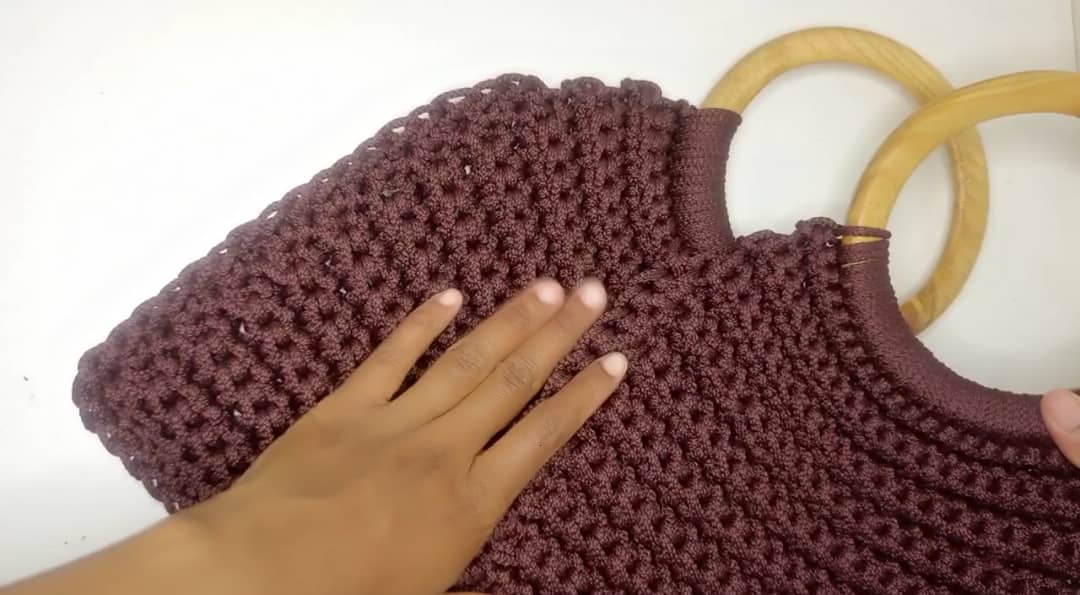
Crochet ribbed bag with wooden handles pattern. Hie everyone, here is a free crochet bag pattern for a ribbed bag with wooden handles. This bag is one of the simplest, yet unique bag you can crochet. So even if you are new to crochet, try crocheting this ribbed bag. You can also check out this other ribbed bag pattern ‘The Portable bag pattern’.
If you prefer an ad-free, printable PDF version this pattern, you can purchase it right below by clicking the BUY NOW button. Thank you for supporting my designs.
Level of skill Required:
Knowledge on how to crochet single crochet, slip stitch and chain is required for this pattern.
Material list:
- Crochet Hook size 6mm
- Macramé/ Rope or t-shirt yarn or any other bulky yarn that is about 3mm thick
- Meters used – 96 meters
- Scissors
- Tapestry needle
- Two circular wooden handles
- Two wooden beads for tassel (optional)
Finished bag measurements
25 cm height and 27 cm width
Crochet Terms in US Terminology
- join – join two stitches together , done by working a slip stitch in the top of the next stitch
- rep – repeat (do it again)
- st (s) – stitch(es)
Stitch guide
- ch – chain
- sl st – slip stitch
- sc – single crochet
Pattern notes:
- You are going to work in rows
- the chain 1 at the end of each row does not count as a stitch
Instructions (crochet ribbed bag with wooden handles):
The bag is made in 2 steps
- Step 1 – the side panel
- Step 2 – joining the sides
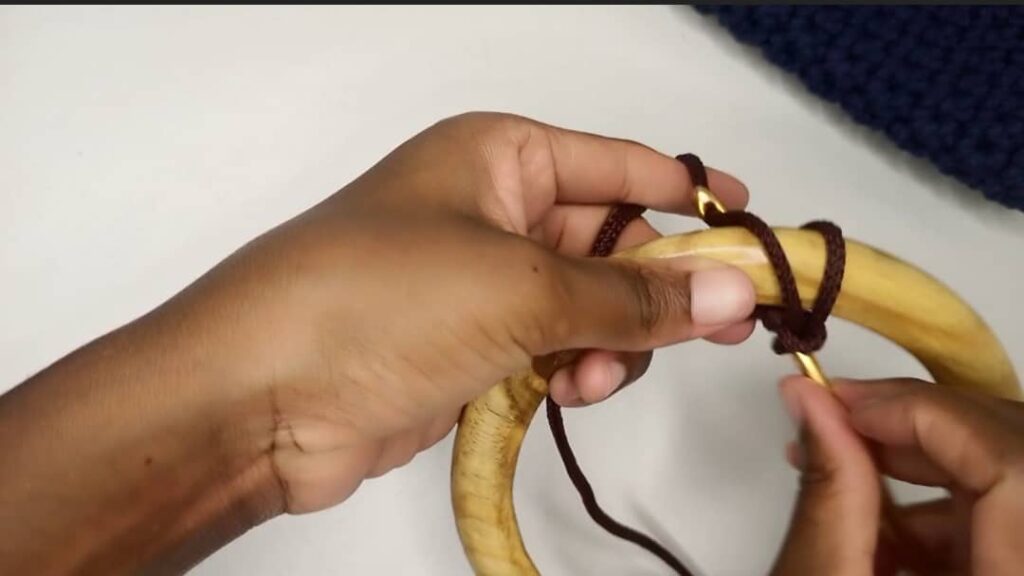
Step 1- The first side panel
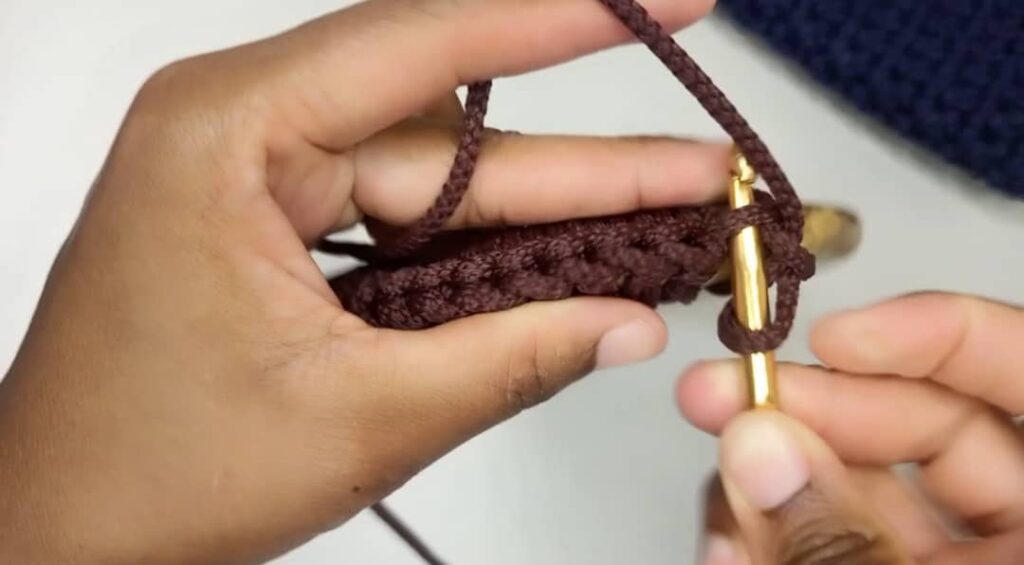
Foundation row: Make a slip knot. Place the slip knot along the edge of one wooden handle. Working around the handle, sc 21 around the handle. Chain 1 and turn.
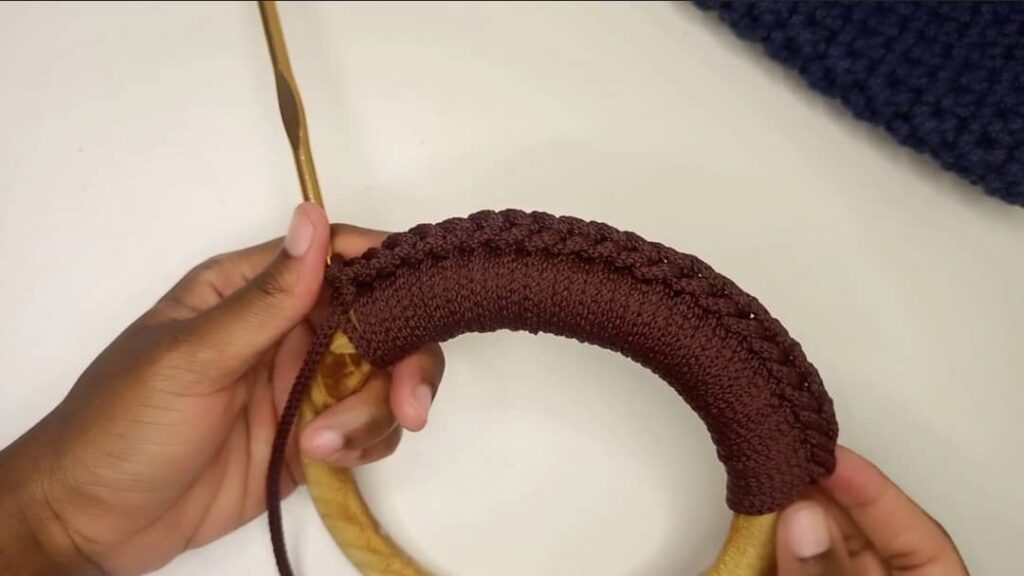
Row 2: insert hook in the backloop and work 1 sc, continue in the following stitches, putting 1 sc in the backloop of each st until the row is done. Chain 1 and turn.
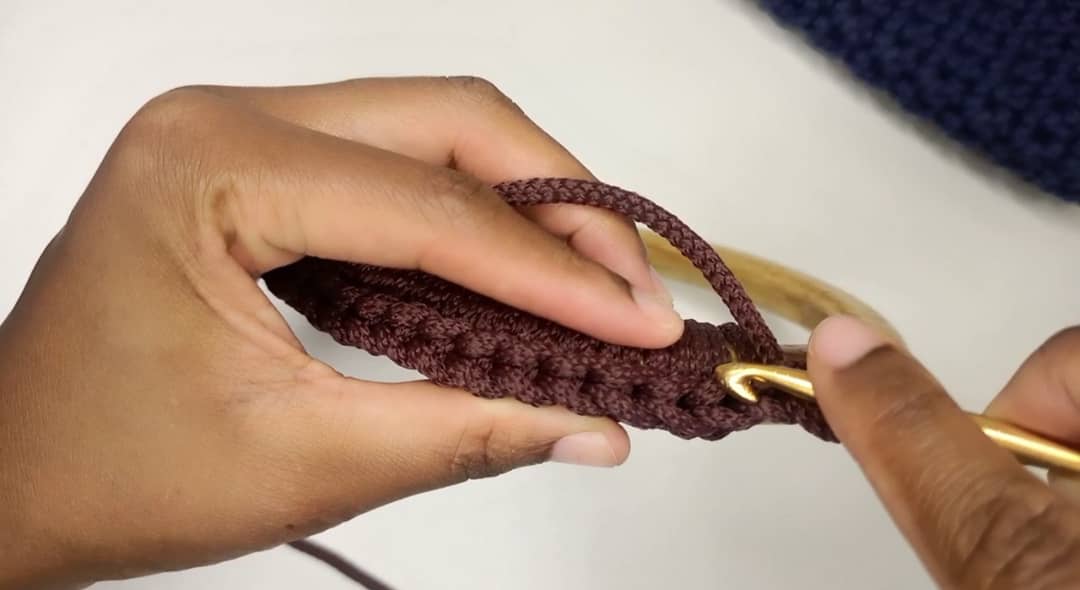
Row 3 – Row 23: Repeat row 2. Cut and fasten off the ends.
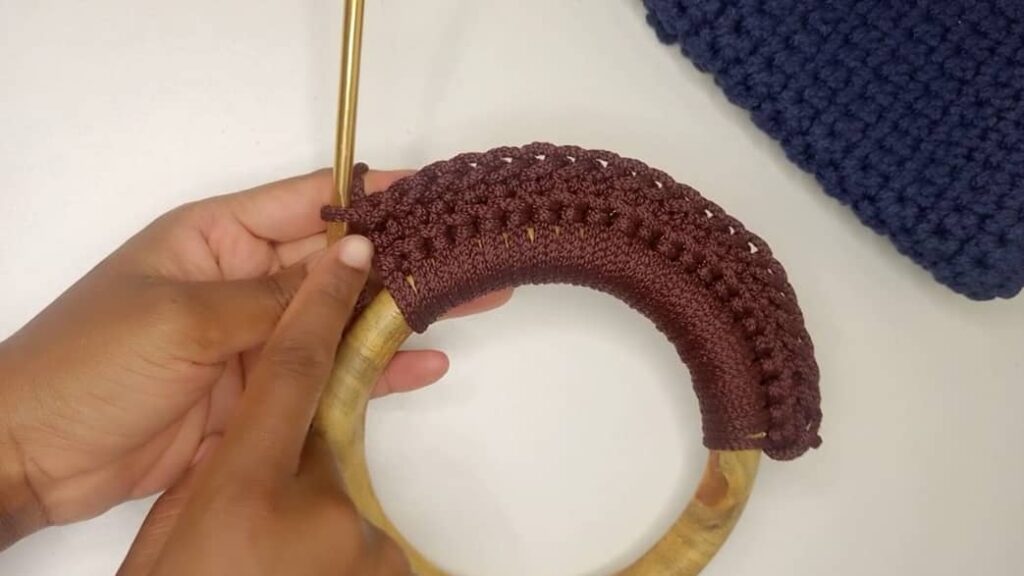
Crocheting the edges (crochet ribbed bag with wooden handles)
Skip the first five rows counting from the handle. Make a slip knot and place it along the edges of the rows, crochet 1 sc on the edge of each row.

When you reach a corner put 2sc ( do this for the other corner). Continue with 1 sc until you reach the other side of your work. Leave the first 5 rows just as we did at the beginning.
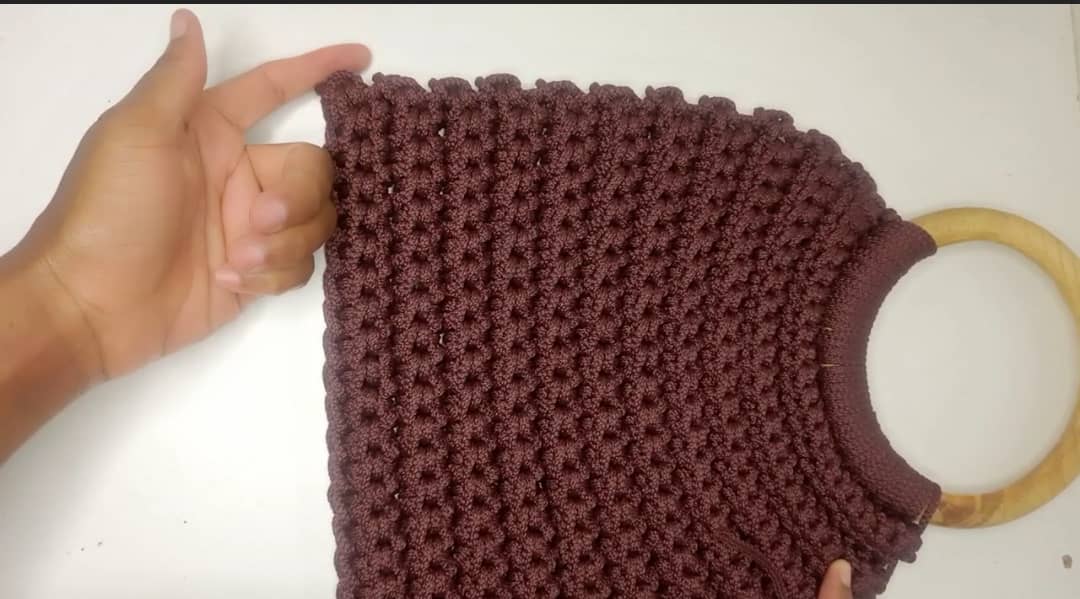
Cut and fasten off the ends. Your first side of the bag is done. Repeat from start to make the second identical side.
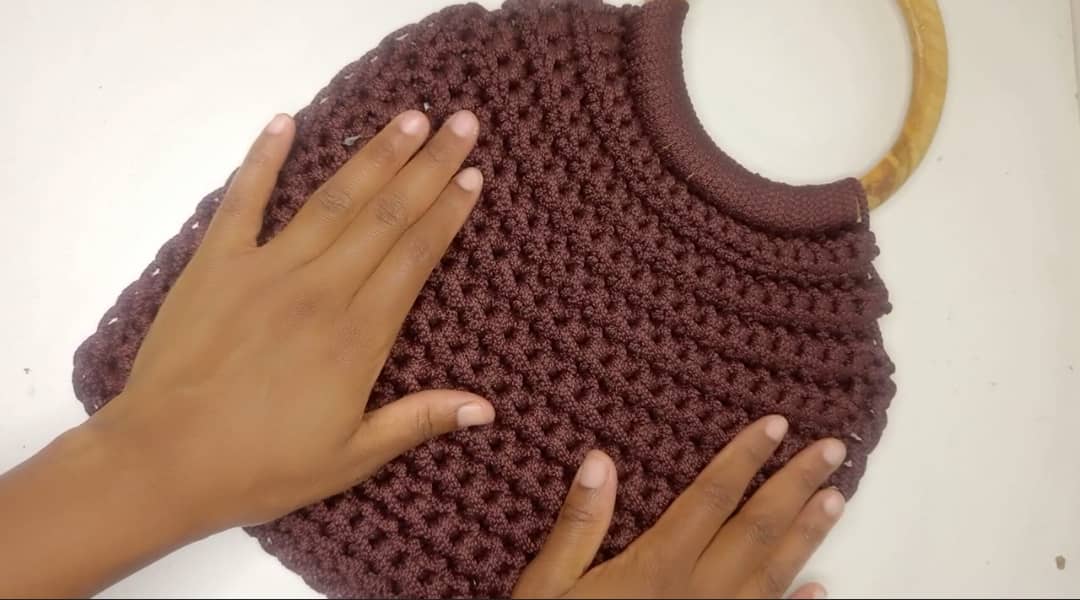
Step 2 – Joining the Sides
Take the two sides align the stitches from both sides. Join with the tapestry needle along the aligned edge as shown below. As you join, insert your needle into the sc along the edges (make sure to skip the first five rows) until you reach the other side (leaving the first five rows).
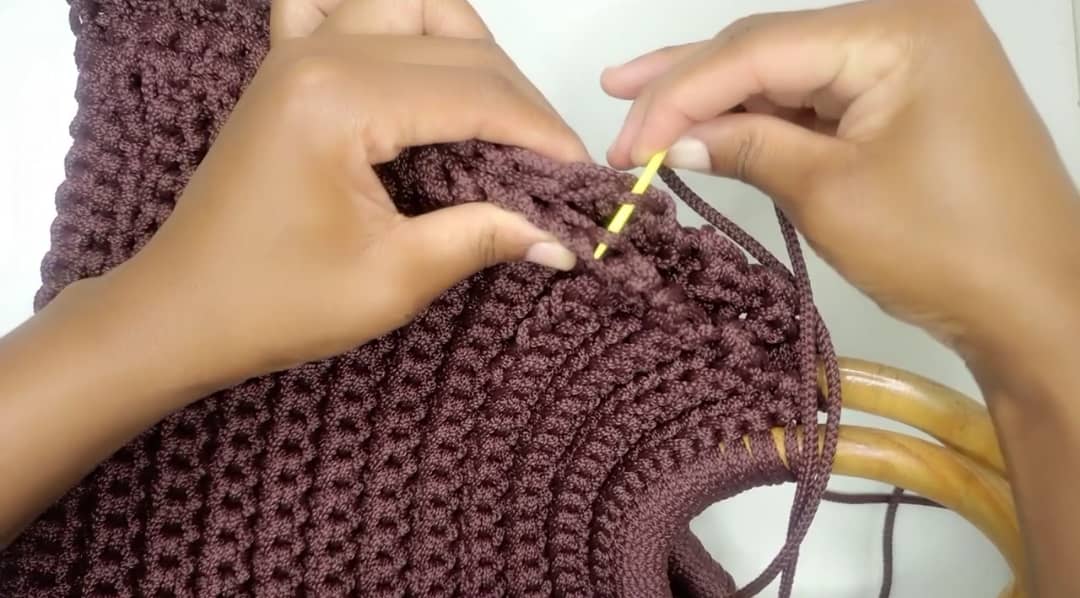
Cut and fasten off the ends.
Turn your bag inside out.
Tassel
Take about 10 strands of yarn. Tie them together in the middle and place two beads at the top. Tie the tassel just below the handle. Your bag is done. Watch the step by step video tutorial