
Your search for crochet bag pattern ends here. This is a simple and easy Japanese knot crochet bag pattern.
This crochet pattern covers how to crochet step by step a box bag with a Japanese knot. Crocheting this bucket bag is not only simple, but also a lot of fun. This bag is crocheted using single crochet and slip stitch. You can also check the popular Forest Green bag and the Chic crochet bag.
Lets quickly get on with the free crochet pattern for the bag.
Material list for the Crochet Japanese knot bag:
- Crochet Hook size 6mm
- Rope or t-shirt yarn or any other yarn that is about 3mm thick , two colors of your choice in this pattern I used blue and white
- Meters used – 360 meters / 393 yards
- Scissors
- 7 Stitch markers
Tension:
Gauge: 4″ = 9 rows x 9 stitches in single crochet, crocheting in the round
Size:
One size bag
Finished measurements
9” length x 9” width x 10” height
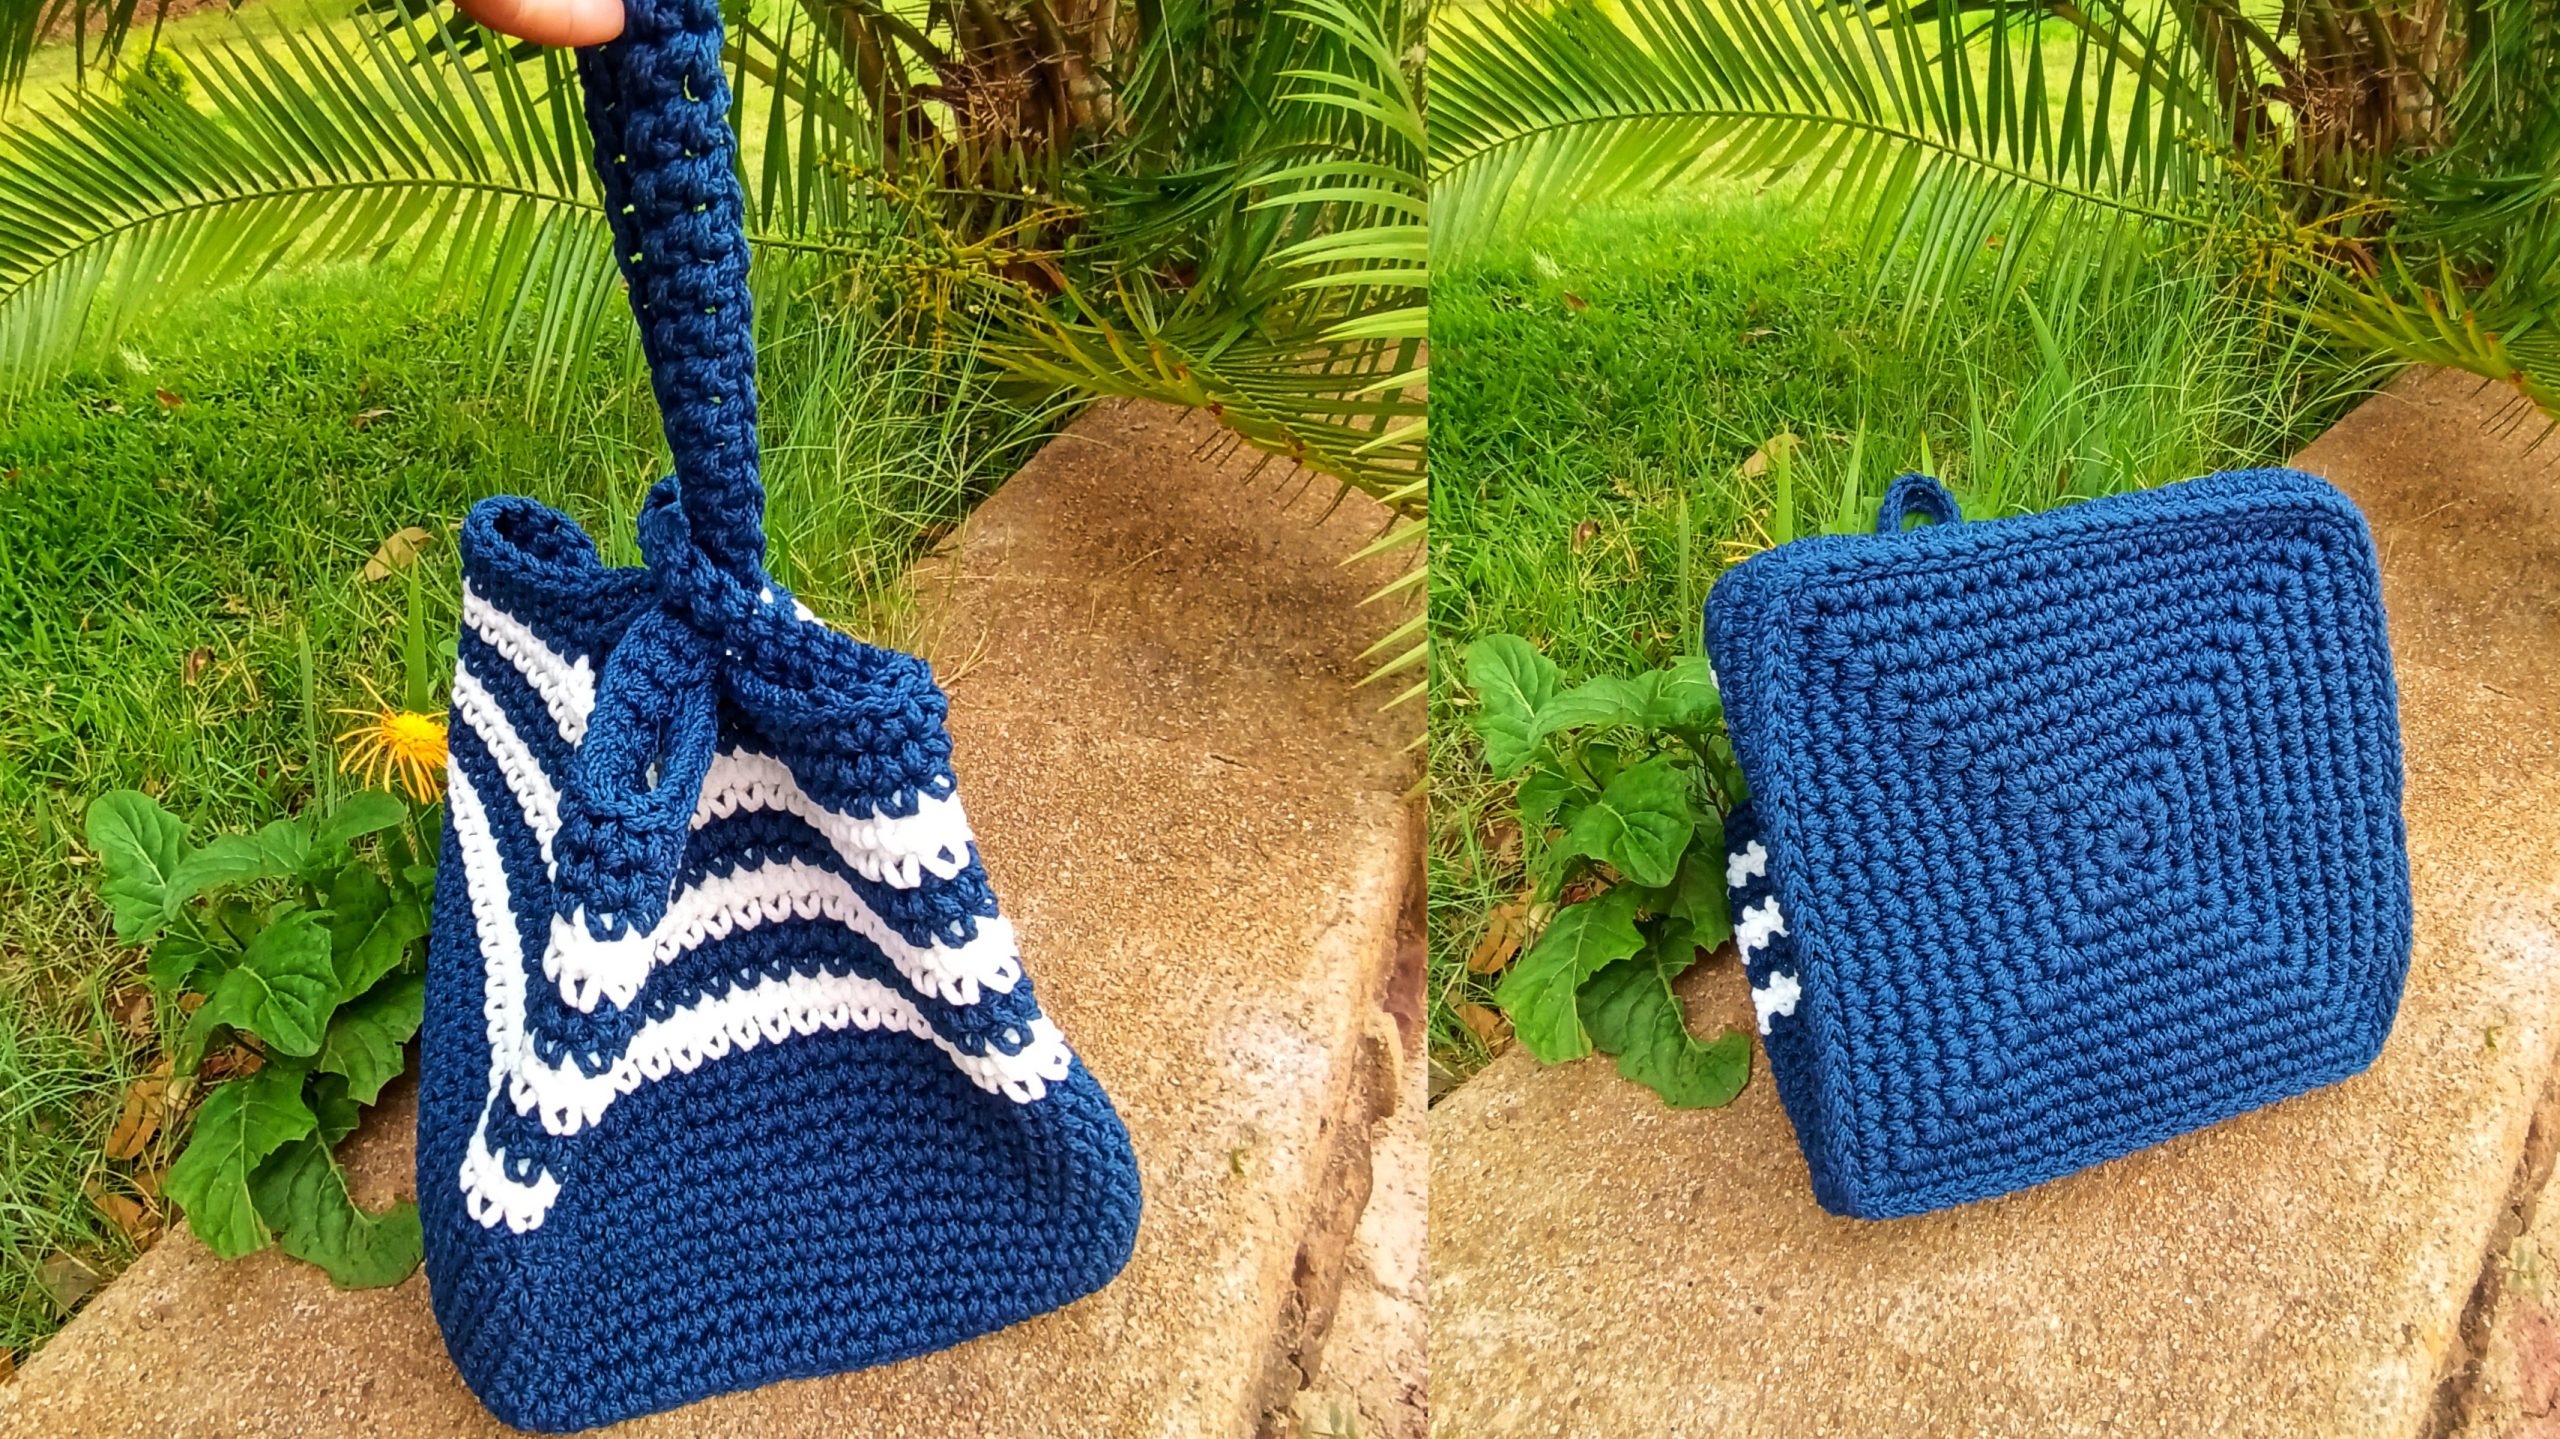
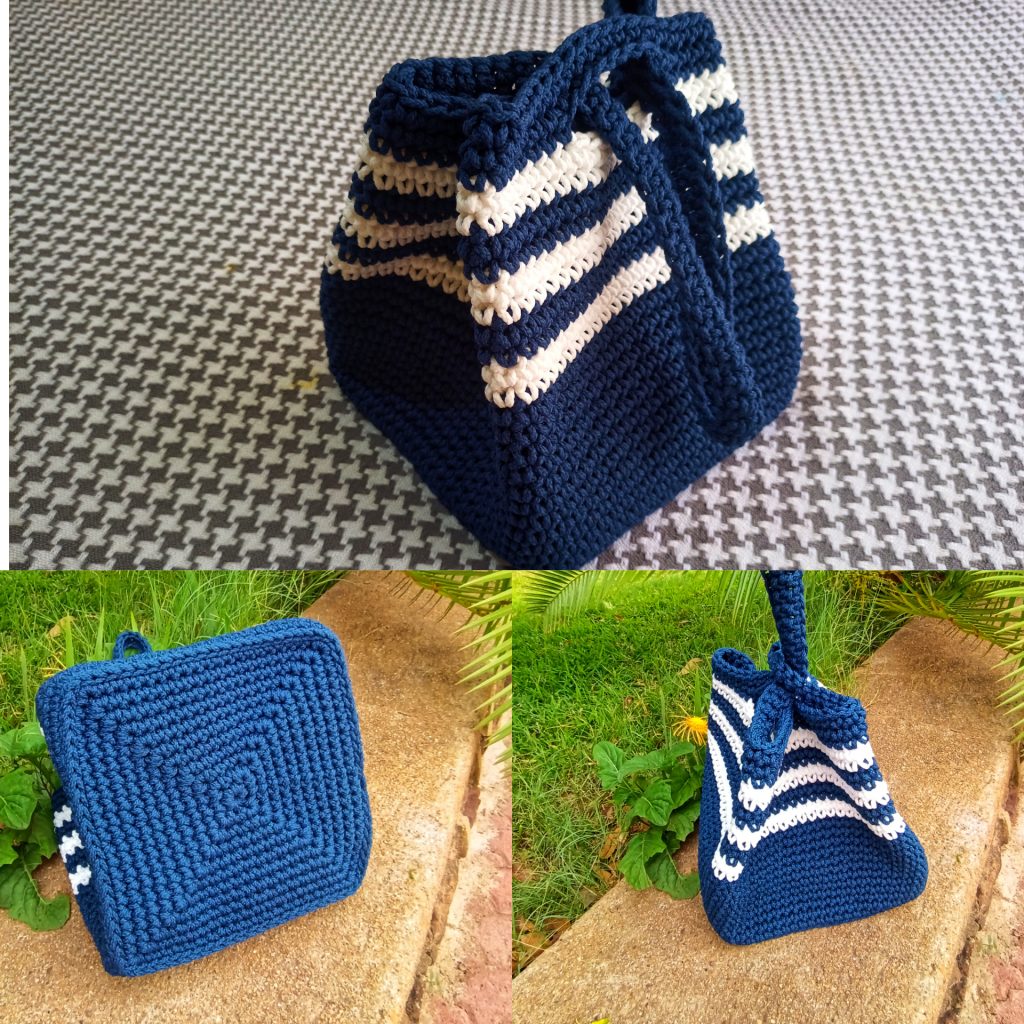
Photo of Bag:
Crochet Terms in US Terminology
- join – join two stitches together , done by working a slip stitch in the top of the next stitch
- rep – repeat (do it again)
- bl – back loop
- st (s) – stitch(es)
Stitch guide
- ch – chain
- sl st – slip stitch
- sc – single crochet
Pattern notes:
- When crocheting the base do not crochet into the slip stitch (that joins the first and last stitch) as well as the chain 1 at the beginning of a round.
- You can change the size of the bag by adjusting the number of the rows at the base. The more the rows the larger the bag, the less the rows the smaller the bag
- Repeat ** :means repeat what is written in between the asterisks
Instructions ( Crochet Japanese knot bag):
Foundation round: start with the magic ring. Put the slip knot and 8 single crochet into the ring. Join the last st to the first with a slip st.
Round 1: Chain 1, put 1 sc in the base of the chain1. Put 3 sc in the next st (put a st marker in the 2nd st of the 3 sts to mark the first corner). *Put 1 sc in the following st, and in the next put 3 sc (put a st marker in the 2nd of the 3 sts to mark the second corner)*.
Repeat ** to make 3 more corners. At the end of the round join with a slip stitch the last st to the first st.
Round 2: Chain 1, put 1 sc in the base of the chain 1. *Continue with sc in each chain until you reach a stitch marker. In the st with the st marker put 3 sc (put the st marker back into the 2nd st of the 3 sts to mark a corner)*
Repeat ** until the end of the round. Join with a slip st.
Round 3 to round 10: repeat Round 2
Round 11: After finishing round 10 join with a slip st and put a st marker into the slip st to mark the starting point (the first st) of the round 11 and then remove every other st marker so that only 1 st marker remains. Continue with slip stitch into each st right round until you are back at the stitch marker.
Round 11 marks the end of the base.
Crocheting the sides of the bag:
Round 1: going upwards or round 1 of increasing the height, continuing from previous round 11 of the base;
Chain 1, remove the st marker, sc into the back loop (the outer loop) of the first st, put back the st marker. Continue with sc in the back loop until you are back at the st marker.
NB: WE ARE NO LONGER JOINING WITH THE SLIP STITCH.
Round 2: remove the stitch marker, sc at the top of the first st (we are no longer crocheting in the back loop), put back the st marker, continue with sc into every st until you are back at the starting point. (total sts 88)
Round 3 to round 12: repeat round 2
Round 13 to round 22: repeat round 2 but alternating colors (blue and white) after every 2 rounds
Round 13: at the last st of round 12 change yarn color to white (change by yarning over with the white color)
Therefore
Round 13&14 – white
Round 15&16 – blue
Round 17&18 – white
Round 19&20 – blue
Round 21&22 – white
Before proceeding to round 23:
Put one stitch marker at one corner (to mark the first corner), from the next st, count 21 st and put a st marker in the following st after the 21st ( to mark the second corner) Repeat until you have 4 corners with st markers plus one other st marker that marks the starting point.
Choose 2 opposite sides which you are going to put handles, a short handle on one side and the longer handle on the opposite side.
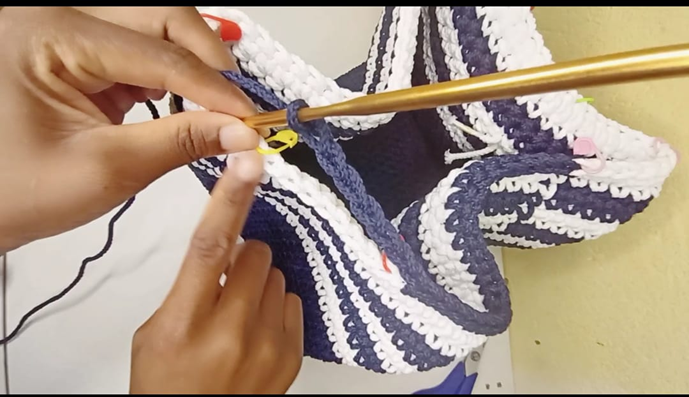
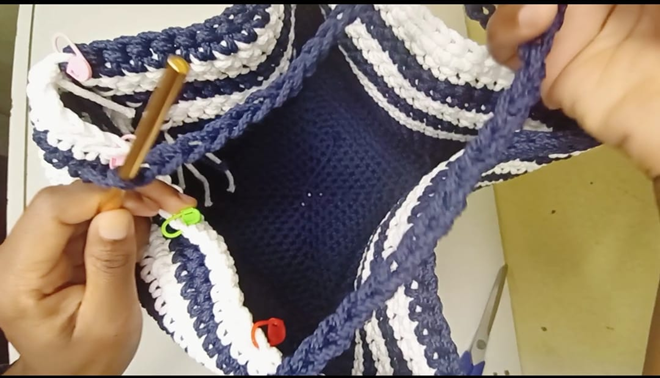
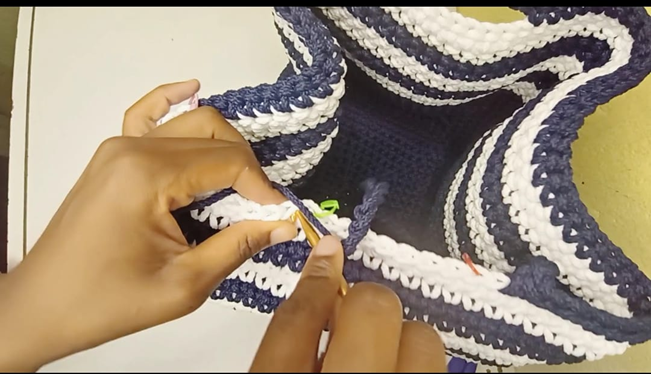
Step 1:
- Count from the corner on the side of the shorter handle 6 st and put a st marker in the next st, from that st count 7 st and put st marker into the next st as shown below
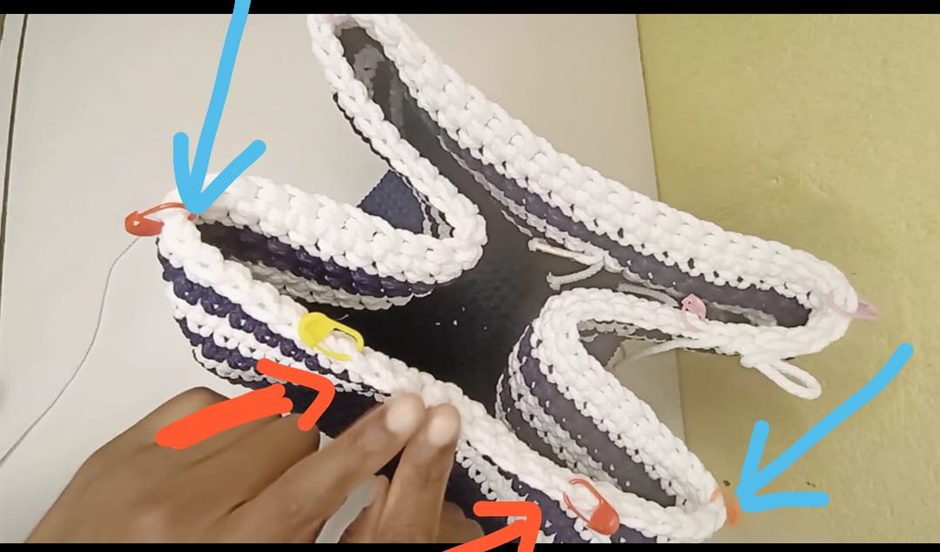
the blue arrows represent the two corners, from the blue arrow count 6 st and put a st marker into the 7th st as shown by the red arrow. Count from the red arrow 7 st and put another marker in the 15th st, that is the shown by the second red arrow. The two fingers on the photo there show the space for the handle.
Step 2:
repeat step 1 above to mark the opposite side.
After finishing the process of marking remove corner stitch markers, and remain with those that mark the points for handles and the one that mark the starting point.
Round 23: from the starting point, sc into every st until you reach the first stitch marker, chain 7 and skip 9 sts including those sts with st markers, and join on the next st after the st marker, continue with sc until you reach the next st marker, chain 40 and skip 9 st including those with the st markers continue with sc until you finish round 23.
Round 24 and round 25: remove stitch marker at the starting point, sc into that st, put back the st marker and continue with sc into every st including those of the handles until you finish the round.
After completing cut the ends and fasten them off to prevent them from sticking out
The crochet Japanese knot bag is complete.
If you have tried this bag please let me know in the comment section below. Happy crocheting.