
Looking for a free purse crochet pattern? Mirrymascrafts has this Rylee purse free crochet pattern for you. This is a great project especially with the holidays around the corner. If you are a fan of crochet purses you might want to check out the Aneni bag pattern and Matipa purse crochet patterns. So let us get on with the pattern:
Level of skill Required:
Knowledge on how to chain, crochet single crochet, half double crochet and slip stitch is required for this pattern.
Material list:
- Crochet Hook size 6mm
- Macramé 4mm thick/ Rope or t-shirt yarn or any other bulky yarn that is about 4mm thick
- Meters used – 180 meters
- Scissors
- 2 metal bag strap buckles
- 2 metal connection ring (for bag strap)
- Sewing needle and sewing thread (for the tag)
- 4 Stitch markers
- Handmade tag (optional)
- Tapestry needle
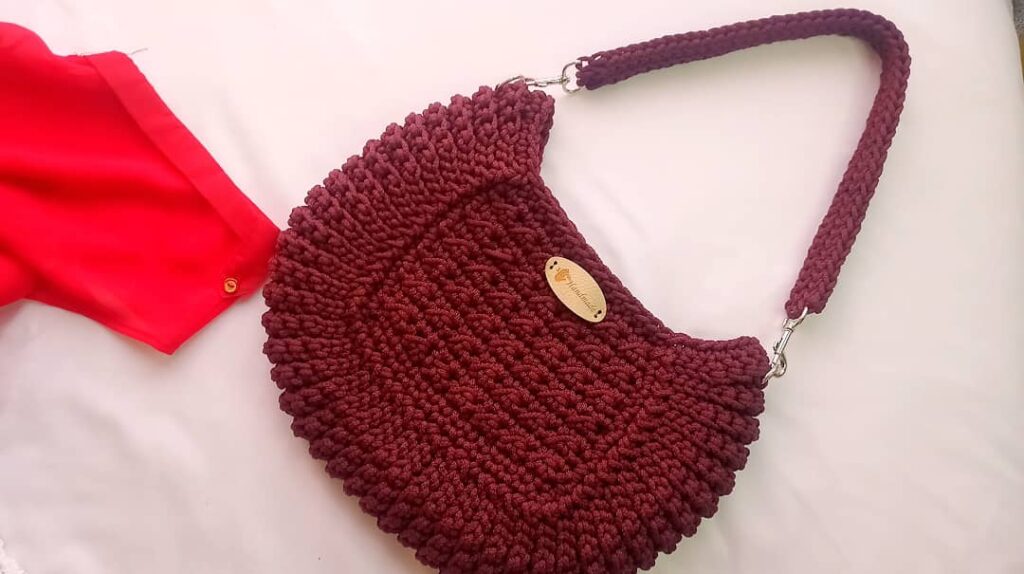
One size bag
Finished bag measurements
24cm height and 35cm width
Handle length 50cm
Crochet Terms in US Terminology
- rep – repeat (do it again)
- st (s) – stitch(es)
- ** – means do what is written in-between the asterisks (for example rep** , means repeat what is written in between the asterisks)
Stitch guide
- ch – chain
- sl st – slip stitch
- sc –single crochet
- hdc – half double crochet
Pattern notes:
- You are going to work in rows.
- The chain 1 at the end of each row is a turning chain therefore it does not count as a stitch
- The number in the brackets at the end of each instruction is the total number of stitches for that row.
Instructions:
The bag is made in 3 steps
- Step 1 –side panel
- Step 2 – joining the panels
- Step 3 – the handle
Step 1- The side panel
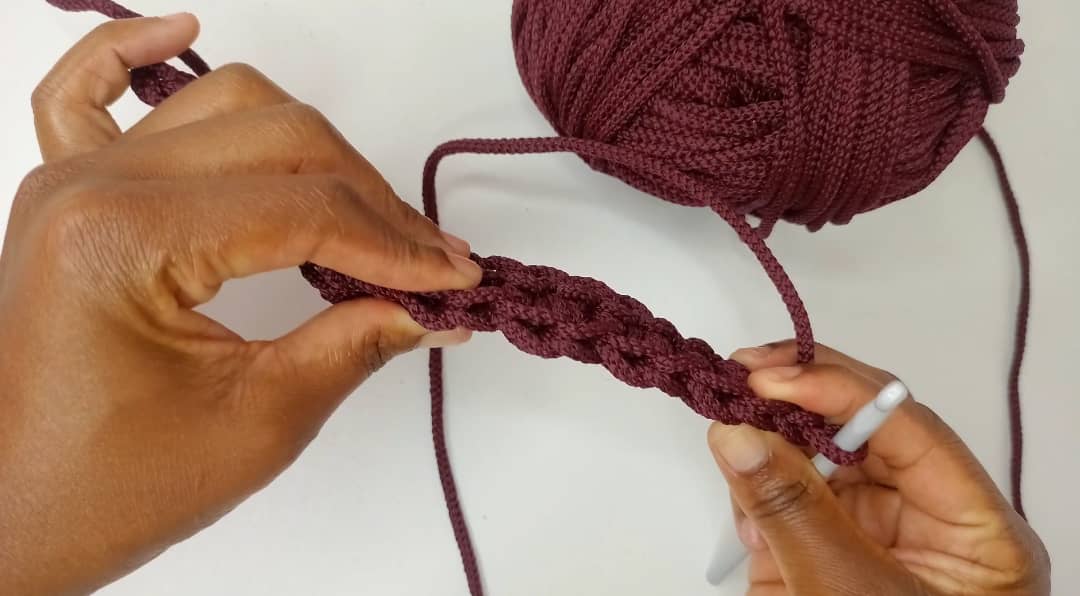
Foundation row: ch 16 (For a bigger bag increase the number of chains, but they should be in the multiples of 2). Insert your hook in the back bar of the 2nd chain from the hook and sc 1.
Continue with 1 Sc in the back bars of each of the remaining chains. (15)
Row 2: In this row you alternate slip stitch and half double crochet. You begin with a slip stitch and you finish the row with a slip stitch. Insert hook below the 2 loops at the top of each st.
Slip st in the first st, *1 hdc in the next st, slip st in the following stitch* repeat from * to * until the row is done, chain 1 and turn (15)
Row 3: 1 sc in each st until the row is done, chain 1 and turn (15)
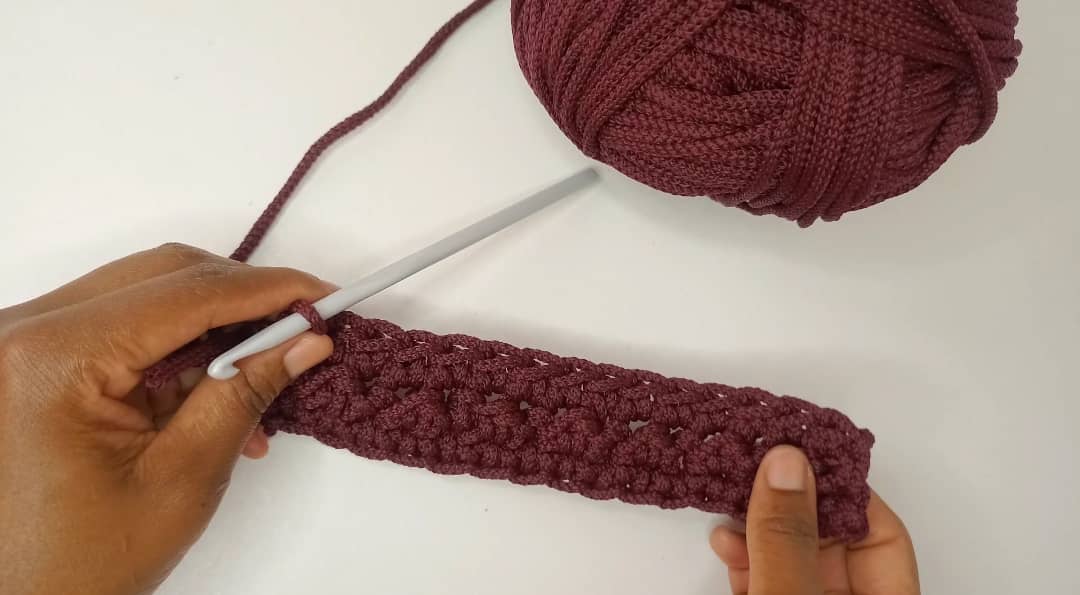
NB: when you crochet the single crochet row, make sure you insert your hook at the top of each stitch. To easily see your stitches turn your work so that the top of the stitches faces you.
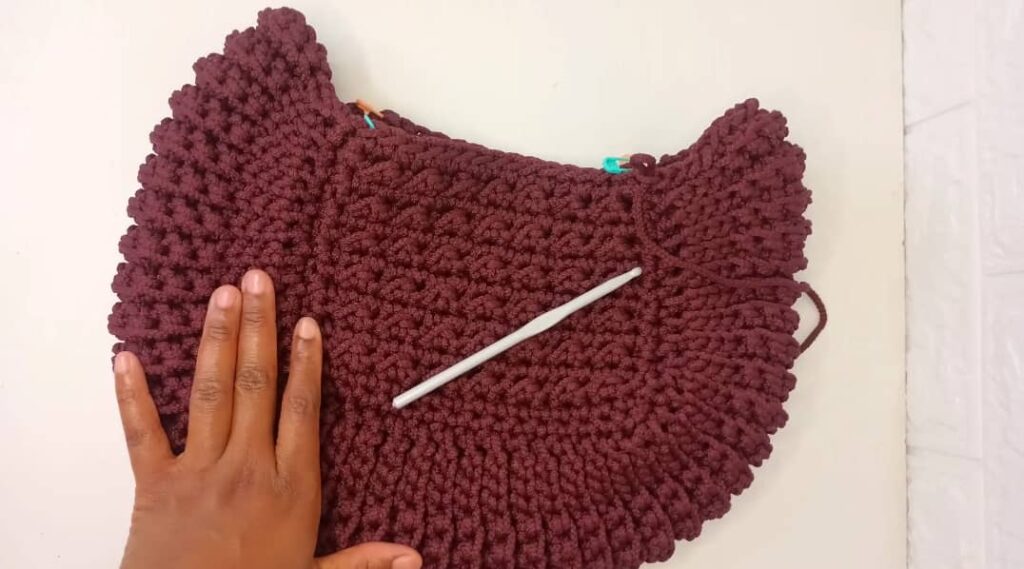
From row 4 to row 13: Repeat row 2 and row 3. Row 13 should be a single crochet row. Mark the first and last stitch of row 13. At the end of row 13, continue to crochet along the edges of your work until you are back at the first st of row 13. Do this by putting 1 sc on the edge of each row. When you reach a corner put 2 sc (do this for all the 4 corners). Cut and fasten off your yarn.
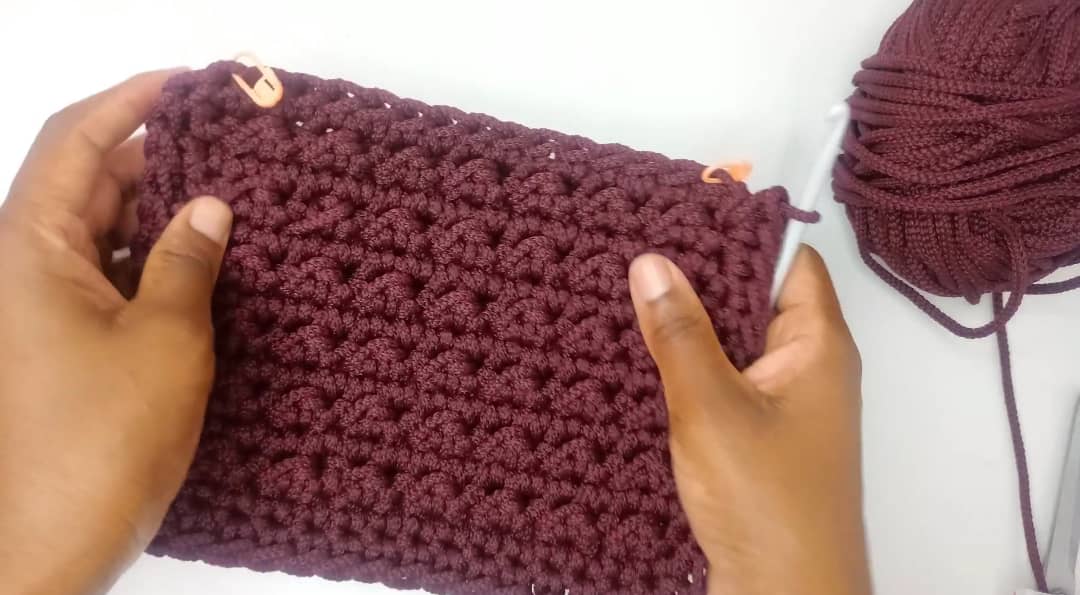
2nd Side Panel
Repeat from row 1 to row 13 as instructed above. When the 2nd panel is done do not cut yarn it is going to be used to join the two panels.
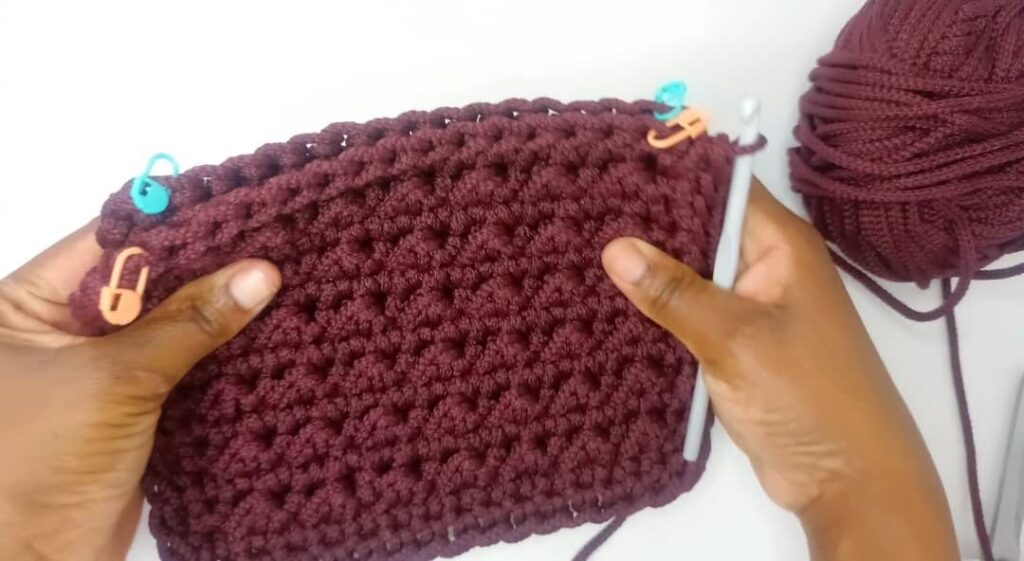
Step 2 – Joining the side panels
The right side of the panel is the one with a ridge like texture. Take both panels and let the wrong sides of both panels face each other.
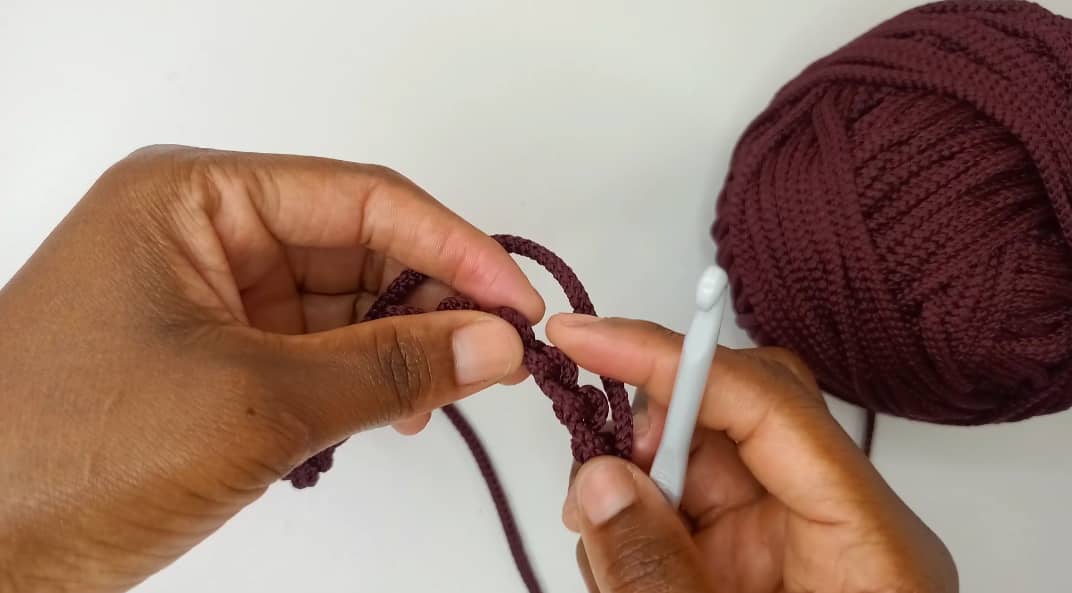
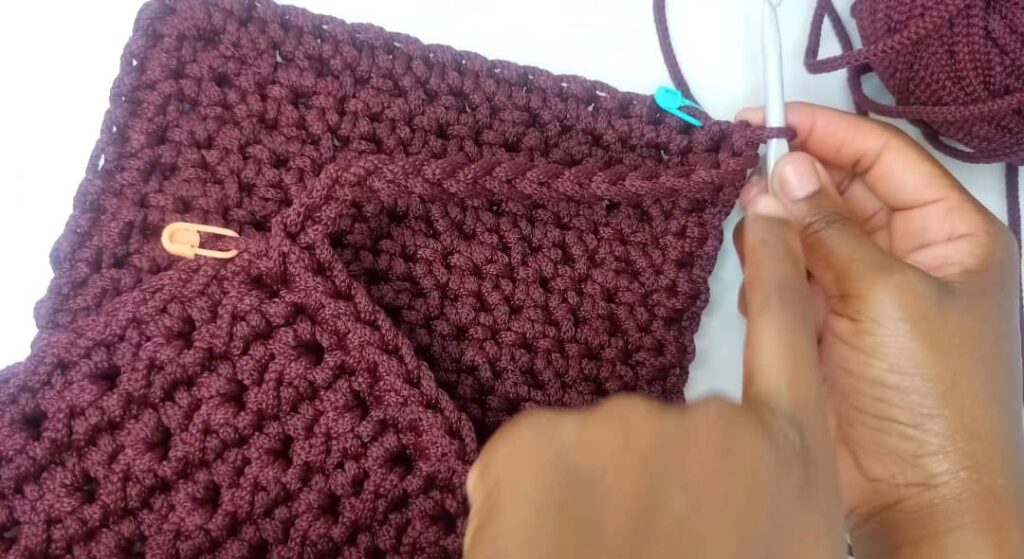
Step 1: Chain 14.
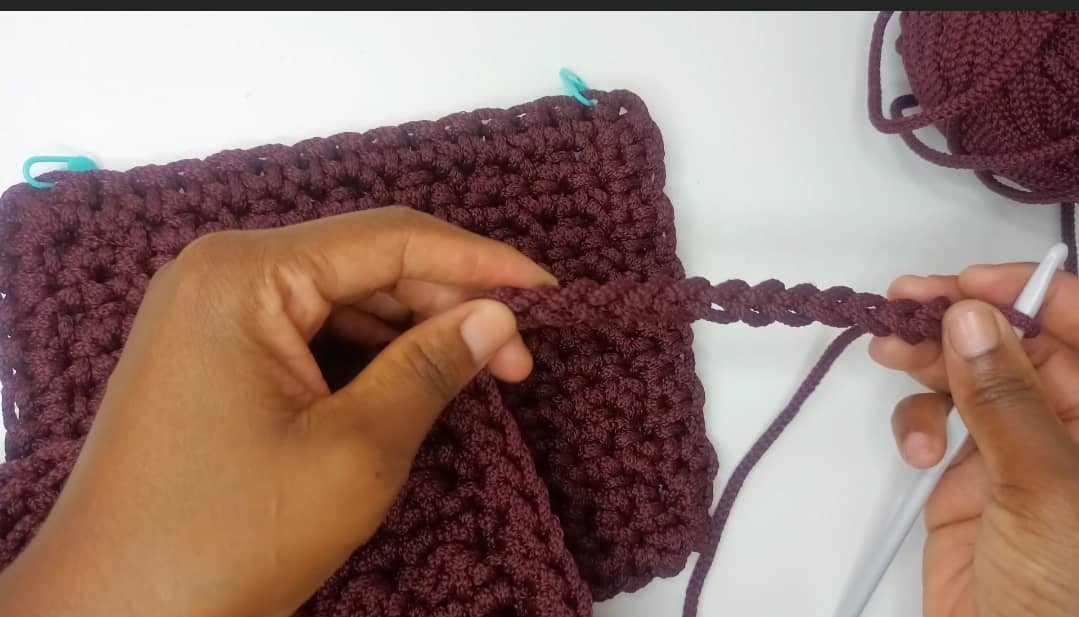
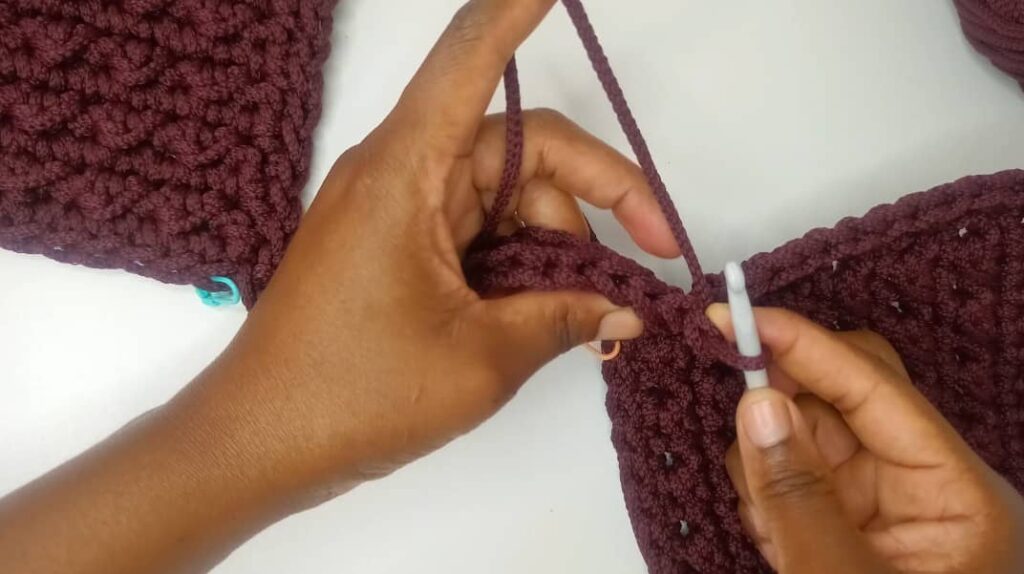
Join the chain (this is the middle strip used to join the panels) to the other panel in the stitch before the marked st with a slip stitch as shown below,

Chain 1 and turn.
Step 2: Skip the turning chain just made and the slip stitch used to join the chain 14 to the panel, these two do not count as stitches. Slip stitch in the next 3 chains, sc 1 in the 4th chain up to the 11th chain,
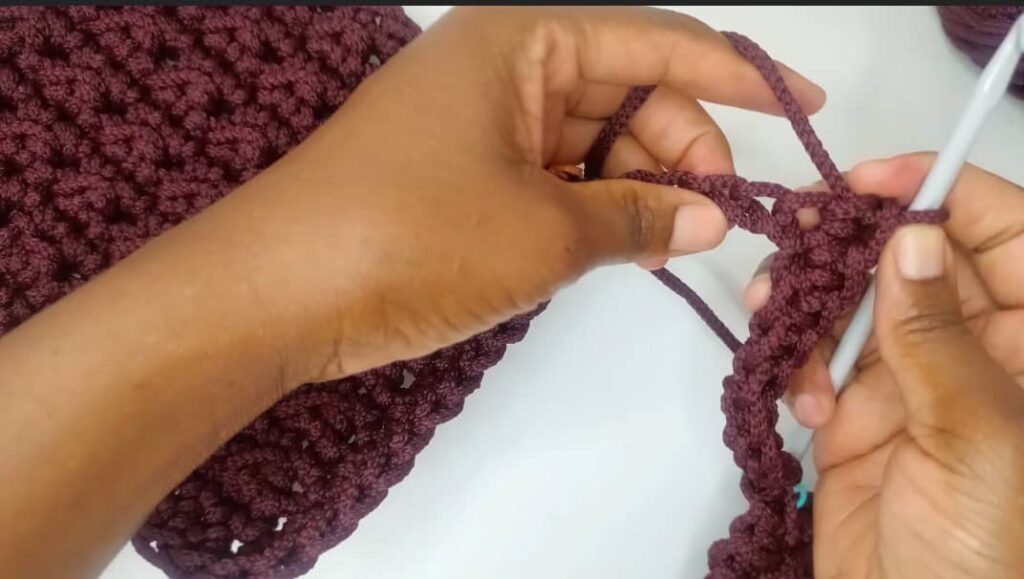
slip st in the remaining 3 chains. Insert hook in the next stitch on the other panel
join the middle strip with a slip st, chain 1 and turn
NB: The middle strip that is joining the two panels (the one we started crocheting in step 1 above) should have 14 stitches. From now on until we finish joining the two panels, insert hook in the back loop only when crocheting the middle strip (this will give the ribbed texture). When joining the middle strip to a panel, insert hook below both loops at the top of the stitch.
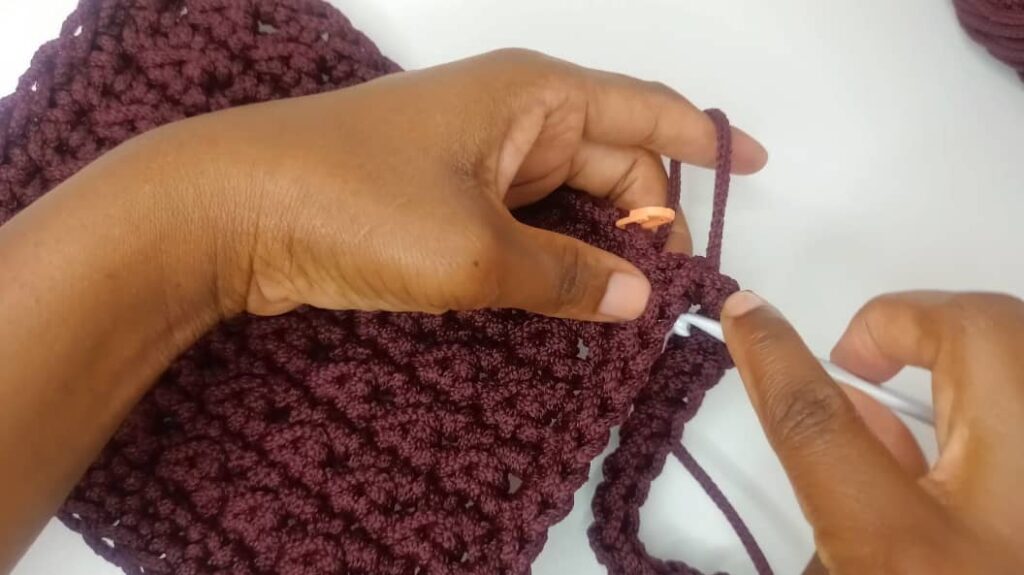
Step 3: Skip the turning chain just made and the slip stitch used to join the middle strip to the panel, these two do not count as stitches. Insert hook in back loop only, Slip stitch in the next 3 sts, sc 1 in the 4th st to the 11th st, slip st in the remaining 3 sts, insert hook in the next unworked stitch on the panel and join the middle strip with a slip st, chain 1 and turn.
Repeat step 3 until you are back at the other marked stitch (leaving out the 15 stitches at the top)
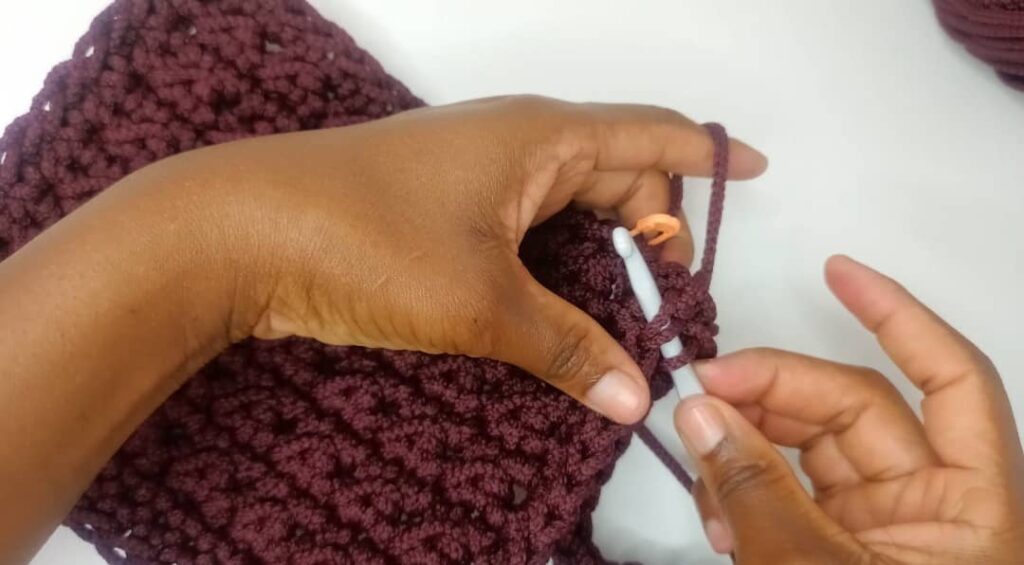
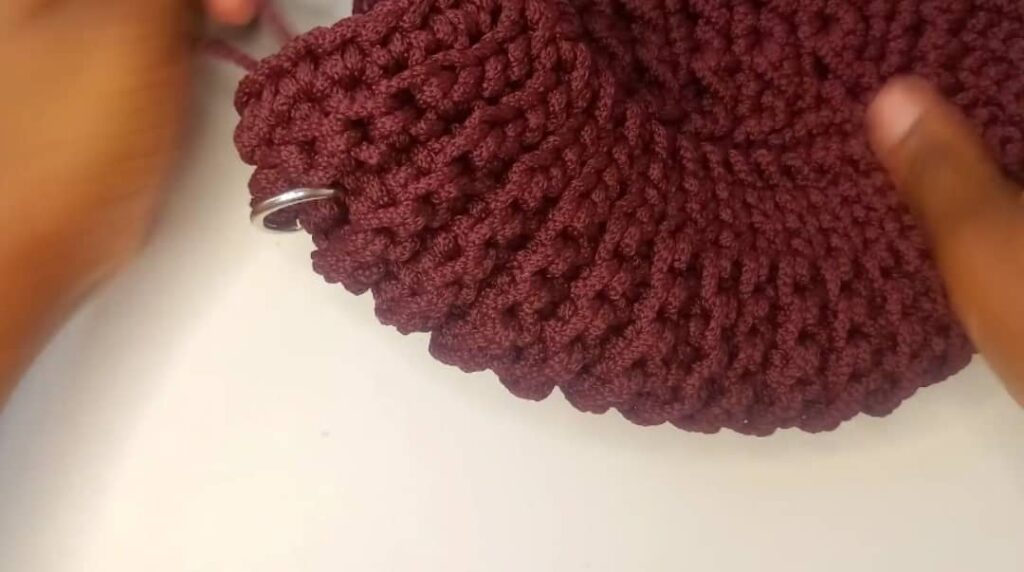
Remove the other 3 stitch markers and remain with the one in the next stitch from where you finished joinings the panels. Beginning in the following stitch (the one with a st marker) put 1 sc in each stitch right round until you are back at the starting point. When you reach a joint (the point where the middle strip is joined to the panel),
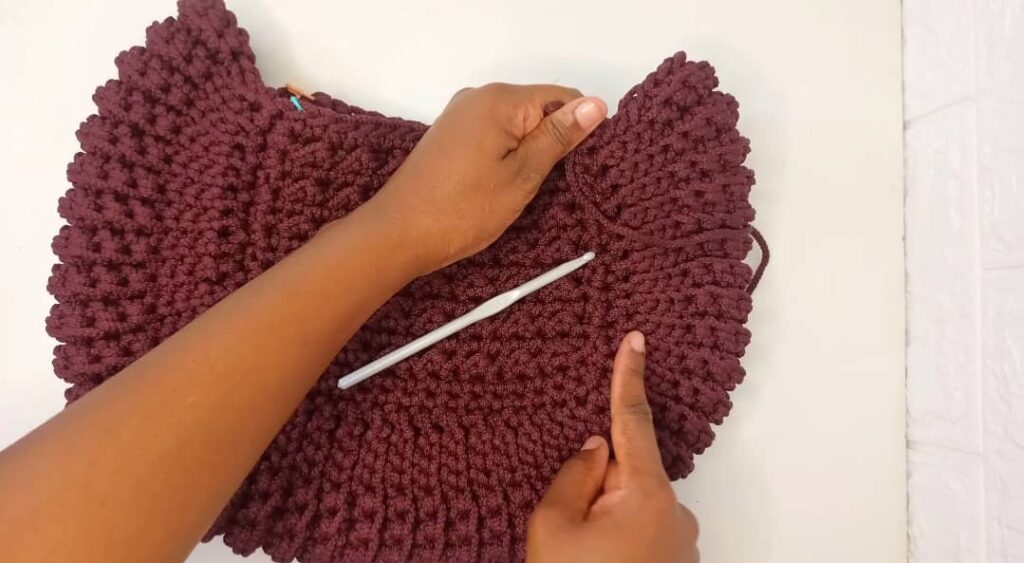
skip that small space and continue with 1 sc in the following stitches. That means when you reach the starting point you would have skipped 4 joints. Cut and fasten off the ends.
Step 2 – The handle
Row 1: Leave a tail of about 30 cm, make a slip knot and chain 50 (increase the number of chains for a longer handle). Turn your chain insert hook in the back bar and put one slip st. continue with one slip st in the back bar of each chain until the row is done. Chain 1 and turn (49)
Row 2: put 1 slip st in the back loop only of each stitch until the row is done (49)
Row 3 and row 4: repeat row 2. At the end of row 4, leave a tail of about 30 cm. Pull the tail through the loop on the hook.

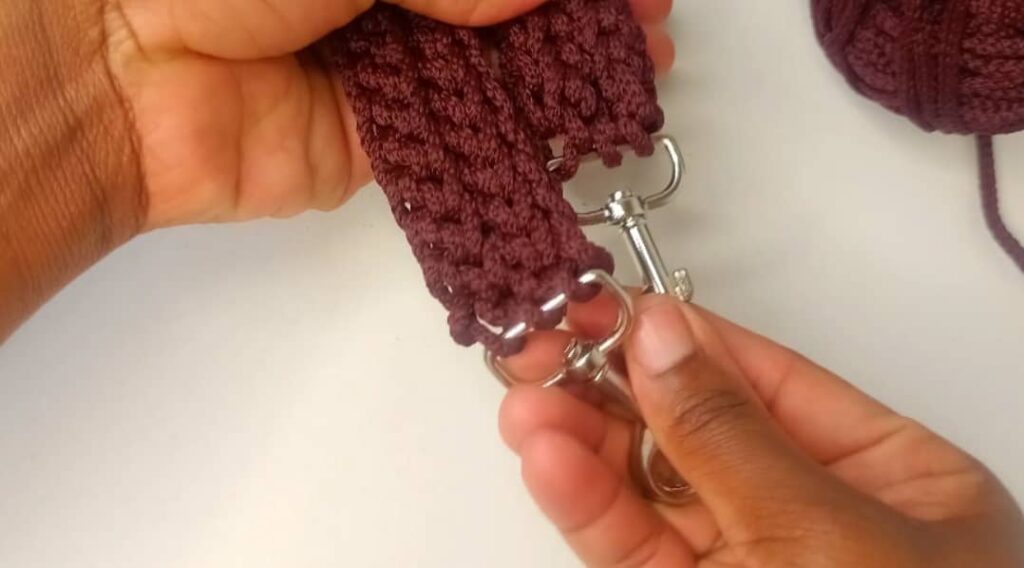
Insert the tail end into a tapestry needle and join the handle to the metal buckle. Do this for both ends of the handle.
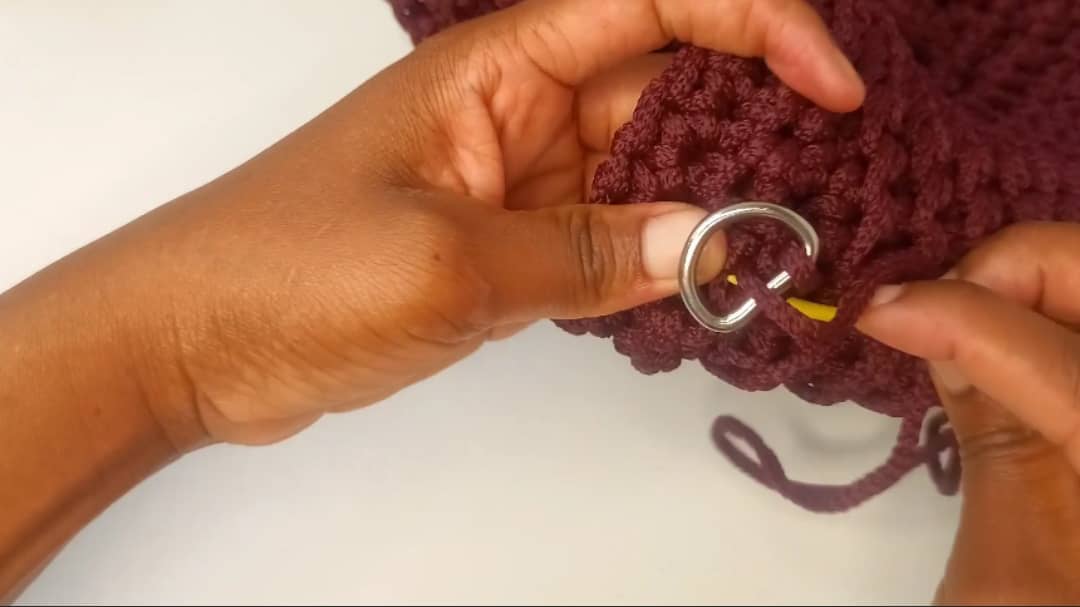
Attach the small connection metal rings on the sides of the bag using a tapestry needle.
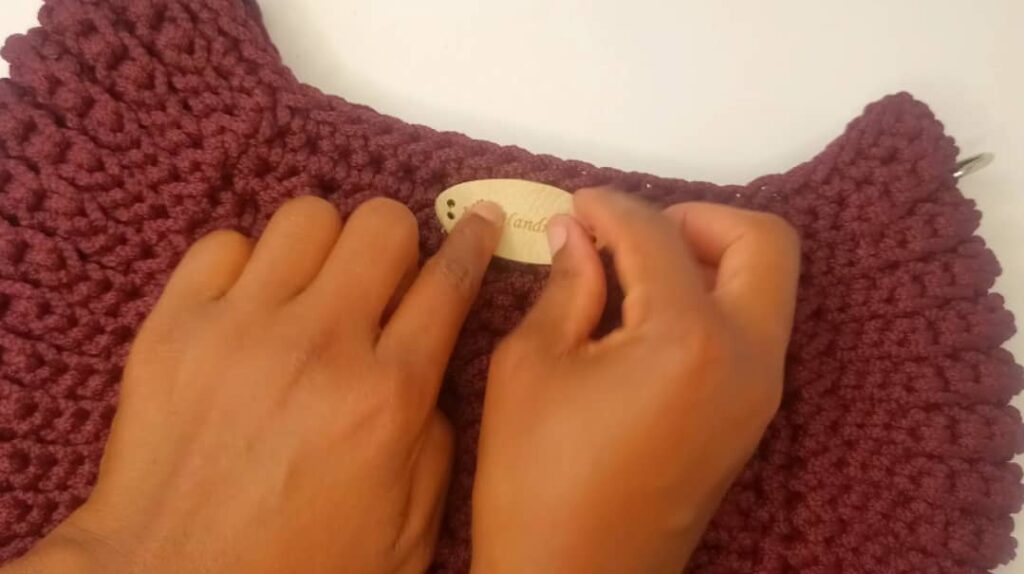
Sew in the tag as shown below using a sewing needle and thread.
Cut and fasten off all ends. Attach your handle using the buckles to the metal connection rings to finish up your bag.
would like to see purses with a zipper closure.
Hie…. I once did one with a zipper here is the link to the pattern https://mirrymascrafts.com/2022/06/20/crochet-a-bag-pattern-the-other-handbag-pattern/
But I will surely do another one.