
Crochet tote bag with this begginer friendly pattern. Crochet tote bags are a stylish and practical accessory for any occasion. In this post, we will explore the popular Mellow tote bag pattern, known for its versatility and simplicity. Whether you’re a beginner or an experienced crocheter, the Mellow tote bag pattern is a must-try for your next project.
The Mellow tote bag pattern is one of the first patterns I did when I was a crochet beginner. The pattern was double crochet throughout. You can add this crochet bag pattern to those last minute projects that you can do in no time and this is because it is done using double crochet. Double crochet is one of the basic crochet stitches. The Everyday bag was also done using double crochet and it is a must try crochet bag.
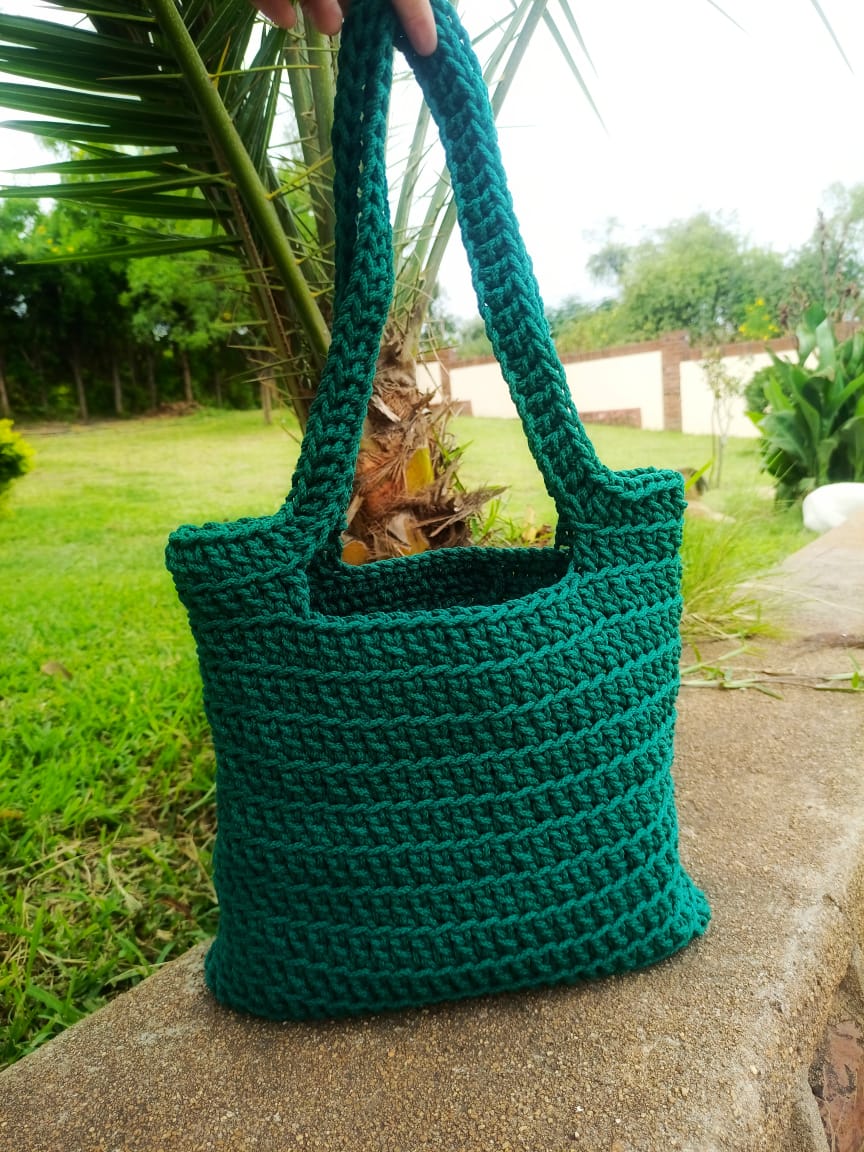
This crochet tote bag can be used as a beach bag, market bag or shopping bag. The color I used on this bag is forest green and the green color gives the bag a natural look to it.
If you prefer a step by step video tutorial on how to make this crochet tote bag click below:
If you prefer an ad-free, printable PDF version this pattern, you can purchase it right below by clicking the BUY NOW button. Thank you for supporting my designs.
Crochet tote bag material list:
- Crochet Hook size 6mm
- Macramé/ Rope or t-shirt yarn or any other bulky yarn that is about 3mm thick
- Meters used – 220 meters
- Scissors
- 4 stitch markers

Tension:
Gauge: 4″ = 4 rows x 9 stitches
One size bag

Finished bag measurements
34 cm height and 32 cm width
Crochet Terms in US Terminology
- join – join two stitches together , done by working a slip stitch in the top of the next stitch
- rep – repeat (do it again)
- st (s) – stitch(es)
Stitch guide(US TERMS)
- ch – chain
- sl st – slip stitch
- dc – double crochet
Pattern notes:
- You are going to work in rounds.
- The number in the brackets at the end of each instruction is the total number of stitches for that round.
Crochet tote bag Instructions:
The bag is made in 3 steps
- Step 1 – the bottom
- Step 2 – the sides
- Step 3 – the handles
Step 1- The Bottom
Foundation round (tote bag crochet pattern): make a slip knot and chain ch 28. Skip the first two chains from the hook and put 1 dc in the 3rd chain from the hook. Continue with 1 dc in the next chains until you are at the end of the row. Put 5 dc in the last chain. Now continue to crochet into the back of the chains as shown below, put 1 dc in the back of each chain until you are left with one chain (the back of the chain with the first dc) and put 4 dc in that chain.

Join the last dc to the first dc with a slip stitch to complete the first round as shown below. After completing the first round the base of the bag is done. (58 st)

NB: Note that from here onwards we are going to crochet in the back loop of the stitches.
- Since we are crocheting with double crochet, we begin each round with a chain of 3
- The slip stitch at the end of each round does not count as a stitch therefore do not crochet in this slip st.
Step 2 – The Sides
Round 2: ch 3, put 1 dc in the back loop of the base stitch of the chain 3.

From there continue with 1 dc in the back loop of each st right round until you are towards the end of the round. Towards the end, do not crochet in the last stitch which is the slip stitch we did in the previous round when we joined the first dc to the last dc.

Therefore skip the last slip stitch and join the last dc to the 3rd chain of the chain 3 we did at the beginning of the round with a slip stitch to finish round 2.


Round 3: start with ch 3, put 1 dc in the back loop of the next stitch, Continue with 1 dc in the back loop of each st right round, skip the last slip stitch and join the last dc to the 3rd chain of the chain 3 we did at the beginning of the round with a slip stitch to finish round 3.
Round 4 to round 12: repeat Round 3
Step 3- The Handles
Round 13: starting counting from the first st, put a st markers in stitch number 7; 23; 36; 52;

Chain 3, put 1 dc in the back loop of the next stitch. Continue with 1 dc in the back loop of each st until you reach the first st marker. Put 1 dc in the st with the st marker (st 7) and chain 50, skip 15 st, and join the chain in the next st with the stitch marker (st 23). Continue with 1 dc in each st until you are at the next st marker (st 36). Put a dc in st 36 and chain 50, skip 15 st and join the chain in st 52. Continue with dc in the back loop until the round is done and join with a slip stitch as done in previous rounds.


Round 14 (tote bag crochet free pattern): ch 3 and put 1 dc in the back loop of the next stitch. Continue with 1 dc in the back loop of each st, when you reach the chain crochet dc in the back bumps of the chains as shown below. Continue with the pattern until the round is done.


When round 14 is done, cut and fasten off the ends to finish the crochet bag.
Your crochet tote bag is complete
Love your tutorial. I want to download the written pattern but can not see where to find that option. Please help me to do that.
Thank you… unfortunately on this page there is no a pdf to download
Brand new to crochet- have never done a project, but your video tutorial makes this seem like something super easy! Can I make it with a Caron cotton cake? If so what kind of adjustments would I make due to it being a thinner yarn?
It is super easy….thank you for watching
Would I need to alter this at all if using Caron cotton cakes instead? It’s the only yarn I have right now
I’m sorry if this goes through twice, but I’m not seeing my other comment show up.
Can I make this with a Caron cotton cake yarn? Would I need to make any adjustments
Hie….Caron cotton cake will do just fine Incase the dimensions are altered what you do is at the beginning when you do the chains You measure if they are 32cm which is the width of the bag and you adjust the width by either adding or subtracting chains.Then at the top before putting the handles you can measure again to see if it’s 34cm if not you can add more rounds to increase the height of the bag.